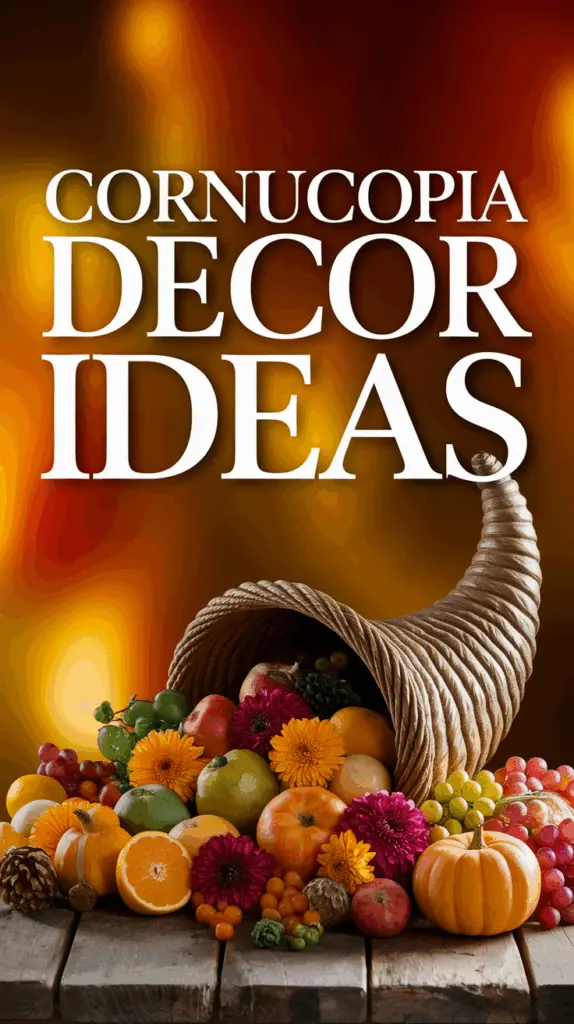
Thanksgiving is just around the corner, and I’m always excited to add a little extra charm to our family table. One thing I’ve learned from having three lively boys is that decorating a cornucopia for Thanksgiving centerpieces doesn’t have to be complicated to look beautiful. If you’re wondering how to decorate a cornucopia, I’ve got simple, fun ideas that anyone can do—no stress involved!
I love making our centerpiece a warm, inviting part of the holiday. From picking out seasonal fruits and leaves with my boys to adding a few playful touches, it turns into a little family tradition that’s always a highlight. Let’s jump into easy ways to decorate a cornucopia that will brighten your Thanksgiving and feel totally doable for busy moms like us!

Choosing the Perfect Cornucopia Base

When you’re thinking about how to decorate a cornucopia, the base you pick sets the whole mood. It’s like choosing the right canvas for a painting—get it right, and everything else just falls into place! For me, the base is the first thing I consider before adding the fun stuff like fruits, leaves, and tiny pumpkins. Here’s what I’ve learned about the most popular options.
Traditional Wicker Cornucopias
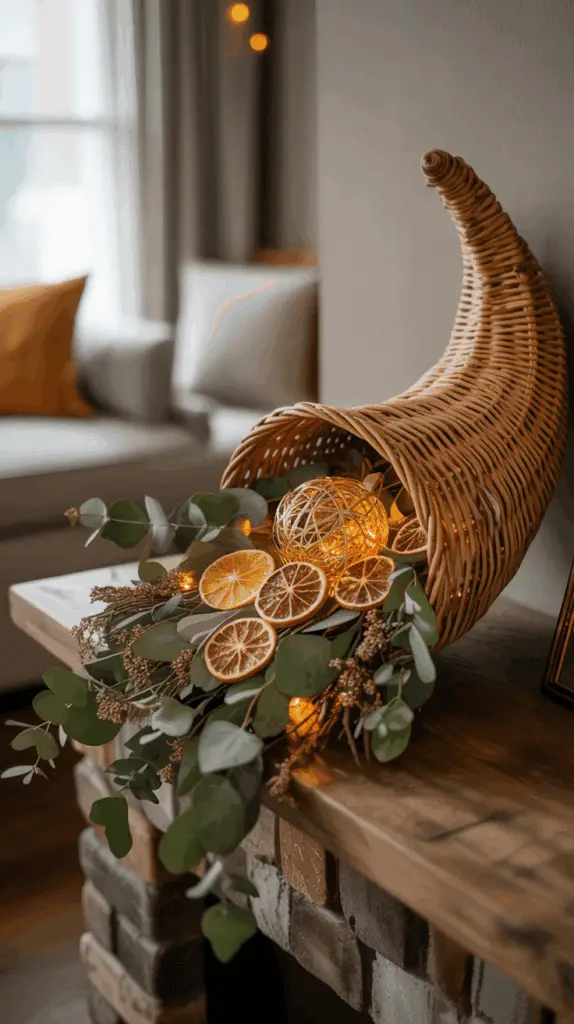
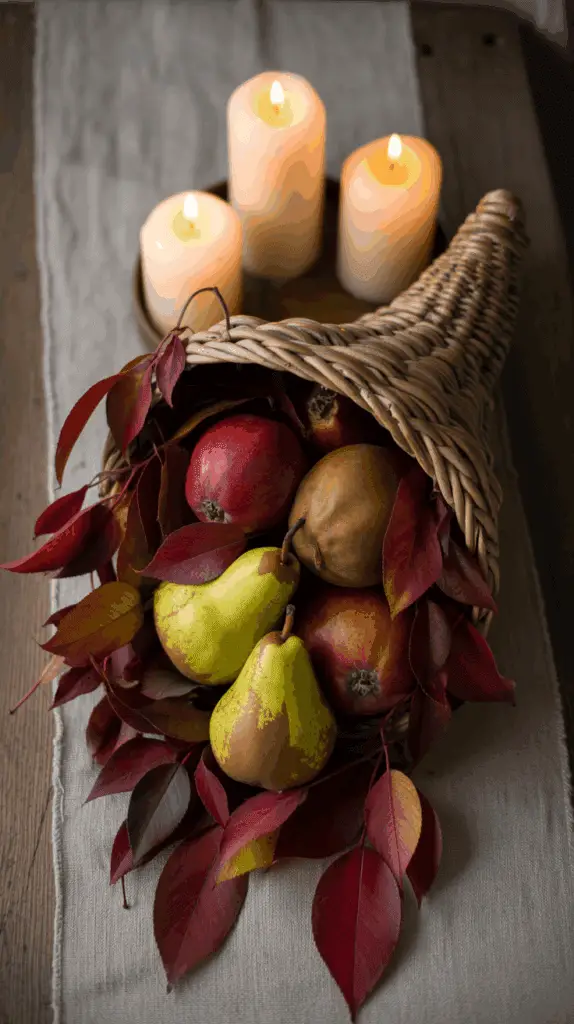
Wicker baskets have been the go-to choice for ages, and for good reason. They bring that classic, homey look that instantly says Thanksgiving. I love how the natural texture of wicker weaves warmth into any centerpiece. It’s earthy and inviting, almost like a little nod to nature’s bounty right on your table.
The woven pattern is not just pretty; it’s sturdy enough to hold a good amount of fall goodies without looking heavy or clunky. Plus, the rustic feel works perfectly with everything from deep red apples to golden corn husks. When my boys helped me set up our wicker cornucopia, I noticed how the simple basket invited them to imagine it as a treasure chest filled with autumn magic.
Wicker bases also come in various sizes, so you can pick one that fits your table space. If you want that authentic vibe, you can’t go wrong with wicker. Its charming imperfections give the centerpiece character, which is hard to get with other materials.
Alternative Base Options

If wicker isn’t your style or you want something a bit different, there are plenty of other bases to consider. Here are some popular ones I’ve tried or seen work great—and the pros and cons I’d weigh if you’re deciding too.
- Ceramic Cornucopias: These are nice because they come in lots of shapes and colors. They’re easy to clean and sturdy enough for heavier decor. But beware—ceramics can be fragile, especially with kids around! I found they add a polished look but don’t have the same cozy warmth as wicker.
- Foam Bases: Foam is awesome if you want to stick things like picks, leaves, or flowers securely in place. It’s lightweight and super customizable if you want to paint or cover it. The downside? Foam isn’t visible when decorated well, but it doesn’t add any natural flair and can feel less substantial.
- DIY Paper Mache Cornucopias: You can make your own! This option is perfect for a craft day with the kids. Paper mache bases let you control the size and shape, plus you can paint them any way you like. They’re lightweight but more fragile than wicker or ceramic, so they’re best for indoor use and careful handling.
Choosing the base depends on your style, the look you want to create, and how much handling it will get from little hands. I always think about what feels right for my family’s vibe and the kind of centerpiece we want to enjoy—all while keeping it simple and fun!
Selecting Seasonal and Natural Fillers
When it comes to how to decorate a cornucopia, the fillers you choose really bring your centerpiece to life. I’ve found that going with seasonal and natural items adds not just color and texture but a real touch of fall’s cozy spirit. It’s like giving your cornucopia a little personality that fits perfectly with Thanksgiving. Every item, from tiny pumpkins to crunchy leaves, tells part of that autumn story we all love. Let’s look at a couple of my favorite types of fillers that always make decorating fun and fresh.
Using Fresh Fruits and Vegetables
Fresh fruits and veggies are the heart of a Thanksgiving cornucopia. They add natural beauty and a splash of vibrant color that never feels forced. I always lean on classic fall picks that scream harvest season, but with a twist that keeps it playful for my boys to help with.
Here are some go-to choices I love:
- Mini pumpkins and gourds: Their little, quirky shapes and bright oranges and greens are just perfect. They fit nicely in a small space and bring that unmistakable fall vibe.
- Apples: Red or green, apples pop with color and smell amazing. I’ve even used a mix of shiny apples and rustic ones for texture.
- Indian corn or dried corn: The multicolored kernels add a rustic charm and break up all the round shapes.
- Pears and small squash: These add variety in shape and color. Plus, pears with their soft curves bring in a gentle softness.
I like to think of fresh produce like nature’s own decorations, ready-made to add warmth. Plus, the boys always find it fun to pick out fruits and veggies that look interesting. I’ve caught them holding mini pumpkins up like little trophies!
Incorporating Fall Foliage and Flowers
Nothing sets the mood better than some natural greenery and blooms. Adding leaves, pinecones, and flowers brings in a whole new layer of texture and makes your cornucopia feel like it just walked in from a crisp autumn walk through the woods.
Here are some favorites I turn to:
- Fall leaves: Think reds, yellows, and burnt oranges. I usually grab a few different kinds to mix sizes and colors for that full, rich look.
- Pinecones: These are a classic filler that add rustic charm and a touch of woodland magic.
- Sunflowers: Their big, cheerful faces bring brightness and a bit of sunshine, balancing the deeper fall tones.
- Mums: These flowers are a staple for fall with their rich colors and fluffy petals. They add softness and volume effortlessly.
When I arrange these, I layer leaves underneath as a kind of carpet, then pop in pinecones and flowers for height and interest. The natural elements make your cornucopia feel freshly picked and alive, which fits perfectly with Thanksgiving’s sense of gratitude for the season.
Using seasonal and natural fillers not only makes your cornucopia look fantastic but also brings in that warm, inviting feeling everyone looks forward to at the holiday table. It’s simple, fresh, and so much fun to put together with the kids!
Creative Arrangement Techniques for a Stunning Centerpiece

Knowing how to decorate a cornucopia so it stands out is all about the way you arrange your items. It’s like putting together a puzzle where every piece counts, but you want it to look natural and inviting—not stiff or crowded. I’ve learned that thoughtful layering and positioning make a centerpiece feel full, rich, and bursting with fall charm. At the same time, mixing in personal touches, especially kid-friendly ones, brings warmth and a little whimsy to the table. It’s fun, and it makes the whole family feel part of the holiday magic.
Layering and Positioning Items
When I start arranging, I always place the larger items first. These are the anchors that give the cornucopia structure and set the scale. Think of mini pumpkins, big gourds, or bunches of leaves as your foundation. I tuck them in gently—sometimes spilling just a bit out of the opening—to create that classic overflowing effect we all love.
Once the big pieces are where I want them, I fill the gaps with smaller accents. This is where the magic happens. I add things like cranberries, small pinecones, or little apples to create visual interest. These smaller details bring depth and texture that keep the eye moving. The whole arrangement feels layered instead of flat, like a cozy blanket folded just right.
To build even more depth, I position some fillers to peek out from different angles—some rising higher, others nestled low. This creates a natural flow that feels like what you’d see out in the woods or a farmer’s market basket.
Here are a few simple tips that help me every year:
- Start by placing the largest items at the back or center.
- Angling longer leaves or stalks slightly outward creates movement.
- Use different shapes and rough versus smooth textures close to each other.
- Layer elements by color from dark to light for an easy visual trick.
This way, it doesn’t just look like you dumped everything in the basket. It looks like you arranged the harvest with care, ready to be admired (and maybe pinched by curious little fingers).
Adding Personal and Kid-Friendly Touches
The best part about decorating a cornucopia for me is making it personal and kid-friendly. My boys love seeing their own little hands-on touches in the centerpiece. It feels special to them, and it sparks conversations and smiles around the table.
Some favorite kid-friendly ideas I add include:
- Painted acorns or small gourds: Let the kids decorate these ahead of time with washable paints or markers. They love their creations being part of the display.
- Handwritten name tags or little notes: I use tiny cards where each child can write what they’re thankful for. We tuck them in – it adds a sweet, personal layer.
- Favorite small toys or figurines: A little pilgrim, a turkey, or even a tiny pumpkin-shaped toy hidden among the natural fillers can bring giggles.
- Colorful fall leaves collected on a neighborhood walk: Kids feel proud when they add something they found themselves.
It’s not about perfection here. In fact, a slightly imperfect or quirky touch makes the centerpiece feel alive and ours. These personal and playful elements keep the kids engaged and make the whole experience memorable. Plus, they encourage little ones to appreciate the season in a hands-on way, not just as spectators.
When you combine these creative arrangement techniques with personal touches, your cornucopia won’t just be another decoration—it becomes a glowing symbol of family, fun, and fall’s simple joys!
Finishing Touches and Maintenance Tips
When you’re figuring out how to decorate a cornucopia, the final touches can really take your centerpiece from nice to wow. I always save this part for last because it lets you add personality and polish. Plus, knowing how to care for your centerpiece keeps it looking fresh through all those Thanksgiving moments we cherish. Whether you use fresh or artificial pieces, these finishing moves and simple upkeep tricks make all the difference!
Using Ribbons and Decorative Accents
Adding ribbons and small accents is like putting the cherry on top of a perfectly baked pie. I love pulling out fall-colored ribbons in rich oranges, deep reds, or mustard yellows to wrap around the mouth of the cornucopia or tie a bow. They add softness and a splash of color that feels festive and warm.
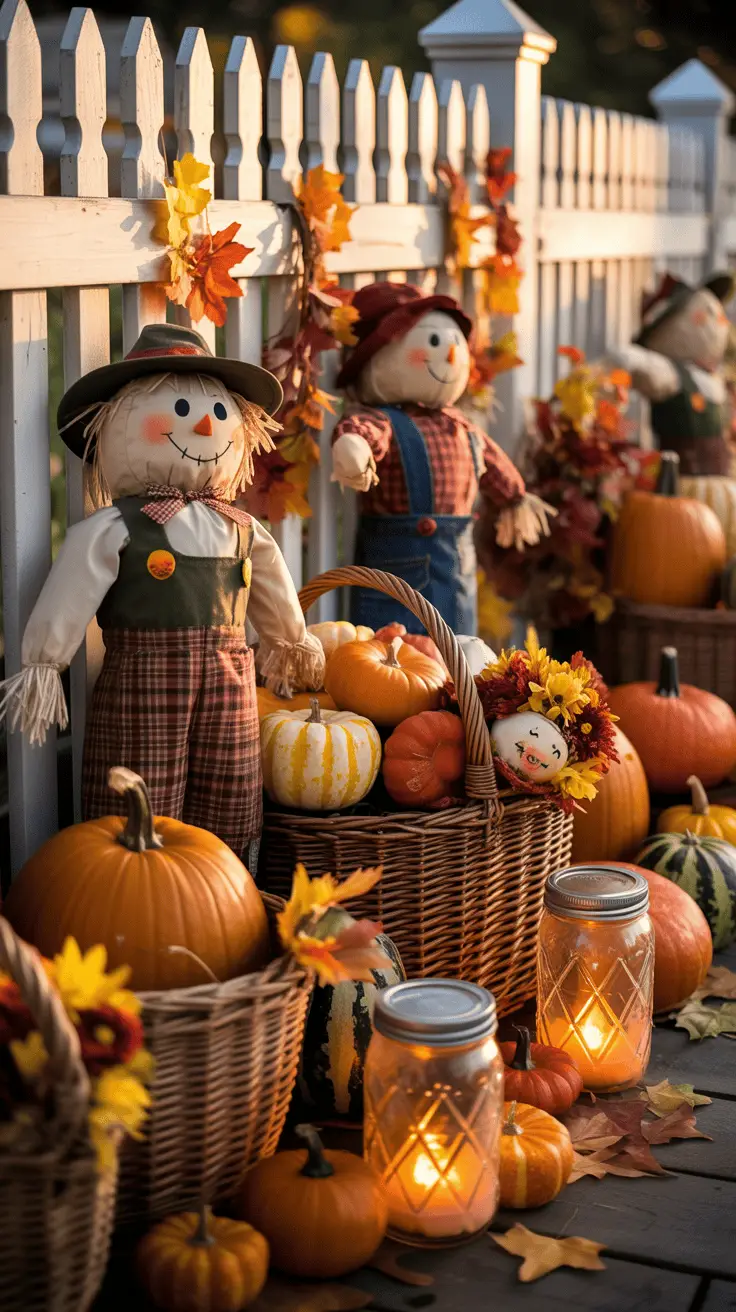
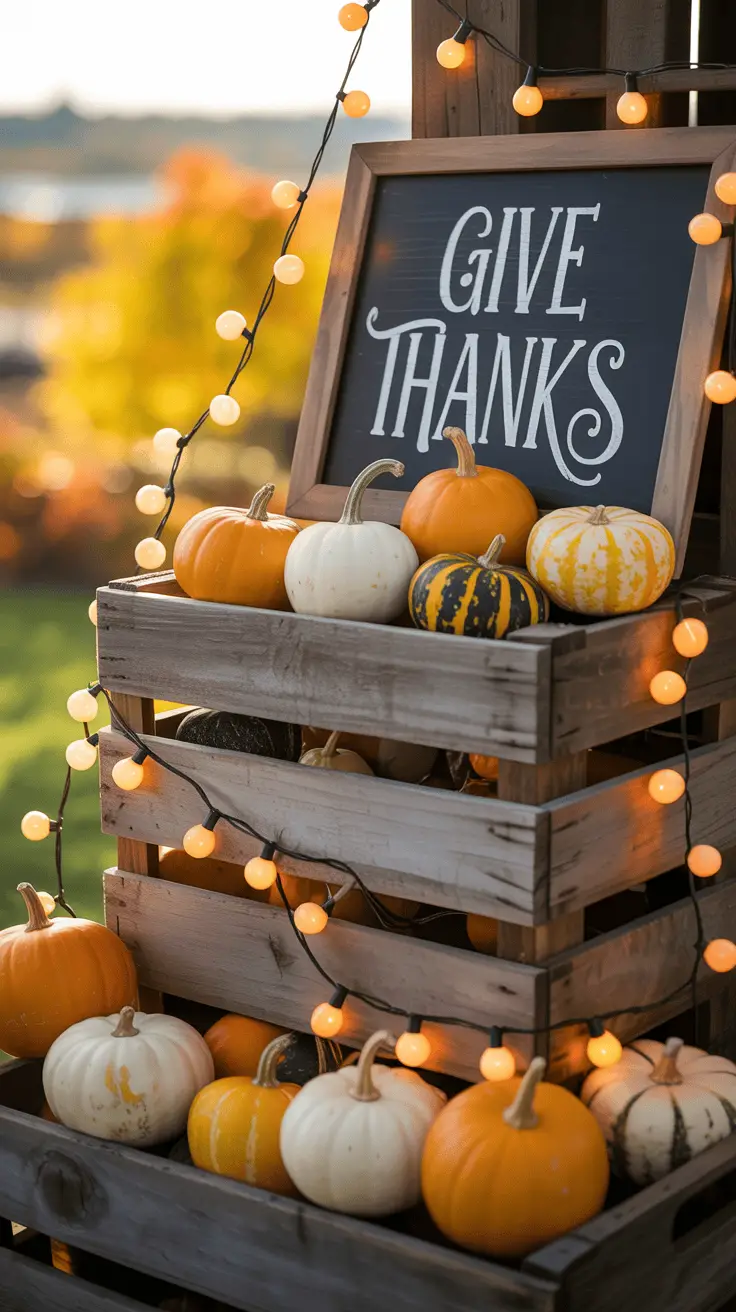
Rustic signs are another favorite. Small wooden plaques or chalkboard signs with phrases like “Give Thanks” or “Harvest Blessings” fit right in. If you want something playful, tiny themed figurines—like little turkeys, pumpkins, or scarecrows—can sneak in between the fruits and leaves. These accents spark smiles and add that extra bit of charm, especially when the kids spot their favorite decorations hiding in the mix.
Here’s a quick checklist I follow:
- Choose ribbons with a matte texture for a cozy, natural look.
- Use wired ribbons if you want to shape your bow so it stays put.
- Tuck small pinecones or berries into the ribbon or around the opening.
- Pick figurines that are simple and small so they don’t overwhelm the display.
These details turn your cornucopia into a centerpiece that invites guests to lean in, admire, and feel that Thanksgiving spirit instantly.
Keeping Your Centerpiece Fresh and Vibrant
If you’re using fresh fruits, flowers, or greenery, keeping everything looking good can feel like a bit of a balancing act, especially during busy holiday days. I’ve learned a few tricks to keep my cornucopia bright and inviting through the meal.
- Fresh fruits and veggies do best if you set up the cornucopia close to the time you’ll use it. The cooler the environment, the longer they last.
- Lightly mist leaves and flowers to keep them from drying out, but don’t soak the wicker—you want freshness, not sogginess!
- If you notice any bruised or soft spots, remove those pieces quickly to keep the whole arrangement looking crisp.
- For hardy items like pinecones and dried corn, they can stay as long as you want, since they don’t wilt.
Using artificial elements instead of fresh ones is another great option, especially if you want your centerpiece to last longer or be reusable. Pick quality fake leaves, berries, and flowers that look natural to avoid that plastic feel. Plus, artificial pieces let you rearrange or refresh whenever you like, which is perfect for busy families who want beautiful decor without the upkeep.
A few handy tips for artificial pieces:
- Dust them lightly before setting up to keep them looking fresh.
- Mix real and fake items to combine longevity and natural appeal.
- Store your cornucopia carefully after Thanksgiving so it’s ready to shine again next year.
With the right care and a few smart choices, your centerpiece will stay as charming and inviting as the day you made it. It’s one of those small wins that make the holiday table feel truly special!
Conclusion
Decorating a cornucopia for Thanksgiving centerpieces is easier than you might think, and it’s such a joyful way to welcome the season at your table. By picking a base that suits your style, adding fresh fruits and natural fillers, and arranging everything with a bit of care (plus some kid-friendly touches), you create more than just decoration—you create memories.
I encourage every mom to try it out this year! It’s a simple project that brings warmth, color, and a bit of festive magic into your home. Thanks for stopping by to read my tips—I’d love to hear how your cornucopia turns out or any fun ideas you add to make it your own. After all, Thanksgiving is all about sharing joy and gratitude, one beautiful centerpiece at a time!
This post may contain affiliate links. Read the full disclosure here.