
Mason Jar Fairy Lights Centerpiece That Adds Instant Glow
I love how a simple mason jar fairy lights centerpiece can add instant glow and charm to any family gathering, especially when you have three busy little boys running around! It’s the kind of quick, glowing décor that brings warmth and a bit of magic without much fuss or mess!
These charming little lights are always a highlight at our dinners and make the table feel cozy and special in seconds. If you’re looking for an easy way to brighten up your home and create a playful, inviting atmosphere, this idea is perfect for you!

Why This Mason Jar Fairy Lights Centerpiece Works for Busy Moms

As a mom of three energetic boys, I’ve learned that anything that saves time, keeps things safe, and still looks good is worth its weight in gold. That’s why the mason jar fairy lights centerpiece has become my go-to for brightening up family dinners and special occasions. It’s simple, quick, and adds a little magic without extra hassle. Let me walk you through exactly why this little glowing jar fits perfectly into a busy family life.
Instant Glow Saves Time

When you have kids, speed is everything. The last thing I want is to wrestle with candles that won’t light, or set up complicated decor that takes forever. The best part about the mason jar fairy lights centerpiece is how fast it works. Just flip the switch and the lights glow instantly. No waiting, no fuss, no matches or lighters required.
This immediate glow means you’re ready to go in seconds, whether it’s a last-minute dinner or a spontaneous family party. It’s the kind of glow that instantly lifts the room’s mood and makes the table feel inviting. When your schedule is packed, this simple step saves so much time while still creating that warm, cozy atmosphere you want.
Kid-Friendly and Safe
Safety is always on my mind with little ones around, and this centerpiece checks all the boxes. The lights are battery-operated, which means they stay cool to the touch—so no worries about burns or fire hazards like you get with candles. The mason jar acts as a protective shield, keeping the delicate bulbs tucked safely inside where little hands can’t reach them.
That peace of mind is priceless, especially when you’re juggling dinner prep, homework, and bedtime routines. I feel confident letting my boys explore their curiosity without risking them pulling over a hot candle or breaking fragile decor. It’s safe, practical, and totally family-friendly.
Fits Any Theme

One of my favorite things about the mason jar fairy lights centerpiece is how easy it is to customize. The plain jar is like a blank canvas, ready to match any occasion or style. You can dress it up with ribbons and fresh flowers for birthdays, add sprigs of pine and mini ornaments for the holidays, or keep it simple with natural twine for casual dinners.
This flexibility makes it a staple in our home. No matter the season or celebration, the centerpiece adapts without you needing to buy new decor every time. Plus, it’s a fun project to do with your kids. We love picking out decorations together, making each jar feel personal and festive. It’s an easy way to add charm and warmth without the extra clutter or cost.
If you want a quick, safe, and versatile way to brighten your table, this mason jar fairy lights centerpiece fits the bill perfectly.
Gathering the Supplies

Getting the right supplies together is the first step to creating a mason jar fairy lights centerpiece that instantly adds glow and charm to your table. I always say, having everything on hand before you start makes the whole process way more fun and less stressful—especially with three little boys who like to help or get distracted quickly! Here’s what you’ll want to gather for your glowing masterpiece.
Choosing the Right Mason Jars

Picking the perfect mason jar sets the stage for your glowing centerpiece. I usually go for pint or quart-sized jars because they give you plenty of room for fairy lights without feeling crowded. Pint jars are great if you want a more delicate glow or if you plan to use more decorations inside. Quart jars hold a bigger cluster of lights, making the glow brighter and bolder.
When it comes to glass, clear jars are my favorite because they let the light shine through beautifully and show off whatever fun decorations you add inside. However, tinted glass can add a little extra moodiness or a vintage feel—think soft blue or amber tones. Clear jars give you that classic charm and keep the light pure and bright, which is perfect for a centerpiece that needs to stand out.
Selecting Battery-Operated Fairy Lights
Battery-operated lights are a lifesaver in safety and convenience. I always pick LED fairy lights because they stay cool, use less energy, and last way longer on batteries. This means the lights won’t get hot to the touch and won’t burn out halfway through your dinner or party.
Battery life is key here since you want your centerpiece to glow for hours without fussing over changing batteries. Look for sets that say they run for 6 to 12 hours, so you get plenty of sparkle from one fresh set of batteries.
When it comes to color, white or warm white lights work best for a soft, cozy feel that fits with almost any decor. If you want a playful vibe, colored lights add a whimsical touch—especially fun for kid-friendly gatherings or holidays. I usually stick to warm white because it’s comforting and goes with everything.
Adding Decorative Touches

This is where you can let your creativity shine! I love adding little extras that match the season or occasion. Here are a few of my favorite ways to personalize a mason jar fairy lights centerpiece:
- Ribbons tied around the jar neck add a pretty pop of color and texture. Choose velvet for fall or satin for a birthday party.
- Faux flowers tucked inside or around the jar bring a fresh touch without wilting. Nothing says spring like bright daisies or lavender!
- Colored sand or small pebbles at the bottom add weight and a natural look while hiding the battery pack.
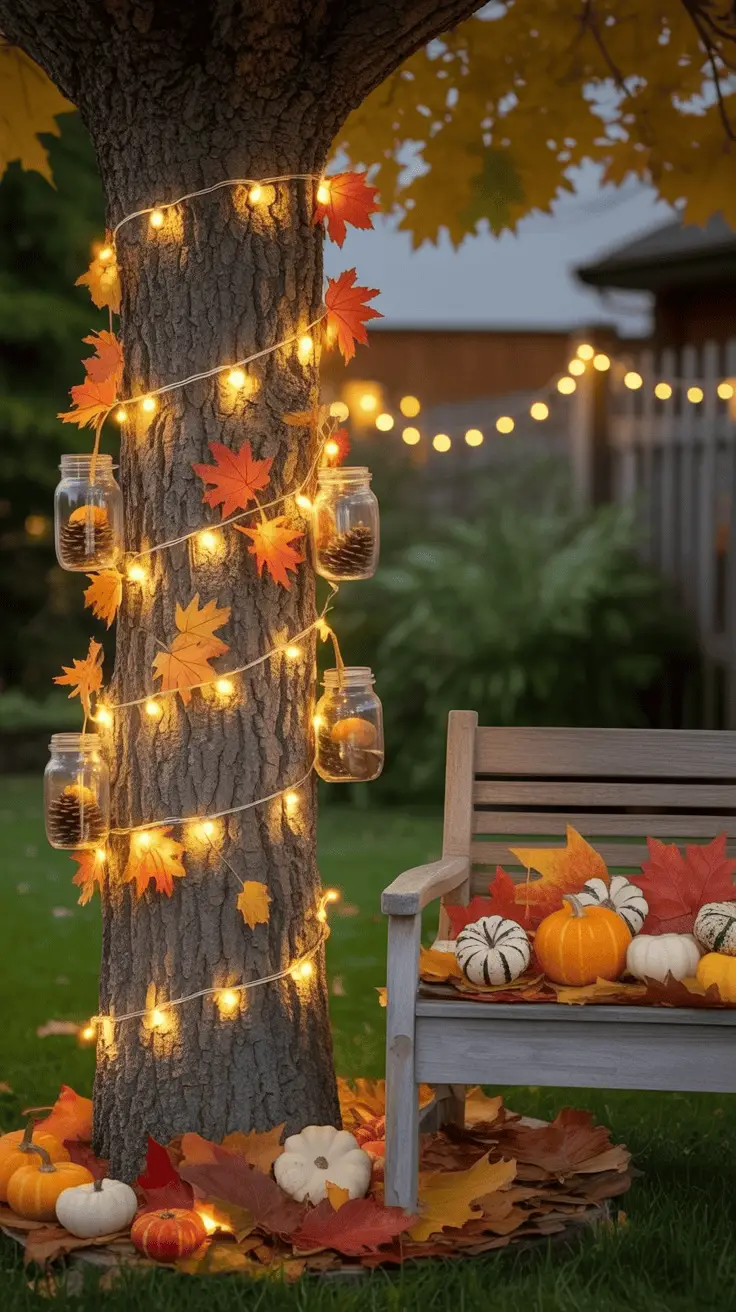
- Seasonal items like pine cones, mini pumpkins, or seashells make your jar feel ready for the holidays or the beach.
Mix and match to fit your style and have fun with it! The more personal, the more special.
Tools You’ll Need
Having the right tools close by makes putting your centerpiece together a breeze. These are the essentials I keep on hand:
- Hot glue gun for securing ribbons or tiny decorations that might slip around.
- Scissors to trim ribbons and cut other soft materials.
- Tweezers to carefully place tiny decorations or lights inside the jar without tangling.
- Small funnel for dropping batteries into the jar if your opening is narrow.
With these tools ready, the assembly goes smoothly and quickly—just the way I like it when juggling little helpers and a busy schedule!
With all your supplies gathered, you’re ready to create a mason jar fairy lights centerpiece that instantly glows and captures the joy of family moments. Next up, we’ll put it all together!
Step-by-Step Assembly Guide

Putting together your mason jar fairy lights centerpiece is easier than you might think, and it’s a fun project to do with the kids! This step-by-step guide will help you avoid the guesswork and get your glowing decoration ready in no time. I promise it’s simple and satisfying, and once you see that soft light flickering inside the jar, you’ll want to make jars for every room!
Preparing the Jar Interior
Before you start stuffing lights inside, the first thing I do is give the jar a good cleaning. You want the glass to be spotless so the fairy lights shine brightly and the whole thing looks fresh and inviting. Sometimes the jars can have dust or fingerprints, and those little imperfections catch your eye when the lights are on.
If you want to add a bit more interest or stability inside, try putting a thin layer of sand or small decorative stones at the bottom. This helps hide the battery pack and gives a natural feel, which I love. It’s like giving the lights a cozy little bed to sit on! Just make sure the sand or stones are dry before dropping them in. After cleaning and adding your base layer, leave the jar to dry completely or gently wipe it down with a dry cloth.
Wrapping the Lights Evenly
Now to the fun part—arranging the fairy lights! I like to start at the bottom of the jar and slowly coil the string upward. This keeps things neat and helps spread the light evenly so the entire jar glows softly, not just a few bright spots. As you wind the string, don’t pull it too tight; leave a bit of slack so you have some flexibility when placing the battery pack.
This step requires a little patience and a gentle touch, especially if your string of lights is long or has tiny bulbs. Move slowly and adjust as you go to avoid tangles or bulbs pressing hard against the glass. If your jar is tall, imagine wrapping the lights like a spiral staircase for your glow—this helps keep the light dancing all around.
Securing the Lights and Adding Extras
Once the lights look evenly spread, it’s time to keep them in place. I use a tiny dab of hot glue at a few points inside the jar to hold parts of the string steady. This is extra helpful if you plan to move the jar around; no one wants a messy tangle popping out.
With the lights secure, you can add a personal touch by tying a ribbon around the jar’s neck or sticking on tiny flowers. These little extras bring out the centerpiece’s charm and make it feel homemade and special. I love using bright ribbons for birthdays or soft pastels for springtime. Adding small faux flowers or twigs can give it a whimsical feel that your kids will adore.
Testing and Final Adjustments
Before sealing the jar, turn the lights on and take a moment to check how everything looks. This is your chance to spot any dark corners or areas where the lights bunch up or look too sparse. Shift the bulbs gently to fill in those spaces until you have an even glow.
Once you’re happy with the lighting, put the lid on snugly. If your battery pack fits inside, tuck it carefully so it doesn’t press too hard against the glass or wires. The final step is a quick check to make sure the switch is easy to reach or accessible—no fumbling in the dark!
With these steps done, your mason jar fairy lights centerpiece will be glowing beautifully and ready to brighten any table or shelf. It’s quick, simple, and so rewarding to see that warm light come alive in just a few minutes.
Styling Tips for Different Occasions
When I put together a mason jar fairy lights centerpiece, I always think about the occasion. It’s amazing how a few small touches can completely change the look and feel of your glowing jar. Whether you’re throwing a birthday bash, settling in for a family dinner, dressing up for the holidays, or lighting up your patio, the right extras add personality without slowing you down. Here’s how I style mine to match the mood perfectly.
Birthday Party Brilliance
Birthdays are a time to celebrate with a splash of fun, and the mason jar fairy lights centerpiece is perfect for this! I love adding colorful confetti inside or around the jar—it catches the light and adds a playful sparkle. Then, I string a little mini banner along the jar’s neck with cheerful birthday messages or cute shapes. This gives it an extra festive vibe that kids and grown-ups both enjoy.
Another trick I use is matching the jar’s ribbon or paint color to the cake, making the whole table look coordinated and thoughtful without much effort. If your cake is bright pink, tying a pink ribbon around the jar pulls the look together. It feels like all the party details are working as one, and the jars shine with extra charm.
Casual Family Dinner
For an easy, laid-back dinner with the family, I keep my centerpiece simple and cozy. Earth-tone ribbons—think warm browns, soft greens, or creamy beige—wrap around the jar’s neck to bring a natural feel that’s subtle and calming. The soft glow from the fairy lights combined with these colors creates a relaxed, inviting mood.
A fresh sprig of rosemary tucked under the ribbon adds a nice touch of green and smells amazing! It’s small details like this that make the centerpiece feel personal and warm without stealing the spotlight from family conversations or dinner itself. Plus, it’s quick to put together after a busy day.
Holiday Decor Ideas
The holidays call for a little more sparkle and season-specific charm. For Christmas, I love swapping in tiny pinecones or mini ornaments inside the jar to add texture and spice up the glow. Wrapping a bright red bow around the jar’s top instantly feels festive and cheerful. It’s easy to customize by mixing and matching these elements based on what you have on hand.
When Halloween rolls around, I switch it up by adding real or battery-operated tealights around the jars to create a spooky but safe glow outside, while inside the jar I keep the fairy lights for that soft twinkle. You can throw in small faux spiders or a bit of black tulle around the neck for fun, playful creepiness that kids will love.
Outdoor Patio Glow
When the weather’s nice, bringing your mason jar fairy lights centerpiece outdoors is a must. I find it easiest to group a few jars on a sturdy serving tray to keep everything together and make moving them simple. This also helps contain any stray twinkling lights and makes cleanup a breeze.
To keep bugs at bay, I place citronella candles nearby, so the space is cozy and pest-free. For outdoor use, I always pick weather-proof LED fairy lights because they hold up well, even if there’s a little moisture in the air. Their battery packs usually fit inside the jars, keeping cords out of sight and the glow soft and steady. This setup turns my patio into a warm, inviting spot for family dinners or casual hangs without the fuss.
Styling these little glowing jars is all about keeping it simple and matching the moment. The best part is, you can tweak and switch decorations anytime, so your centerpiece feels fresh but never complicated!
Maintenance, Safety, and Troubleshooting
Taking care of your mason jar fairy lights centerpiece is easier than you might think, and it really pays off. Keeping it well-maintained means your glowing jar will shine bright for many family dinners and celebrations to come. Plus, a bit of simple safety and regular checking helps avoid surprises and keeps everything kid-friendly. Here’s how I handle battery swaps, cleaning, fixing dim lights, and storing the jars when they’re not in use.
Battery Replacement
When the lights start dimming or stop altogether, fresh batteries are usually the fix. To get to the battery pack, I gently unscrew or lift off the jar lid—it’s often just a twist or pop, nothing tricky. Once open, carefully slide out the old batteries; most sets use AA or AAA, so keep the right replacements on hand.
Don’t toss those old batteries in the trash! I always take mine to a recycling spot, which is easy to find at most grocery stores or electronics shops. Recycling keeps harmful chemicals out of the landfill and helps protect the planet for our kids. After swapping in fresh batteries, snap the lid back on and test the lights before placing the jar back on the table. This little check saves headaches during your next family meal!
Cleaning the Jar
A clean jar really makes the lights sparkle, and it keeps the whole centerpiece looking fresh. I find the best way is to wash the jar gently with warm, soapy water. Use a soft brush or sponge to reach inside and clean off dust or fingerprints without scratching the glass. Avoid harsh cleaners that might dull the shine or leave residue.
After washing, I rinse well and let the jar air dry completely. A quick tip: dry it with a soft cloth inside and out to prevent water spots or fogging, which can dim the glow. Avoid sealing up the jar while it’s still moist because trapped dampness can fog the glass and cause a cloudy look. A dry jar means your fairy lights shine bright and clear every time!
Fixing Dim or Dead Lights
If your centerpiece isn’t glowing like it used to, there are a few quick things to check. First, make sure the battery pack is snug and the batteries are fresh. Loose connections are often the culprit. Next, inspect the light strand for any breaks or frayed wires, especially near the battery pack or switch.
Sometimes one tiny bulb going out can affect the whole string, so look for any bulbs that look burnt or broken. Replacing the faulty strand with a new one is simple and worth having extras on hand, especially if you love using these jars for events or parties. Before each special occasion, I always test the lights to catch any issues early. This little habit keeps your centerpiece glowing without any last-minute stress!
Storing When Not in Use
After the party’s over or dinner is done, proper storage is the key to keeping your mason jar fairy lights centerpiece ready for next time. I like to store my jars in a dry box or plastic bin with a lid to keep dust and moisture away. Avoid damp basements or humid spaces that could damage the lights or jar.
Label each jar if you have several or use different styles. This helps me grab the right one fast, especially during busy family events. Another tip is to keep the fairy light strands separate from one another when storing. I wrap each string loosely in twist ties or small bags to prevent tangles—that’s a lifesaver when you want your decorating to stay quick and easy.
With these simple care and troubleshooting routines, your mason jar fairy lights centerpiece will keep adding that charming glow for years to come—ready to bring warmth and magic to your table whenever you want.

Conclusion
A mason jar fairy lights centerpiece is such an easy way to add warmth and a little spark to any family table. It’s quick to make, safe for little hands, and simple to style for every occasion, which makes it perfect for busy moms like me.
Once you try it, you’ll see how those glowing jars bring a cozy, inviting feel that everyone loves. I really encourage you to gather your supplies, get the kids involved, and make your own.
I’d love to see how your mason jar fairy lights centerpiece turns out—share your photos or thoughts in the comments below! This little project has been a bright spot in our home, and I’m sure it will be in yours too.
This post may contain affiliate links. Read the full disclosure here.