It’s no secret that outdoor kitchen sink installations are a total game-changer for moms like me who love hosting family gatherings!
As a mom of three energetic boys, I’m always looking for ways to make outdoor cooking as simple and stress-free as possible—because let’s face it, things can get messy fast!
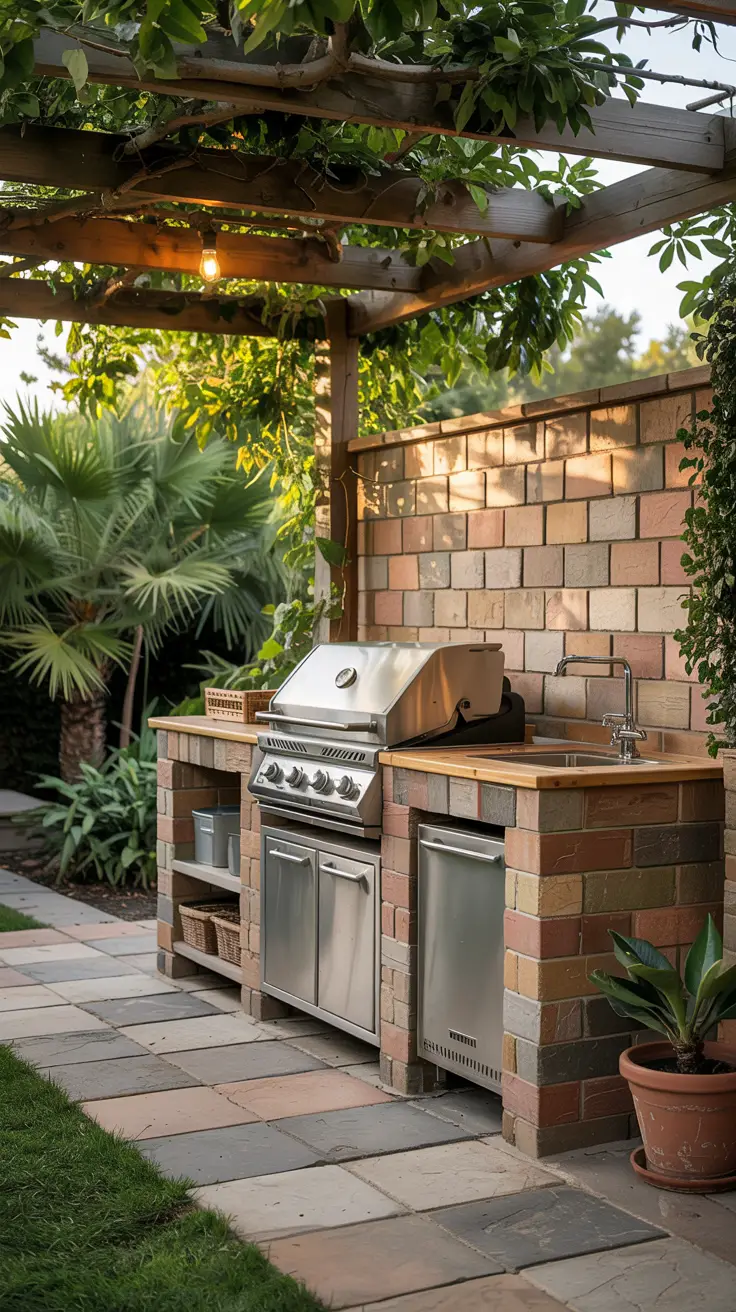
We added this while working on our modern outdoor kitchen plans and it’s been so helpful with the kids!
Adding a sink to your outdoor kitchen isn’t just convenient; it’s a lifesaver when you’re juggling food prep, sticky hands, and everything in between.
Trust me, once you have one, you’ll wonder how you ever managed without it!

Why Every Mom Needs an Outdoor Kitchen Sink
If you’re like me, juggling everything from grilling burgers to supervising the kids splashing in the pool, you know how chaotic outdoor family time can get! That’s why outdoor kitchen sink installations are an absolute must-have for moms. They don’t just make outdoor cooking easier… they completely transform how you manage the messiest parts of your day. From sticky fingers to barbecue remains, an outdoor sink is your new best friend!
Streamlined Clean-Up After Family BBQs

Picture this: you just finished a fantastic family barbecue. The burgers were perfect, the kids are happily full, but now there’s a mountain of dishes waiting for you. Instead of hauling everything (and I mean everything) back into the house, wouldn’t it be a dream to tackle the mess right there? That’s exactly what an outdoor sink lets you do!
No more balancing plates stacked high or trying to avoid dripping grease all over your floors. You can rinse plates, pots, and utensils outside, keeping all of that chaos where it belongs—outdoors. It’s especially helpful when the kids decide they need to try every available sauce or dunk their carrots into three different dips. All those sticky bowls? Washed and done without a single trek inside. Trust me, it’s one less thing to stress about during an already busy day. Plus, less traffic in and out of the house means fewer muddy footprints on your clean floors. That’s a win-win in my book.
Encouraging Kids to Help with Chores
Let’s be honest, getting kids to help with clean-up isn’t always easy (or fun). But with an outdoor sink, it suddenly becomes part of the adventure! My boys love “playing” with water—they’ll grab the sponge, spray down plates, and scrub while pretending they’re on a secret mission. I don’t even have to ask sometimes because the fun of splashing around gets them excited.
It’s not just about getting chores done (although that part is amazing)—it’s about teaching them responsibility in a way that doesn’t feel like work. And since we’re already outside, the messier it gets, the less I care. If their shirts get a little damp or if someone decides the sponge is a water gun, it’s no big deal. They’re engaged, they’re helping, and we’re spending quality time together while knocking out the post-meal clean-up. Honestly, it’s one of those simple parenting wins that feels huge.
Perfect for Poolside Snacks and Handwashing
If your house is anything like mine during summer, the pool becomes your second living room. Whether it’s a round of Marco Polo or kids cannonballing into the deep end, someone is always heading back to the kitchen for a snack. Then, of course, there’s the parade of wet hands all over everything as they grab sandwiches or open chip bags. Sound familiar?
This is where an outdoor sink becomes a lifesaver. It’s the perfect spot for quick handwashing before reaching for snacks, and it makes rinsing off those popsicle-sticky dishes a breeze. Plus, if you’ve got kiddos who track pool chemicals on their hands or grab muddy toys in between swims, they can rinse up before even touching the snacks table. It’s such a simple thing, but it keeps the chaos manageable, which is always the goal for me.
And let’s not forget the convenience for us moms. Imagine enjoying lemonade on the patio while the kids wash up their own lunch plates at the outdoor sink… instead of running inside ten times an hour. It’s one of those little upgrades to your space that makes it easier to enjoy summer fun without feeling like a referee in your own home.
This section flows so seamlessly into outdoor family life, and I’d honestly call it a parenting hack wrapped up in stainless steel. If you’ve been debating whether this addition is worth it, I promise you it’ll change the way you handle outdoor cooking, cleaning, and… let’s be real… parenting!
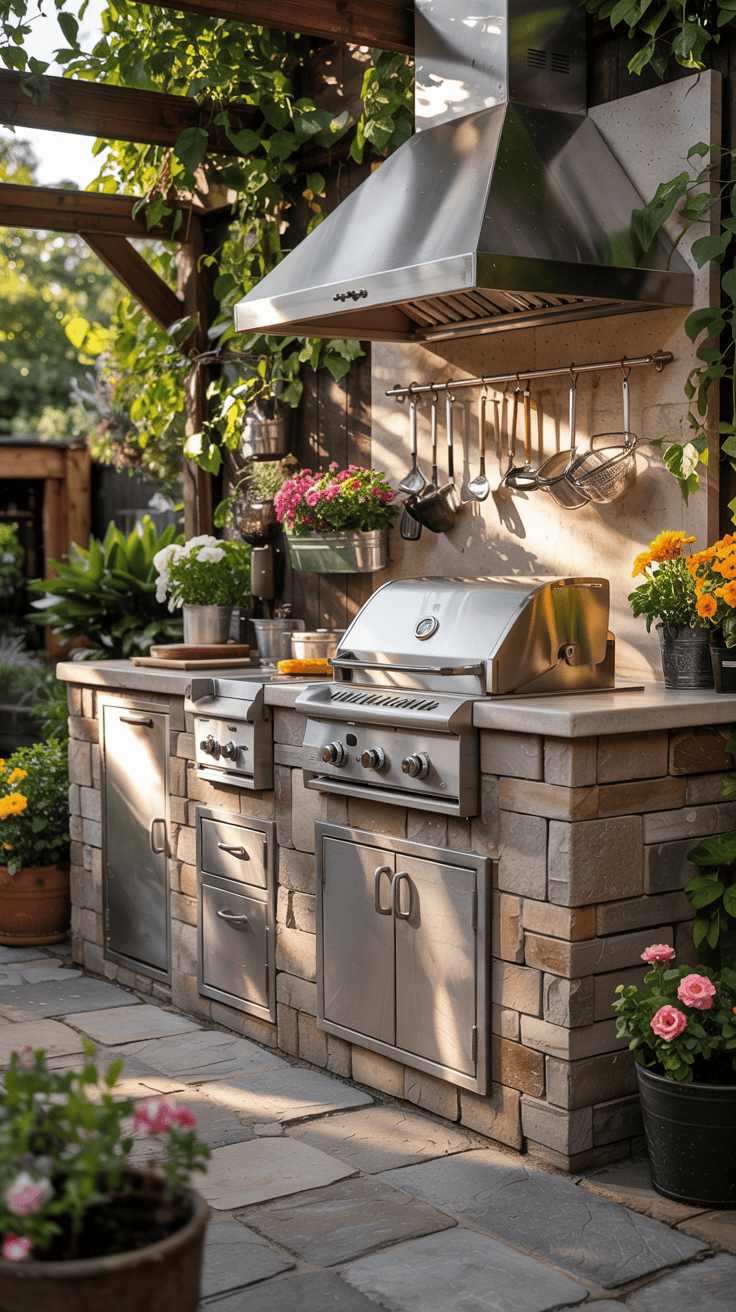
Choosing the Right Outdoor Kitchen Sink for Your Space

When it comes to outdoor kitchen sink installations, the right sink can really make a difference in how functional and enjoyable the space is for you and your family. As a mom of three boys, I’ve learned that every detail counts! Finding the perfect sink involves considering sizing, materials, and style, so let’s dive into how to choose wisely.
Sizing and Placement Considerations
First things first: sizing and placement! You want your outdoor kitchen sink to fit your space without feeling cramped or out of place. Here are some tips to help you evaluate your options:
- Measure your available space: Take out the tape measure and determine the dimensions you’re working with. Remember to account for any cabinets or grilling areas near the sink.
- Consider the workflow: Think about how you move around while cooking. Placing the sink close to the grilling area can minimize those trips back to the kitchen, especially when washing up platters or utensils.
- Accessibility matters: Make sure the sink is easily accessible for everyone in the family. A good spot would be near the prep area or dining space—this way, kids can wash their hands before grabbing snacks without running inside and tracking in dirt.
- Shade and exposure: Consider how much sun your sink will get throughout the day. You might want to place it under a patio cover or umbrella to make washing up more comfortable during sweltering summer afternoons.
Having the sink positioned more thoughtfully can really enhance your outdoor cooking experience and make it feel like an extension of your home!
Best Materials for Durability
Now onto materials, because let’s face it: your outdoor sink needs to withstand the elements! I’ve discovered that choosing the right material is essential for longevity and ease of maintenance. Here are some options I’ve found beneficial:
- Stainless steel: Often the top choice for outdoor sinks, stainless steel offers durability and resistance to rust and corrosion. It’s easy to clean and maintains its sleek look over time.
- Porcelain: If you’re after something more traditional, porcelain can be a lovely option. Just ensure it’s rated for outdoor use, and be mindful that it might chip if something heavy were to fall on it.
- Stone: For a rustic, high-end look, stone sinks are beautiful and can withstand extreme temperatures. However, they may require more maintenance than other options, so weigh that against your willingness to care for the material.
- Composite: These sinks can mimic stone or porcelain and offer good resistance to scratching and staining. They’re often lighter than their stone counterparts while still maintaining durability.
Picking the right material ensures your sink remains functional and beautiful year after year, no matter what Mother Nature throws at it!
Single Basin vs. Double Basin Options

Last but not least is the decision between a single basin or double basin sink. Each has its perks, so consider what aligns with your outdoor cooking habits:
- Single Basin: Perfect for those who prefer a streamlined look and don’t mind washing larger pots or pans all together. It can be a bit deeper, allowing for soaking or rinsing multiple items at once without separating them.
- Double Basin: If you often find yourself cooking for a crowd or frequently prepping food while cleaning, a double basin can be a great fit! It allows you to wash and rinse items simultaneously or set up one side for washing and the other for prepping.
Consider your typical family gatherings and whether you’re likely to have messy clean-up after preparing those big-spread meals. Reflecting on your needs can help you make the best choice for your unique family situation!
Finding the right outdoor kitchen sink isn’t just about functionality; it creates a space where cooking is more enjoyable and integrated into your outdoor lifestyle. So before making the final decision, weigh your options based on space, materials, and your family’s cooking habits. This little upgrade can change how you experience outdoor cooking forever!
DIY Versus Professional Outdoor Kitchen Sink Installations
When it comes to outdoor kitchen sink installations, the choice between doing it yourself or hiring a professional can feel a bit overwhelming. As a busy mom of three boys who love to splash around, I understand the desire to tackle projects on my own, but sometimes it makes more sense to call in an expert. Let’s break down what you need to know about DIY installations and when it might be best to get some professional help!
DIY: What You Need to Know
If you’re considering a DIY installation for your outdoor kitchen sink, there’s definitely a sense of accomplishment that comes with it! You’ll want to make sure you have the right tools and a clear plan before jumping in. Here are the essentials:
Tools Required
- Wrench and Pliers: Vital for adjusting and tightening fixtures. Make sure they are comfortable to hold.
- Pipe Cutter: A handy tool for cutting pipes to the right length. Trust me, this makes the job much easier!
- Drill: Necessary for creating holes in your countertop or cabinets. Look for a cordless one to move around freely.
- Safety Gear: Gloves and safety glasses keep you protected—better safe than sorry!
Basic Steps
- Plan Your Layout: Decide where you want your sink. Consider accessibility and drainage.
- Prep the Area: Clear out the installation zone, ensuring a clean and safe workspace.
- Install Plumbing: Connect the water supply lines to the sink, following the manufacturer’s guidelines.
- Secure the Sink: Once everything’s plumbed, set the sink into place and secure it using the provided clamps or adhesives.
- Test for Leaks: Turn on the water supply and check for any leaks. If all looks good, you’re ready for action!
Potential Challenges

While DIY projects can be rewarding, some challenges might pop up during the process.
- Plumbing Issues: If the existing plumbing system is complicated, you can easily get stuck.
- Incorrect Measurements: Double-check your measurements before cutting—one wrong move can lead to more work.
- Heavy Lifting: Some sinks can be heavy. Make sure you have help if needed!
Even with a solid plan in place, it can get tricky, especially when kids are running around wanting your attention. So, think carefully about whether you’re ready to dive into a DIY sink installation!
When to Call in the Pros
While attempting this as a DIY project can be tempting, there are clear signs when it’s best to hire professionals. Here are situations that might require expert hands:
- Complex Plumbing Requirements: If your current plumbing is outdated or complicated, it’s wise to get a licensed plumber. They know how to navigate any potential issues without stress!
- Seamless Finish: Professionals can ensure that the installation looks perfect and integrates smoothly with your outdoor kitchen design. Worrying about making everything look just right can be a lot when you’re trying to manage everything else!
- Permits and Regulations: Depending on your area, an installation might need permits. Professionals will be familiar with local regulations and can handle any red tape for you, which is a huge relief!
- Time Constraints: Let’s face it—sometimes we just don’t have enough hours in the day! Hiring a pro not only saves time but can fill your family’s weekend with more fun than installation headaches!
Investing in the right help can result in a beautiful, functional outdoor sink that enhances your cooking experience without the stress of potential DIY pitfalls. Trust me, it’s often worth it for peace of mind!
Whether going the DIY route or reaching out to the pros, outdoor kitchen sink installations truly elevate your outdoor cooking experience. You’re one step closer to hassle-free family gatherings and cleaning up after the chaos!
Budgeting for Your Outdoor Kitchen Sink Installation

Installing an outdoor kitchen sink can feel like one more thing to manage on your to-do list. But with a little planning, you can navigate the costs effectively! Knowing what to expect in terms of materials, installation options, and smart saving tips will make the whole process exhilarating rather than overwhelming. Here’s how to budget effectively for your outdoor kitchen sink installation.
Cost of Materials and Fixtures
When you think about outdoor kitchen sink installations, the first aspect that comes to mind is cost—specifically, the materials and fixtures you’ll need. Here’s a quick breakdown of what to anticipate:
- Sinks: Depending on materials and design, outdoor sinks can range from $150 to $600. Stainless steel is often on the pricier end, but it’s worth it for durability and easy maintenance!
- Faucets: Given the variety on the market, faucets can usually be found in the $50 to $300 range. It’s tempting to go for the cheapest option, but remember: quality here translates to longevity and fewer headaches later.
- Additional Fixtures: Always factor in costs for extra items like drainage systems, hot water hookup, or accessories such as soap dispensers or cutting boards. These can add anywhere from $30 to $200 to your total budget.
You can see how these costs can accumulate, making it crucial to plan ahead. I always recommend creating a detailed list of what you’ll need so you can set a realistic budget before diving into your purchase!
Installation Costs: DIY vs. Professional

Should you roll up your sleeves and tackle this as a DIY project, or is it best to call in the pros? This is a big decision that can greatly influence your budget. Let’s explore both options:
DIY Installations
Taking on the installation process yourself can save you a significant amount of money—often 50% or more of what you’d spend hiring a professional! Here’s what to keep in mind:
- Tool Costs: If you already have tools like wrenches, pliers, and drills, that’s great! If not, you might spend about $100 – $200 to get the necessary equipment.
- Your Time: As a mom, I know how valuable your time is! Setting aside a weekend or two can be required, which could keep you from more enjoyable family activities.
However, if you feel confident and have the right tools, a DIY installation can be a rewarding experience—plus, you can involve the kids and make it a fun family project!
Professional Installation
On the flip side, calling in a licensed plumber typically costs between $300 to $800, depending on your area and the complexity of the job. Here’s when hiring a professional may be worth it:
- Experience: Professionals have the expertise to spot potential complications that may arise with plumbing, avoiding costly mistakes down the road.
- Time-Saving: Let’s face it, some days your schedule is packed! Having a pro take care of the installation allows you to spend quality time with your family rather than worrying about home improvement tasks.
- Permits: Some cities require permits for plumbing installations, which a licensed plumber will manage for you. This can save you from unexpected delays.
In short, if your budget allows, bringing in a professional might provide peace of mind and a hassle-free experience!
Smart Tips to Save Without Sacrificing Quality
Finding ways to trim costs without compromising on quality is a game plan every savvy mom can appreciate! Here are a few strategies that have worked wonders for me:
- Scout for Sales: Seasonal sales or holiday promotions from home improvement stores can lead to fantastic savings. Trust me; a little patience can lead to a big payoff!
- Buy Used or Refurbished: Check local listings or marketplaces for gently used fixtures. You might find high-quality sinks or faucets at a fraction of their retail price—what a win!
- Consider Alternative Materials: While stainless steel is often the gold standard, there are durable composites that won’t break the bank. Find a reputable brand that offers materials rated for outdoor use without sacrificing quality.
- Plan Your Layout Ahead of Time: The more planned out your sink installation is, the fewer surprises you’ll encounter. This means fewer last-minute costs, helping you stay on track!
- Involve Your Kids: Teaching them how to do age-appropriate tasks during installation not only turns it into a bonding experience but also saves labor costs!
With the right budgeting strategy, your outdoor kitchen sink installation can become a reality without straining your finances. By weighing your options thoughtfully, getting creative with costs, and planning for your family’s needs, you can transform your cooking space into a functional, joyful retreat!
Frequently Asked Questions About Outdoor Kitchen Sinks
Outdoor kitchen sink installations can really change the flow of your cooking experience, leaving you with so many questions! As a mom of three energetic boys, I’ve been through the trial and error of figuring out what works best for our family. Let’s tackle some of the most common questions I hear about outdoor kitchen sinks!
Do Outdoor Sinks Require Special Plumbing?
When it comes to plumbing for outdoor kitchen sinks, there are definitely a few things to consider! First things first, if you’re planning to have running water and a drain, you will need to take specific plumbing requirements into account. Generally, outdoor sinks do connect to your home’s water supply, just like indoor sinks, but they also have their own unique needs.
- Separate Drain: Ideally, outdoor sinks should have a separate drain system to ensure that they can handle the outdoor elements without causing problems inside your house. This also allows for better drainage for all those washed vegetables and messy hands!
- Hot Water Connection: If you want the convenience of hot water outside (which I highly recommend for washing up greasy pots or rinsing off sticky hands), you’ll need to set up a hot water connection as part of the plumbing. This may require a bit more planning and installation, especially if you’re not sure how to access your home’s hot water supply.
Making sure you meet these plumbing needs from the get-go can save you headaches later!
How Do I Winterize My Outdoor Sink?
In our chilly climate, winterizing the outdoor kitchen sink is essential if you want to maintain its longevity. I’ve learned a few tried and true steps to protect my sink from those freezing temperatures:
- Turn Off the Water Supply: Make sure to shut off the water supply to the sink completely. This helps prevent any water left in the pipes from freezing and causing cracks.
- Drain the Lines: After shutting off the water, open the faucet to let any remaining water drain out. You might even want to use compressed air to blow out any trapped water in the pipes!
- Disconnect Any Hoses: If you have a hose connected to your outdoor sink, disconnect it and store it indoors to avoid cracks from freezing temperatures.
- Insulate Exposed Pipes: Wrap any exposed pipes leading to the sink with insulation or foam pipe covers to protect them from freezing.
- Cover the Sink: If possible, put a heavy-duty cover over the sink to keep snow and ice from accumulating on it. This will help keep it protected and ensure everything stays in good shape until spring.
By taking these steps, you can make sure your outdoor kitchen sink stays safe and sound until sunny days roll back around, allowing the family to enjoy outdoor cooking together again!
Are Outdoor Sinks Safe for Kids?

As a mom, the safety of my kids is always my top priority. If you’re wondering whether outdoor sinks are safe for children, rest assured that there are plenty of ways to child-proof these spaces and keep kids safe while they help out!
- Supervised Usage: Always keep an eye on your little ones while they’re using the sink. It’s a great opportunity to teach them about washing hands and helping with dishes, but supervision is key!
- Install a Tempered Faucet: Opt for faucets that have safety features, like tempered water that won’t scald little hands. This way, they can wash up without any worries.
- Teach Water Safety: Give your kids a quick lesson on staying safe around water—especially if your outdoor sink is near a pool or other water features.
- Use Non-Slip Mats: Placing non-slip mats around the sink area can help prevent any slips and falls during soap scrubbing time or while washing up after messy meals.
- Encourage Playful Help: Kids love being part of the action! Make washing dishes a fun game where they can splash and clean without worries. Just knowing they are helping out makes it even more enjoyable!
By implementing a few simple strategies, outdoor kitchen sinks can become a fun part of family cooking and cleaning while ensuring your kids stay safe and involved! Trust me, it creates good memories, laughter, and a sense of responsibility they’ll cherish as they grow.

Conclusion
Outdoor kitchen sink installations truly change how we enjoy cooking and gathering as families! They streamline clean-up, promote teamwork among the kids, and keep everything organized during those busy outdoor meals. As a mom, I’ve seen firsthand how having a dedicated space for washing up makes family barbecues a lot less stressful.
If you’ve been toying with the idea of adding an outdoor sink, take the leap! You won’t regret it. Imagine how much easier it will be to manage outdoor messes while making unforgettable memories with your loved ones. Investing in this small addition can have a huge impact on your family gatherings. What are you waiting for? Let’s make outdoor cooking even more fun and enjoyable!
This post may contain affiliate links. Read the full disclosure here.