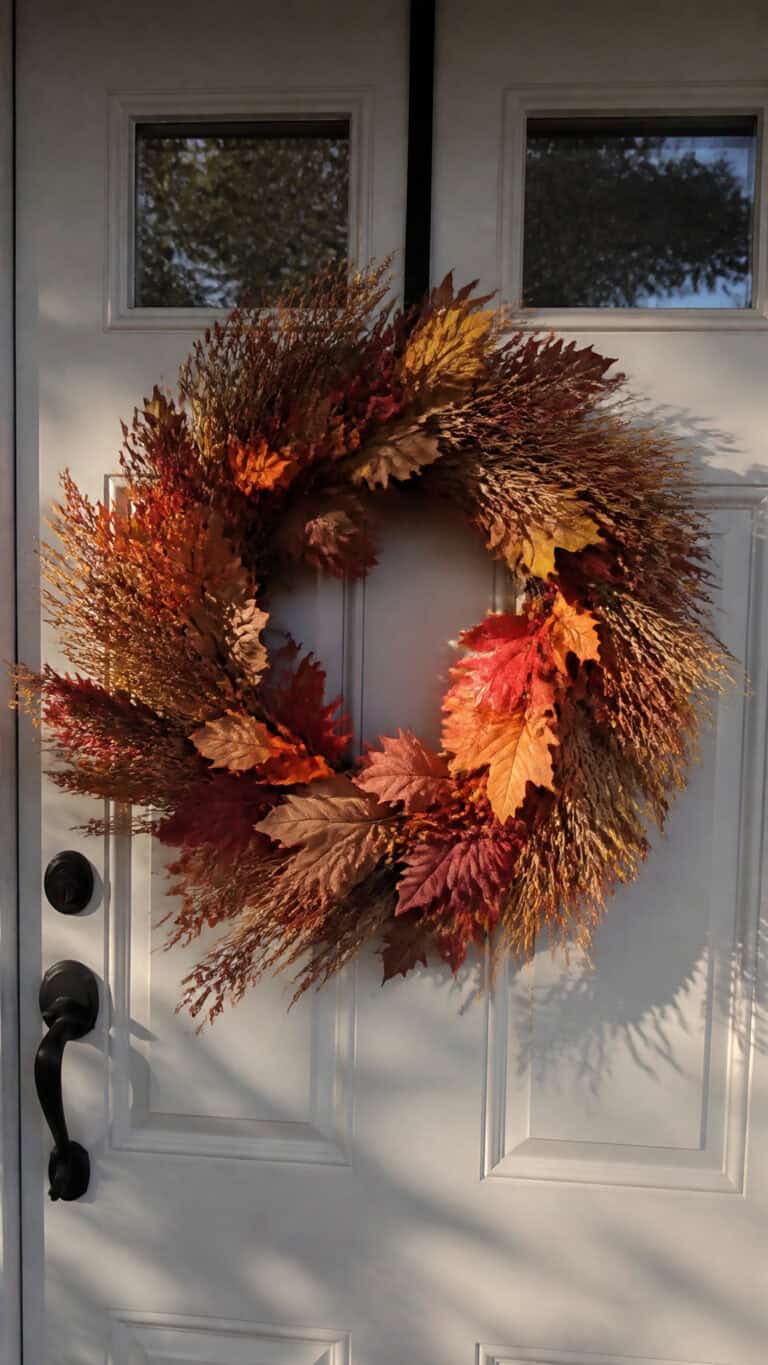
Black pumpkins are having such a moment right now, and I am absolutely here for it! As a mom of three energetic boys who are constantly tracking dirt through the house and knocking things over, I’ve learned to appreciate décor that’s both stylish and forgiving. Black pumpkin painting ideas have become my secret weapon for creating a sophisticated Halloween look that doesn’t scream “tacky” but still gets my boys excited about the spooky season!
The best part about working with black pumpkins is that they’re incredibly versatile and can match any aesthetic you’re going for. Whether you want something elegant for your front porch, fun and quirky for the kids, or modern and minimalist for your Instagram-worthy mantel, black is the perfect base color. Plus, painting pumpkins means they last way longer than carved ones, which is perfect when you’re decorating in early October but need everything to survive until Halloween night!
Metallic Gold Drip Design
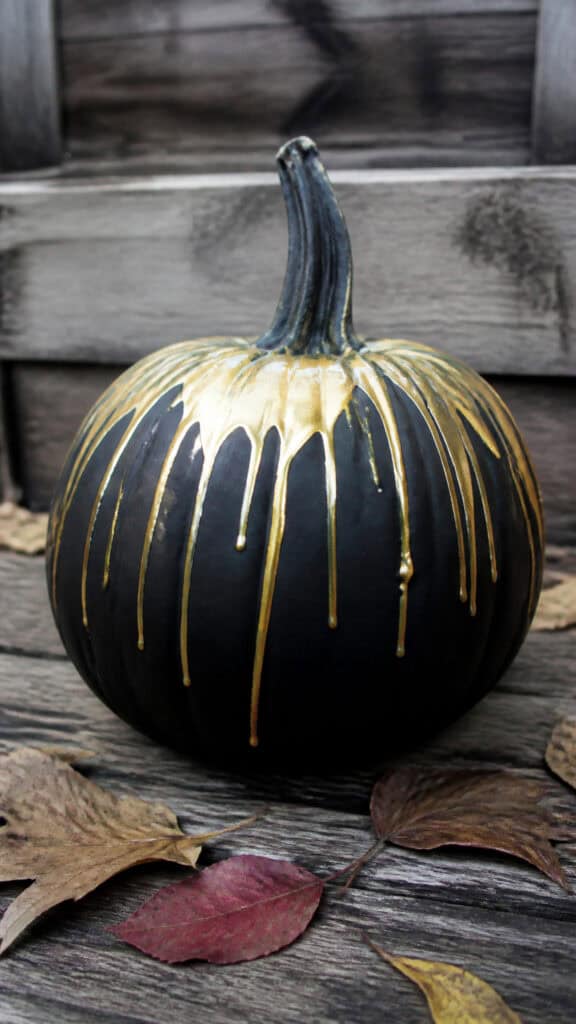
This has to be one of my absolute favorite black pumpkin painting ideas because it looks incredibly fancy but is actually super easy to pull off! The contrast between matte black and shiny gold is just stunning, and it gives off major upscale boutique vibes. I love setting these on my front porch steps with some mums and corn stalks for that perfect fall welcome!
To create this look, start by painting your pumpkin with a matte black acrylic paint as your base coat. You’ll probably need two coats to get that deep, rich black color that really makes the gold pop. Once it’s completely dry (and I mean completely, because we don’t want any smudging!), grab some metallic gold paint and start dripping it from the top of the pumpkin. You can control the drips by tilting the pumpkin or using a paintbrush to guide where the gold flows!
The beauty of this design is that it’s impossible to mess up. Every drip pattern is unique and gorgeous in its own way! My middle son actually helped me make one of these last year, and even though his drips went everywhere, it still looked amazing. You can also experiment with different metallic colors like rose gold, copper, or silver for variety. I usually make a whole collection of these in different sizes and group them together for maximum impact!
Constellation and Moon Phases
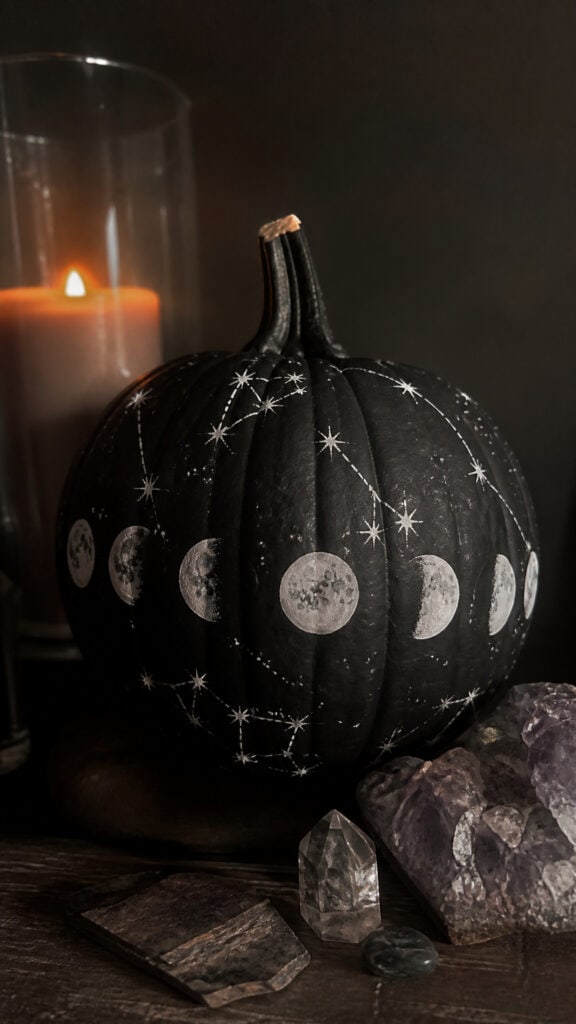
If you want to combine your love of outer space with Halloween décor, this celestial-themed design is absolutely perfect! My oldest son is obsessed with astronomy right now, so when we made these constellation pumpkins together, he was thrilled to help map out his favorite star patterns. These black pumpkin painting ideas are perfect for anyone who wants a more mystical, witchy vibe without being too over-the-top spooky!
Start with your black base coat on the pumpkin, making sure it’s nice and even. Once dry, use white or silver paint to create moon phases wrapping around the pumpkin horizontally. You can paint a full moon, crescent moons, half moons, and new moons in sequence. For the constellations, use a small brush or even a toothpick to dot white stars in recognizable patterns like the Big Dipper, Orion’s Belt, or whatever constellation speaks to you!
To make the stars really sparkle, I like to add tiny dots of silver glitter paint on top of some of the white dots. You can also connect the constellation dots with thin white or gold lines to make the patterns more obvious. This design looks absolutely magical when you cluster several pumpkins together, each featuring different moon phases or constellations. It’s sophisticated enough for adult spaces but still captures that sense of wonder that makes Halloween special for kids!
Modern Geometric Patterns
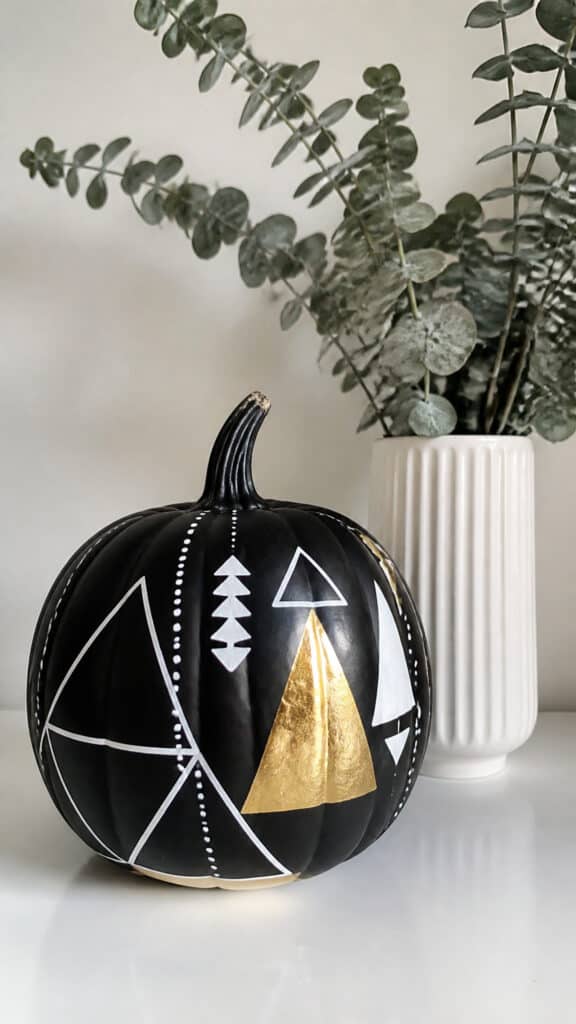
For those of us who love clean lines and contemporary design, geometric patterns on black pumpkins are where it’s at! These black pumpkin painting ideas are perfect for a more modern home where traditional Halloween décor might feel out of place. I started making these after realizing that my usual orange pumpkins clashed terribly with my living room color scheme, and now I’m completely converted!
The key to this look is using painter’s tape to create crisp, clean lines. After painting your pumpkin black and letting it dry completely, apply strips of painter’s tape in geometric patterns. You can create triangles, hexagons, chevrons, or abstract shapes. Then paint over the tape with white, gold, or even a pop of color like emerald green or deep burgundy. When you peel off the tape, you’ll have these gorgeous, sharp geometric designs that look like they came straight from a design magazine!
I love making a whole collection of these with different patterns but the same color palette. You can do all gold geometric shapes, or mix metals, or even create an ombre effect with different shades of gray. My boys think these look like something from a video game, which they mean as the highest compliment! These pumpkins also transition beautifully from Halloween into Thanksgiving décor, so you get way more mileage out of your decorating efforts!
Elegant White Lace Pattern
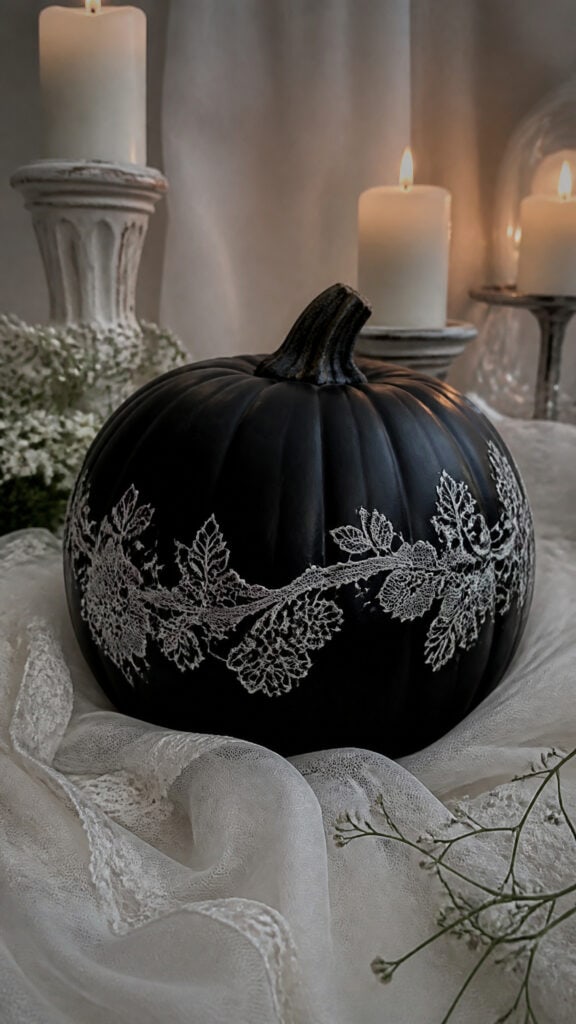
Talk about sophisticated! This lace-inspired design is one of those black pumpkin painting ideas that makes everyone ask where you bought it because it looks so professional. The combination of black and white is timeless, and the delicate lace patterns add such a romantic, vintage feel. These are absolutely perfect for a Halloween wedding or a more grown-up Halloween party!
You have a couple of options for creating this look. The easiest method is to use actual lace as a stencil! Find some pretty lace fabric or doilies, lay them on your black painted pumpkin, and use spray paint or a sponge with white paint to dab over the lace. When you lift it off, you’ll have a beautiful lace imprint. The other option is to freehand paint lace patterns using a thin brush and white paint, which takes more time but gives you complete creative control!
I like to focus on creating lace patterns that wrap around the pumpkin like a decorative band, or you can cover the entire pumpkin for a more dramatic effect. You can also add small pearl or rhinestone accents using craft glue to make it extra fancy. These pumpkins look stunning mixed with white pumpkins and lots of candles for an elegant tablescape. Fair warning though: once you make these, you might never want to go back to traditional orange pumpkins!
Spooky Dripping Candle Wax Effect
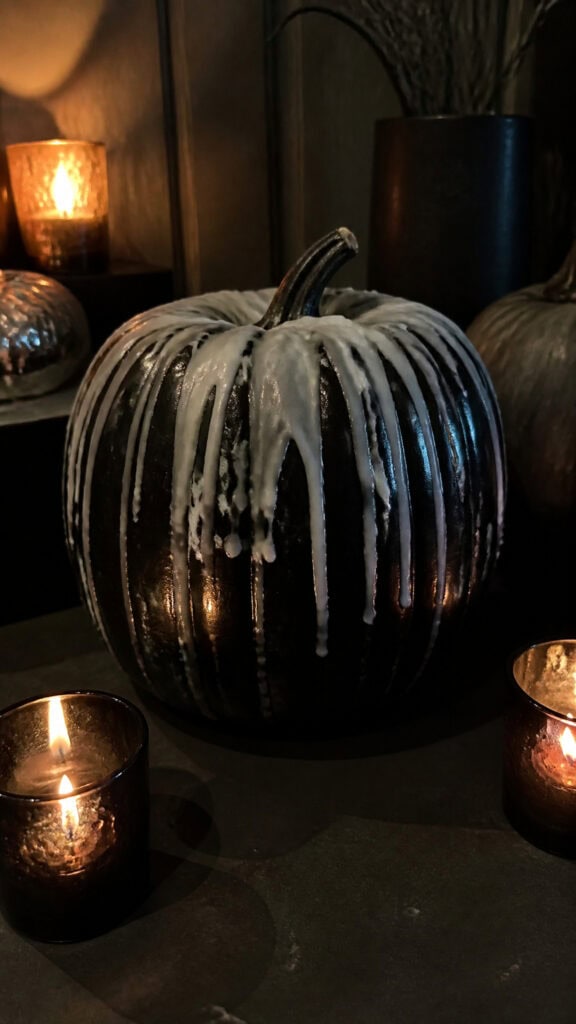
This one is perfect if you want to keep things Halloween-spooky but still sophisticated! The dripping wax effect on black pumpkins creates such a creepy-chic vibe that my boys absolutely love. They think it looks like something from a haunted mansion, and honestly, they’re not wrong! This is one of those black pumpkin painting ideas that really embraces the spooky season while still looking put-together!
To create this effect, paint your pumpkin black first and let it dry completely. Then, using white paint (or you can use gray, cream, or even red for a different vibe), create drips that look like melting candle wax running down the sides. Start at the top near the stem and let the paint naturally drip down, or use a brush to create controlled drip marks. The key is to make them uneven and organic-looking, just like real melted wax would be!
For extra realism, you can build up layers of drips in slightly different shades of white or cream. Some drips should be thick and short, while others are thin and run all the way down the pumpkin. You can also add a few drips that pool at the bottom. My youngest loves helping with this project because there’s really no wrong way to do it, and the messier it looks, the better! These pumpkins look amazing clustered with real candles or LED candles for a truly atmospheric Halloween display!
Ombre Fade to Gray
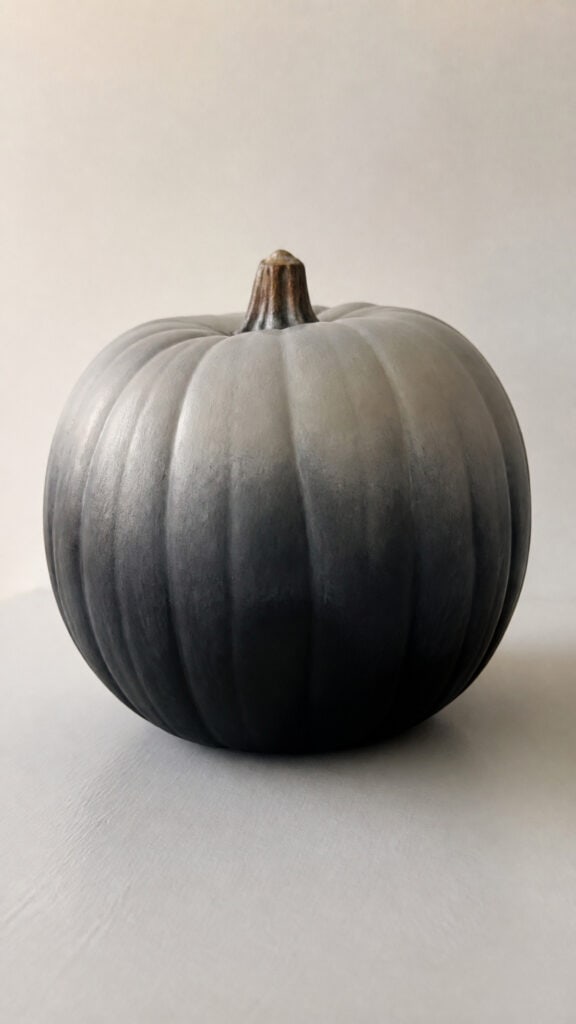
If you’re looking for something a little more subtle and artistic, the ombre effect is absolutely gorgeous! This technique creates a beautiful gradient from deep black at the bottom to light gray or white at the top. It’s one of those black pumpkin painting ideas that feels very Pinterest-worthy but is actually pretty forgiving for beginners. I made my first ombre pumpkin while my boys were napping, and I was so proud of how it turned out!
Start by painting the entire pumpkin black and letting it dry. Then, mix your black paint with white paint to create several shades of gray, from dark to light. Working in sections, paint the darkest gray just above the black base, then gradually work your way up the pumpkin with lighter and lighter shades. The trick is to blend where each color meets while the paint is still wet, using a dry brush to soften the transitions!
You can create a dramatic ombre with just a few color transitions, or make it super smooth and gradual with many subtle shade changes. This technique works beautifully whether you’re going from black to gray, black to white, or even black to a color like deep purple or navy blue. I love grouping several ombre pumpkins together in different sizes for a cohesive, artistic display. These also look amazing in modern farmhouse or Scandinavian-style homes where you want that minimalist aesthetic!
Matte Black with Copper Dots
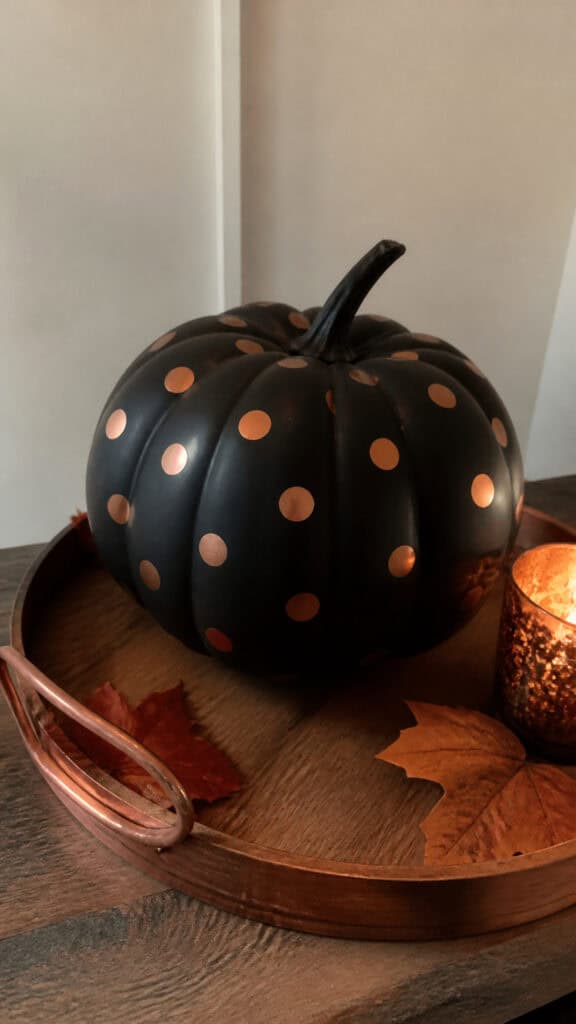
Sometimes the simplest designs are the most striking! This polka dot pattern using copper on matte black is so chic and modern. It’s one of my go-to black pumpkin painting ideas when I want something that looks intentional and stylish but doesn’t require hours of detailed work. As a busy mom, I appreciate projects that deliver maximum impact with minimal time investment!
After painting your pumpkin with matte black paint, let it dry completely. Then comes the fun part – adding copper dots! You can use a round sponge dauber, the eraser end of a pencil, or even your fingertip to create perfectly round dots. I like to create an all-over pattern with evenly spaced dots, but you can also do random placement or create a specific pattern like dots concentrated at the top that gradually spread out as they go down!
The copper color is so warm and beautiful against the black, and it catches the light in the most amazing way. You can also experiment with different metallic colors like rose gold, silver, or bronze, or even mix multiple metallics on one pumpkin! My middle son loves helping with this project because making dots is easy and satisfying. These pumpkins look fantastic grouped together in odd numbers, and they work beautifully from September all the way through Thanksgiving!
Black Cat Silhouette
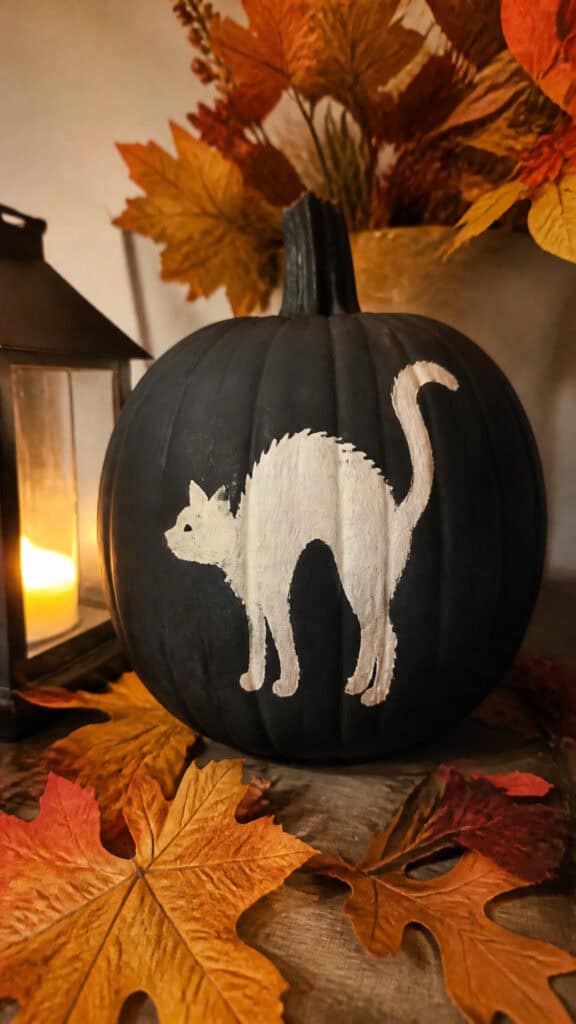
How can you do Halloween without at least one black cat? This design is absolutely adorable and still maintains that sophisticated black pumpkin aesthetic! My boys request these every single year because they love our family cat, and they think seeing her silhouette on a pumpkin is hilarious. It’s one of those black pumpkin painting ideas that manages to be both cute and classy at the same time!
Paint your pumpkin black as the base, then use white, silver, or gold paint to create a cat silhouette on the front. You can find cat silhouette templates online or freehand it if you’re feeling confident! The classic arched-back, tail-up pose is instantly recognizable and perfect for Halloween. You can make it extra special by adding little details like whiskers, or keep it simple with just the solid silhouette!
For a more dramatic effect, paint a large full moon in white or pale yellow behind the cat silhouette. You can also add small stars, a witch’s hat, or even a tiny mouse for the cat to chase. I like to make several of these with cats in different poses and sizes. Some years I’ve even painted our actual cat’s silhouette, which the boys think is the coolest thing ever! These pumpkins are perfect for anyone who wants Halloween décor that’s fun and festive without being scary or gory!
Matte Black with White Script
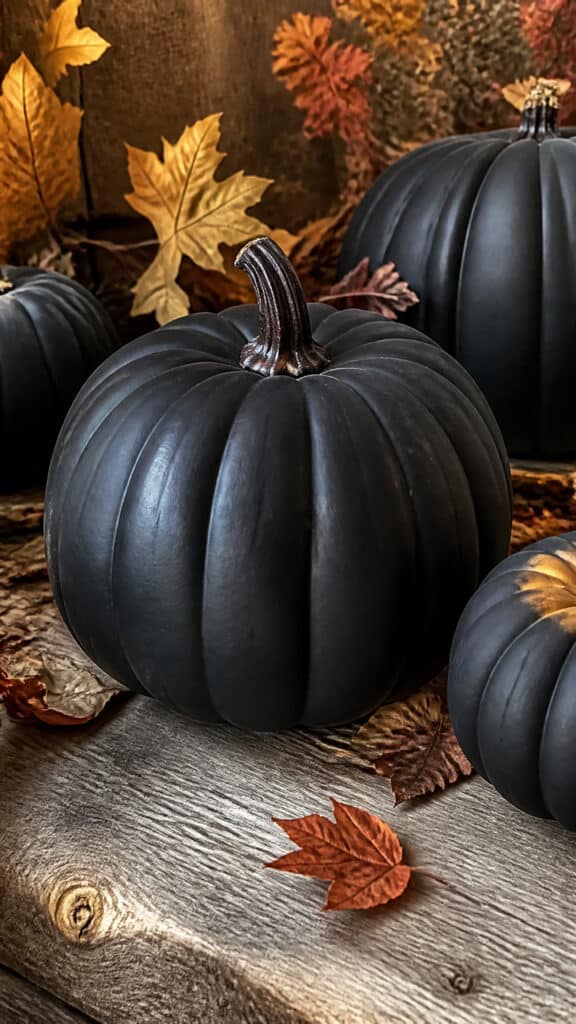
For a truly personalized touch, adding words or phrases to your black pumpkins is such a great idea! This is one of those black pumpkin painting ideas that lets you get creative with messaging while keeping things stylish. You can write anything from spooky phrases to fall blessings to family names. I love making these as hostess gifts or personalized décor for different rooms in the house!
Start with your black painted pumpkin base, and once it’s completely dry, use white paint and a thin brush to write your chosen words or phrases. You can do elegant script lettering, fun hand-lettering, or even use stencils or vinyl letters if you’re not confident in your handwriting. Popular phrases include “Boo,” “Trick or Treat,” “Spooky Season,” “Happy Halloween,” or even just “October” or the year!
For a more rustic or farmhouse look, you can use white chalk paint which gives a softer, more matte finish. I also love adding small decorative elements around the words like little stars, dots, or flourishes. You can create a whole collection of pumpkins that spell out a phrase when placed together, like “Happy Halloween” with one or two words per pumpkin. My boys love when I write their names on pumpkins for their bedrooms – it makes them feel so special! These also make amazing photo props for fall family pictures!
Create Your Own Black Pumpkin Masterpiece
I hope these black pumpkin painting ideas have inspired you to try something new this Halloween season! The beauty of working with black pumpkins is that they’re so versatile and forgiving. Whether you’re a crafting pro or someone who usually avoids DIY projects (I see you, and I get it!), there’s a design here that will work for your skill level and style. Plus, painting pumpkins is such a fun activity to do with kids, and the memories you make together are worth way more than any store-bought decoration!
The best part about these projects is that you can start with real pumpkins or use craft pumpkins that you can store and reuse year after year. As someone who’s constantly trying to balance creating a beautiful home with the chaos of raising three boys, I’ve found that these black pumpkin designs give me that perfect mix of style and practicality. So grab some paint, put on your favorite fall playlist, and get creative! Your porch, mantel, or dining table is about to look absolutely amazing!
This post may contain affiliate links. Read the full disclosure here.