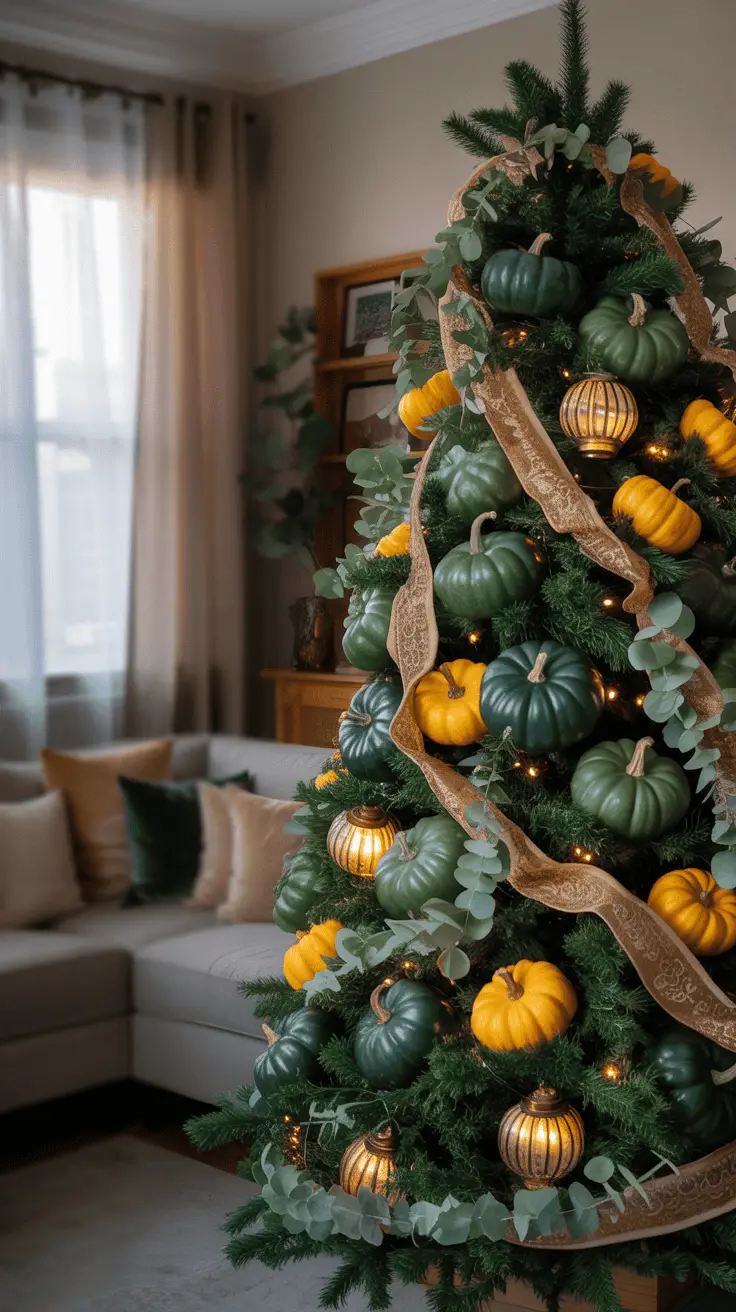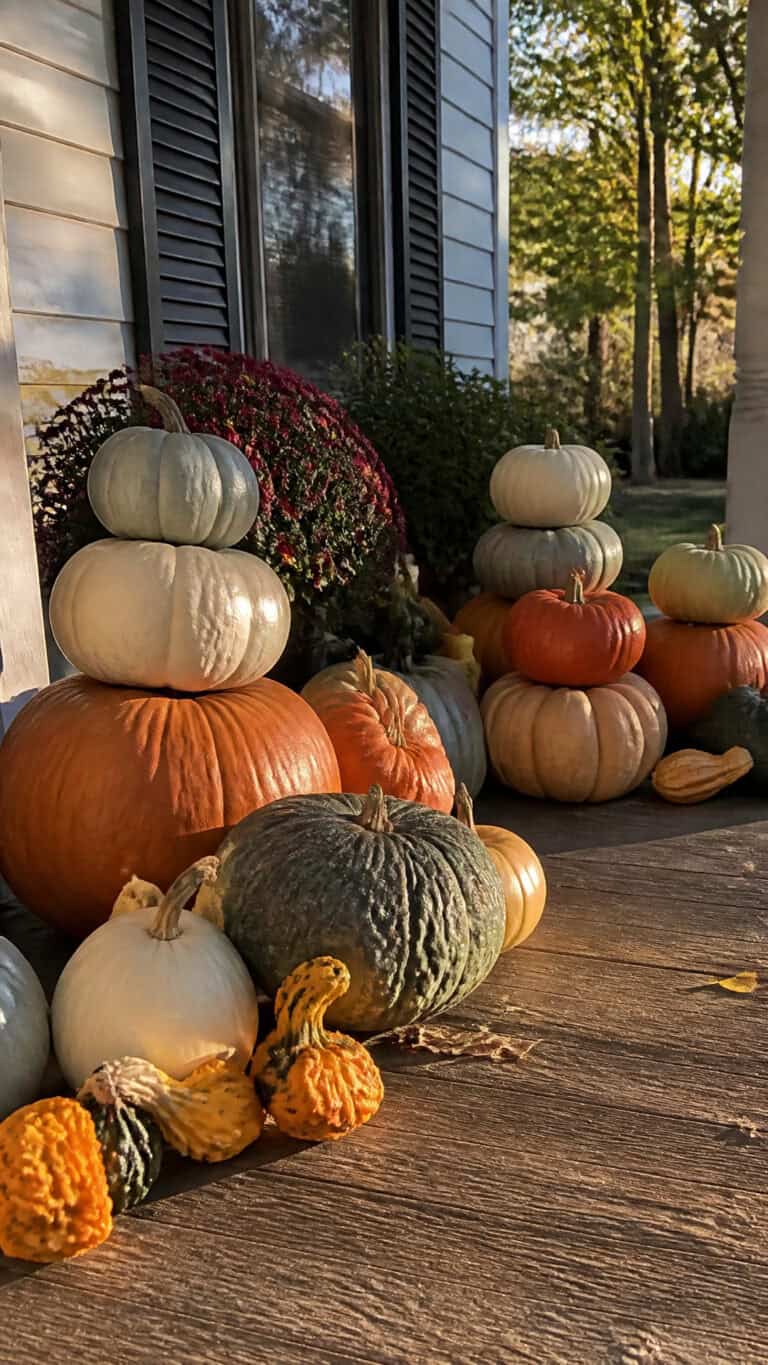
Fall decorating has become one of my absolute favorite times of year, especially since I can finally tackle some creative projects while the boys are at school! Ceramic pumpkins have completely stolen my heart because they’re reusable, won’t rot on my porch, and give me the perfect canvas for trying out new painting techniques without the mess of carving real pumpkins.
Whether you’re a seasoned crafter or someone who just wants to add a personal touch to your autumn decor, ceramic pumpkin painting ideas are everywhere and so much fun to experiment with! I’ve spent the last few falls testing different techniques and designs, and I’m excited to share what I’ve learned so you can create beautiful pieces that’ll make your home feel cozy and festive all season long.
Classic Autumn Ombre Designs
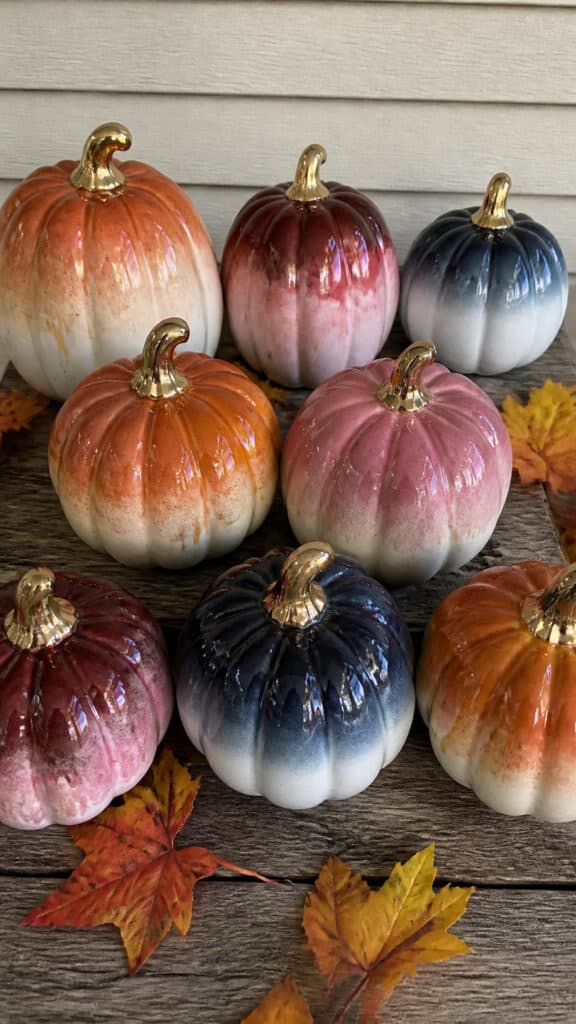
Ombre painting has to be one of the most forgiving techniques ever, which is perfect when you’ve got three boys running around asking for snacks every five minutes! The beautiful gradient effect looks incredibly professional, but it’s actually super simple to achieve on ceramic pumpkins.
Start with your base color at the bottom of the pumpkin and gradually blend lighter shades as you work your way up to the stem. I love using burnt orange at the base, transitioning through coral, and finishing with a peachy cream at the top. The key is working while the paint is still wet so the colors blend seamlessly together!
You can create ombre effects with traditional fall colors like deep burgundy fading to soft pink, or try something unexpected like navy blue transitioning to white for a more modern coastal vibe. I’ve even done a sunset-inspired ombre using purple, orange, and yellow that looks absolutely stunning when grouped with other pumpkins!
Pro tip: Use a damp sponge or foam brush to blend the colors together, and don’t stress about making it perfect. The beauty of ombre is in its organic, flowing appearance, and honestly, any little imperfections just add character to your finished piece!
Elegant Metallic Finishes
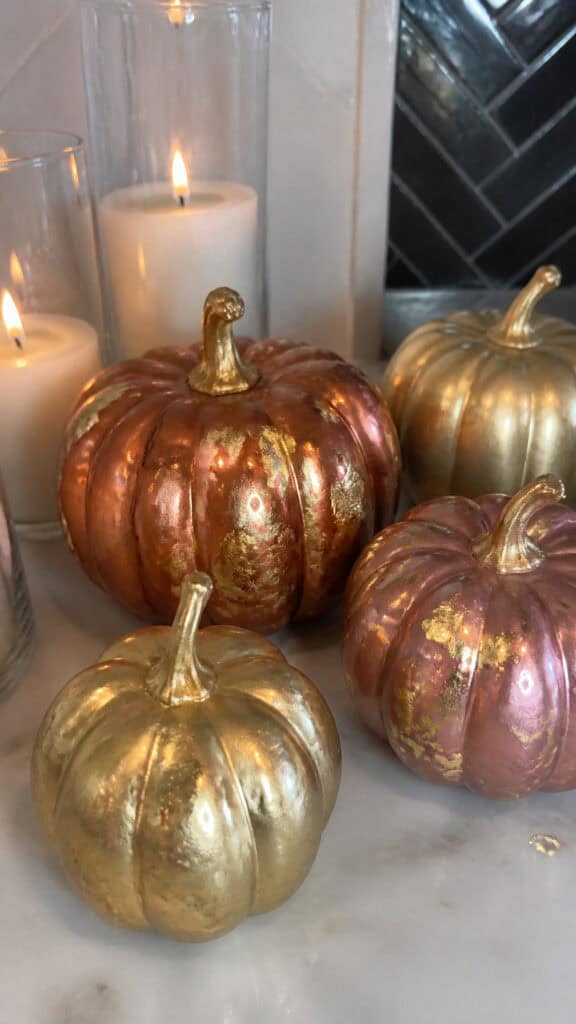
Metallic painted pumpkins have completely elevated my
Gold leaf is my absolute favorite metallic technique because it looks expensive but is actually really affordable. You can apply gold leaf adhesive to your entire ceramic pumpkin or just add it in patches for a more rustic, aged appearance. I did a whole set last year where I covered white ceramic pumpkins with gold leaf in random sections, and they looked like they came straight from a boutique!
If gold leaf feels too intimidating (I get it!), metallic acrylic paints work beautifully too. Copper, rose gold, and champagne gold are gorgeous alternatives to traditional yellow gold. I love painting the entire pumpkin in a metallic shade and then adding a matte stem for contrast, or vice versa!
For an extra special touch, try combining metallics with other techniques. Paint your pumpkin white first, then dry brush metallic gold or copper over the ridges for a highlighted effect that really makes the pumpkin’s natural shape pop. You can also use metallic paint pens to add delicate details, patterns, or even write thankful messages on your pumpkins!
Charming Farmhouse Style Patterns
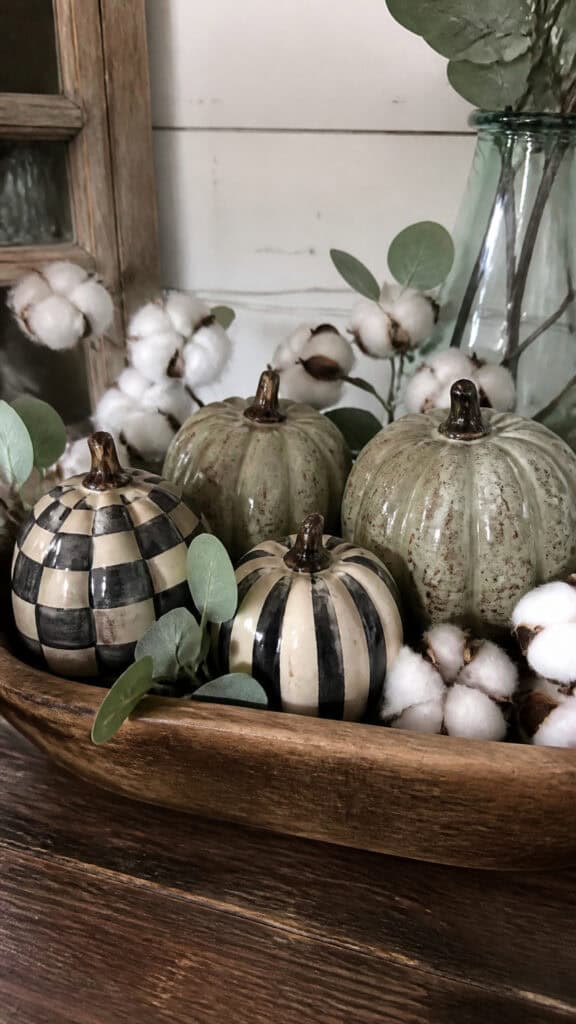
Farmhouse style is still going strong in my house, and these ceramic pumpkin painting ideas fit perfectly with that cozy, rustic aesthetic we all love! The beauty of farmhouse designs is that they’re meant to look handmade and imperfect, so there’s zero pressure to be a perfect artist.
Buffalo check (that classic black and white plaid) is probably the most popular farmhouse pattern, and it’s easier to paint than you might think! Use painter’s tape to create your grid, then fill in alternating squares with black paint. Once it’s dry, peel off the tape and you’ve got that iconic look. I’ve also done this in navy and white, and rust and cream for different fall color schemes!
Stripes are another farmhouse favorite that work beautifully on ceramic pumpkins. Vertical stripes, horizontal stripes, or even diagonal stripes all create different visual interest. I usually paint my base color first (white, cream, or soft gray), let it dry completely, then use painter’s tape to create perfectly straight stripes in a contrasting color like black, navy, or terracotta.
Don’t forget about simple patterns like polka dots, which you can easily create using the eraser end of a pencil or a small round sponge! For a more rustic look, paint your pumpkin in a solid matte color like sage green or dusty blue, then lightly distress it with sandpaper once it’s dry. This technique gives your pumpkins that perfect farmhouse aged appearance that looks like you found them at an antique store!
Whimsical Watercolor Effects
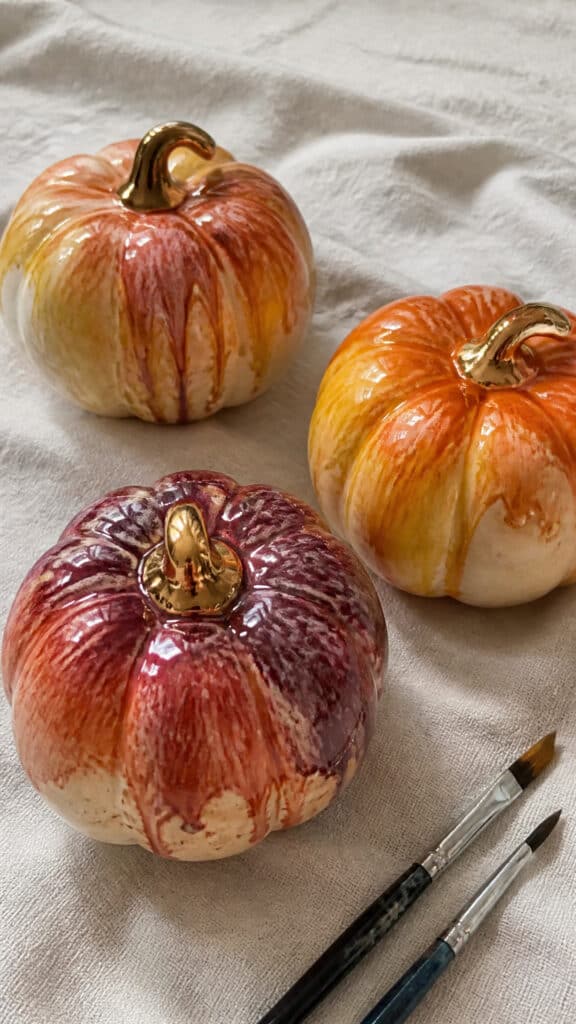
Watercolor techniques on ceramic pumpkins create the most dreamy, artistic look that I absolutely adore! This is one of those ceramic pumpkin painting ideas that looks incredibly complicated but is actually really forgiving, which makes it perfect for those of us who aren’t professional artists.
The key to achieving a watercolor effect on ceramic is to thin your acrylic paints with water until they have a translucent, watery consistency. Apply the diluted paint to your pumpkin in loose, flowing strokes, allowing colors to blend and bleed into each other naturally. I love using autumn colors like burnt sienna, golden yellow, and deep plum for a traditional fall palette.
One technique I discovered by accident (thanks to my middle son bumping the table!) is to spray your painted pumpkin lightly with water while the paint is still wet. This creates beautiful drips and organic patterns that look so artistic and intentional. You can also dab the wet paint with a paper towel to lift some color and create lighter areas and more dimension.
For a more controlled watercolor look, try painting abstract florals or leaves using the watercolor technique. You don’t need to be precise—the beauty is in the loose, flowing nature of the design! I’ve also seen gorgeous watercolor pumpkins where different shades of blue create an almost ethereal, non-traditional fall look that’s perfect if you want something different from the typical orange and brown color scheme.
Modern Geometric Designs
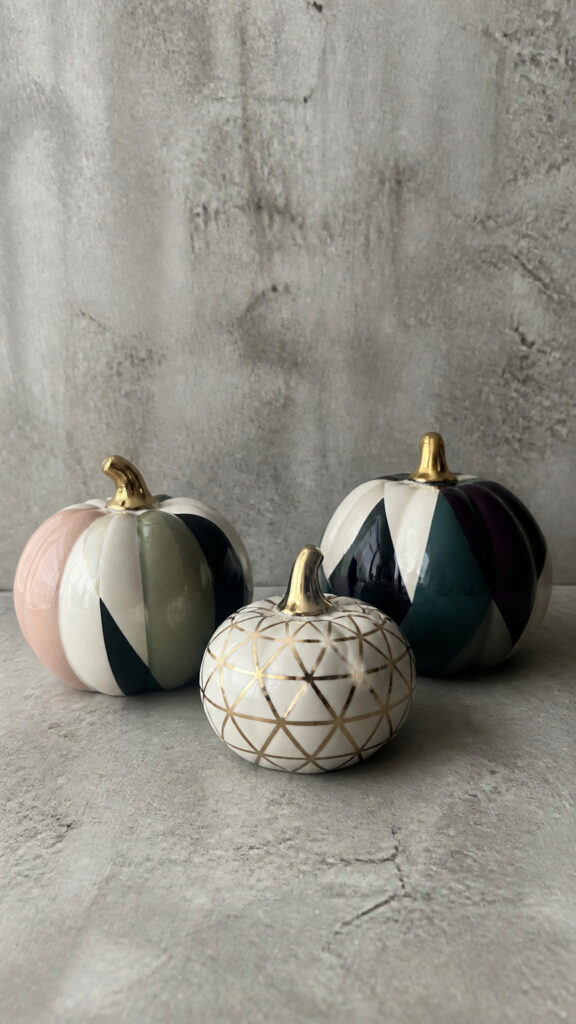
If you love clean lines and contemporary style, geometric ceramic pumpkin painting ideas are going to be right up your alley! These designs bring a fresh, modern twist to traditional
Triangle patterns are my go-to geometric design because they’re simple but make such a bold statement! Paint your pumpkin in a neutral base color like white, gray, or even black, then use painter’s tape to create triangle shapes. Fill them in with contrasting colors like mustard yellow, terracotta, or even unexpected shades like teal or blush pink. The result is graphic and eye-catching!
Color blocking is another modern technique that’s super trendy right now. Divide your pumpkin into sections—you could do half and half, thirds, or even quarters—and paint each section a different coordinating color. I love using a neutral palette like white, cream, tan, and gray for a sophisticated look, or going bold with jewel tones for something more dramatic.
For a more intricate geometric design, try creating a repeating pattern of shapes like hexagons, diamonds, or even abstract angular designs. You can freehand these if you’re feeling confident, or use stencils or painter’s tape to keep your lines crisp and clean. Metallic gold or copper geometric patterns on a matte white or black base look especially stunning and modern!
My favorite shortcut: Geometric paint pens! They make adding precise lines, dots, and small shapes so much easier than trying to use a tiny brush. I use them for adding details after my base coat is completely dry, and they’ve been a total game-changer for my ceramic pumpkin projects!
Textured Painting Techniques
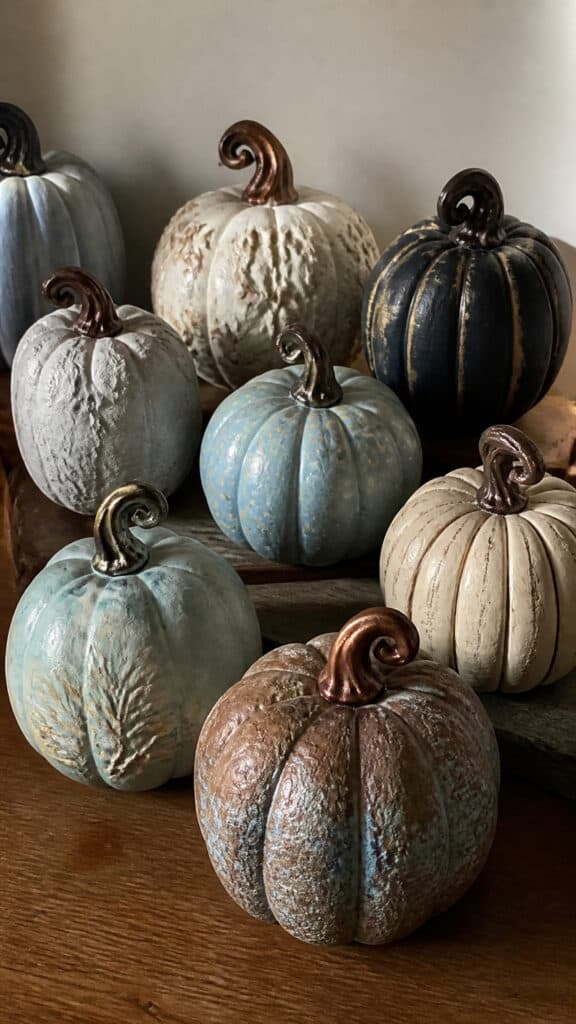
Adding texture to your ceramic pumpkin painting ideas takes your decor from simple to seriously impressive! These techniques create visual and physical dimension that makes your pumpkins look so much more interesting and professional.
Chalk paint is my absolute favorite for creating texture because it naturally has a matte, slightly rough finish that’s perfect for that farmhouse or vintage look. You can apply chalk paint in thick layers and then distress it with sandpaper once it’s dry for an aged, weathered appearance. I’ve also used chalk paint as a base and then added other decorative techniques on top!
Stippling is a technique where you use a stiff brush or sponge to dab paint onto your pumpkin, creating a speckled, textured surface. This works beautifully for creating a stone-like or concrete effect, especially when you layer different shades of gray or taupe. My boys actually love helping with this technique because it’s all about dabbing and there’s no way to mess it up!
For a really dramatic textured look, try using modeling paste or texture medium before painting. Apply it to your ceramic pumpkin in swirls, peaks, or rough patches, let it dry completely, then paint over it with your chosen colors. The raised texture catches light beautifully and adds so much visual interest to your finished piece!
You can also create texture with unconventional tools—I’ve used crumpled plastic wrap, bubble wrap, and even old dish sponges to create interesting patterns in wet paint. Each tool creates a completely different effect, so it’s fun to experiment and see what unique textures you can achieve!
Nature-Inspired Painted Details
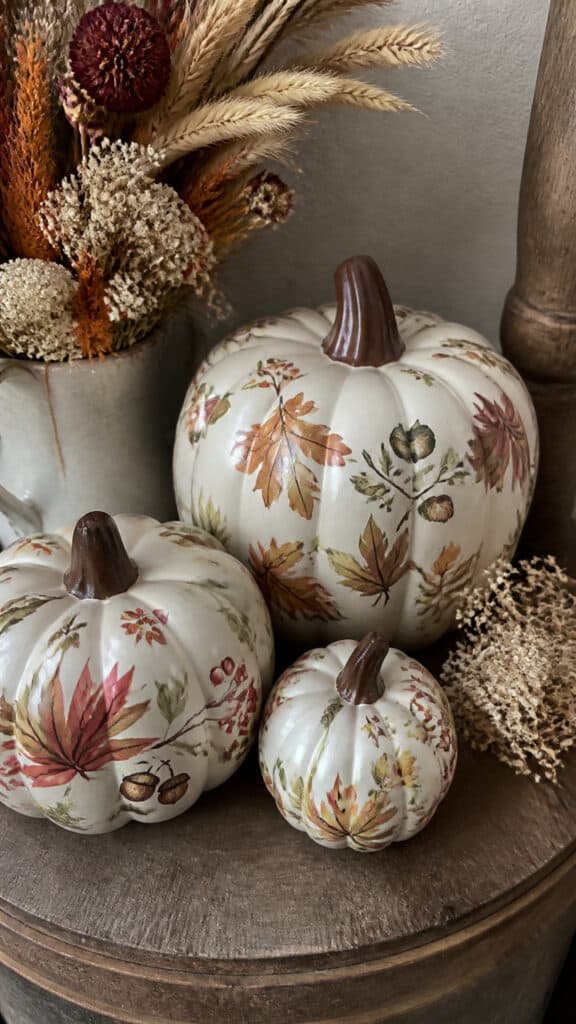
Bringing elements of nature into your ceramic pumpkin painting ideas creates such a warm, organic feel that’s perfect for fall! These designs celebrate the beauty of the season and can range from simple to quite detailed, depending on your comfort level and available time.
Painted leaves are probably the most classic nature-inspired design, and they’re easier than you might think! I usually paint my pumpkin in a solid neutral color first—cream, soft gray, or even a muted sage green. Once that’s dry, I use a small brush or even a toothpick to paint simple leaf shapes in fall colors like burnt orange, deep red, and golden yellow. You don’t need to be a botanical illustrator—simple leaf outlines look beautiful and charming!
Acorns, pinecones, and berries are other adorable motifs that work wonderfully on ceramic pumpkins. I love creating a scattered pattern of these elements around the pumpkin, almost like they’ve naturally fallen onto it. Adding tiny details like stems, leaf veins, or highlights with a lighter shade of paint really makes these designs pop!
For a more subtle nature-inspired look, try painting just the stem area with realistic detail—adding bark texture, moss effects, or even tiny painted vines that curl around the stem. This keeps the pumpkin itself simple but adds that special handcrafted touch that makes people look twice!
If you’re feeling ambitious, botanical illustrations are absolutely stunning on larger ceramic pumpkins. Paint delicate branches, wheat stalks, or even full autumn flower arrangements. I’ve found that using reference photos from Pinterest makes this so much easier, and you can simplify the designs to match your skill level. Even simple line drawings of botanical elements look sophisticated and beautiful!
Bringing Your Ceramic Pumpkin Painting Ideas to Life
The best part about all these ceramic pumpkin painting ideas is that there’s truly no wrong way to do it! Whether you stick with one technique or combine several, whether your lines are perfectly straight or charmingly wobbly, your handpainted pumpkins will add such a special personal touch to your
So grab those ceramic pumpkins (I always stock up at craft stores when they go on sale!), pick your favorite painting idea, and carve out a little creative time for yourself this fall. Your home will look absolutely gorgeous, and you might just discover that pumpkin painting becomes your new favorite autumn tradition. Happy painting, and here’s to a beautiful fall season filled with creativity and cozy vibes!
This post may contain affiliate links. Read the full disclosure here.