As a mom of three energetic boys, I know how wild dinner time can get inside the house. Between homework messes and hungry kids darting around, cooking always felt rushed and stressful. That’s why I started searching for cheap simple outdoor kitchen ideas that would actually work for our family’s busy life.
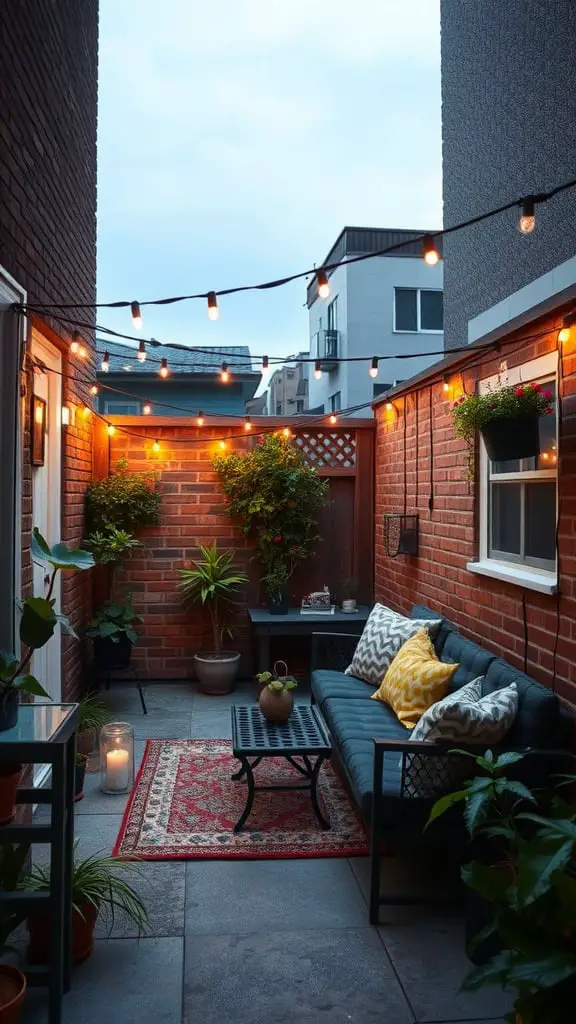
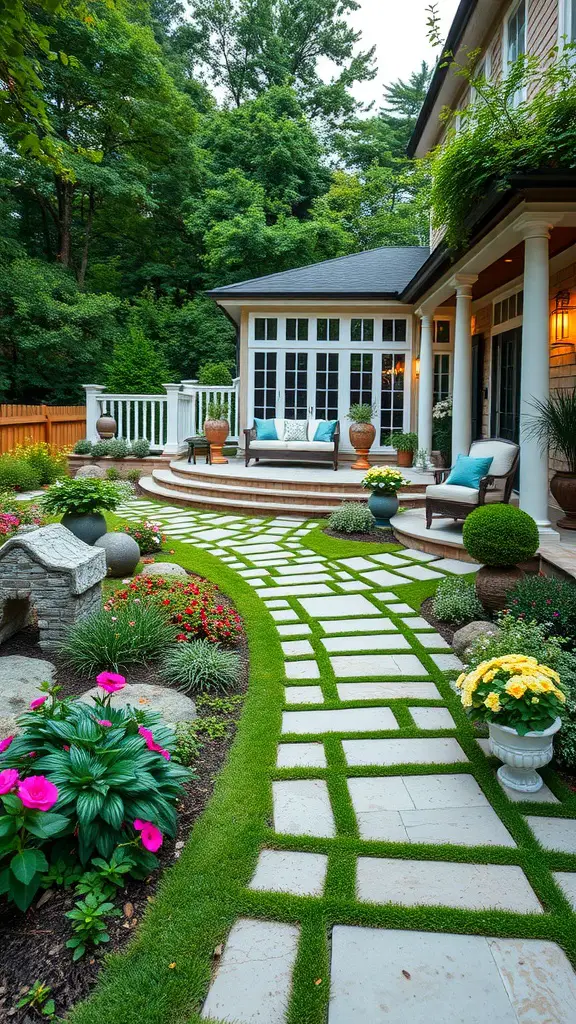
Our layout came from these easy backyard transformation tips that truly helped us stay on budget!
I wanted a place where my boys could play, and I could cook or prep meals without feeling stuck inside. It turns out, building a cheerful, affordable outdoor kitchen was not only possible but so much easier than I imagined! If you’re a busy mom looking for real, wallet-friendly ways to bring more ease (and more fun) to dinner time, I’m here to share what worked for us. You don’t need a giant budget or tons of time to create a backyard kitchen your family will love!
Planning Our Outdoor Kitchen
Setting Realistic Goals and a Budget
Jumping into our outdoor kitchen project was both exciting and a little intimidating. Before I even started picking out paint colors or grilling tools, I had to get really honest with myself about what we actually needed—and how much we could spend. I know how easy it is to scroll Pinterest and see setups that look straight out of a magazine, but that just isn’t real life for most of us! My approach? Keep it simple, focus on our family’s priorities, and make sure every dollar counted. Here’s how I tackled planning and budgeting without losing my mind, and why being thoughtful at the start made all the difference.
Deciding What We Really Needed
Every mom knows that juggling busy schedules means you have to cut through the noise and get to what matters. My boys love being outside, but I didn’t need a full gourmet kitchen to make them happy. I sat down and made a list of must-haves and nice-to-haves.
Here are my “must-haves” for a cheap simple outdoor kitchen ideas setup:
- A safe cooking area that I could keep an eye on while the boys played
- Counter space for prepping sandwiches or snacks
- Easy access to supplies so I wasn’t running in and out of the house
- Shade, because no one wants a sunburn while grilling burgers!
The “nice-to-have” list? That was where I dreamed a little bigger, but only if the budget allowed. Think string lights, a little fridge, or fun decor.
Setting a Realistic Budget
Let’s be honest—no one wants to overspend, especially with kids who seem to grow out of everything in a blink. I looked at our family’s finances and picked a number that wouldn’t leave us stressed at the end of the month. For us, $250 was the magic number. It was enough to do something special but not enough to worry about a big mistake.
Here’s how I approached it:
- Wrote down everything we needed—from the grill to paint to storage bins.
- Checked prices online before hitting any stores or secondhand groups.
- Made a simple spreadsheet to track spending. I just used columns for the item, estimated price, and actual price.
- Set aside a little “oops money” for things I might forget.
By committing to stick to the plan, I could shop around for deals and avoid impulse buys. This kept things fun, not stressful—even when I was tempted to splurge on things that looked cute but weren’t essential.
Choosing DIY Over Expensive Upgrades
I’m all for rolling up my sleeves! Doing things myself, or with the help of my family, meant I could save money and make the space our own. My kids helped paint old shelves, and my husband put together a small prep table from wood we already had. Besides saving a ton (seriously, store-bought outdoor furniture adds up fast), the boys got involved and felt proud of their work.
If you’re looking to stay within budget, here are a few easy DIY swaps to consider:
- Repurpose indoor furniture by weather-proofing it
- Build a countertop with leftover wood and outdoor paint
- Use storage baskets or plastic totes instead of pricier cabinets
- Hang a tarp or beach umbrella for quick shade
This hands-on, practical approach helped us be creative and made the whole project feel like a real family effort.
Talking It Over as a Family
Before I put any sanding blocks to wood or ordered supplies, I had a quick meeting with my husband and kids. I wanted everyone to share what they were excited about—and, honestly, to see what they didn’t really care about. The boys didn’t need a fancy pizza oven; they just wanted a spot for s’mores! My husband cared more about grill space than anything else.
By listening to everyone’s input early, I could focus on what would actually get used. That way, we finished with a space that felt like home, worked for our routines, and made sense for our budget.
Keeping Expectations Reasonable
Let’s face it: an outdoor kitchen doesn’t have to look perfect to make your family happy. I reminded myself often that a few scuffs or mismatched chairs didn’t matter. What did matter was having a place where we could be together, eat outside, and laugh while the boys ran wild. Staying grounded helped me focus on fun memories instead of stressing about appearances.
Planning in this way made all the difference. Now our backyard feels like a sanctuary, not another expensive project. If you’re thinking about making your own outdoor cooking space, know that simple really can be the secret!
Simple, Budget-Friendly Materials That Worked for Us
When I started piecing together our outdoor cooking spot, I wanted cheap simple outdoor kitchen ideas that anyone could pull off. My main goal was to get a sturdy space for busy weeknights, family weekends, and snack-y afternoons without blowing our budget. That meant picking materials and tools that were easy to buy, easy to use, and actually held up to all three of my wild boys. Even better, we found ways to get them involved, which added a lot of fun without making more work for me.
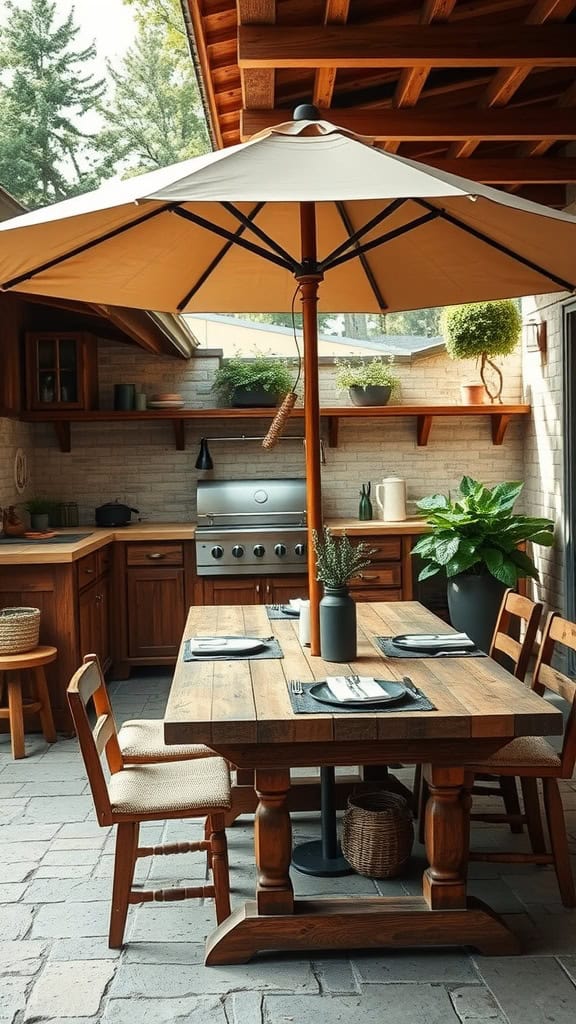
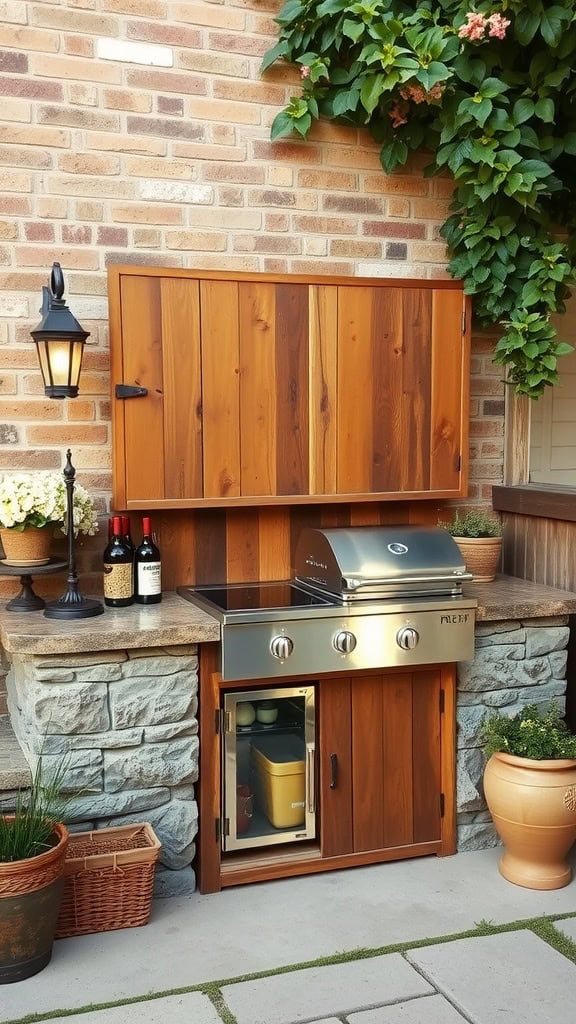
Building Our DIY Outdoor Countertops and Cooking Spaces
The heart of our little outdoor kitchen is the countertop area. I promise you, this does not have to be fancy! We went with the simplest, most wallet-friendly materials we could find. Here’s how we did it and what worked (and what didn’t):
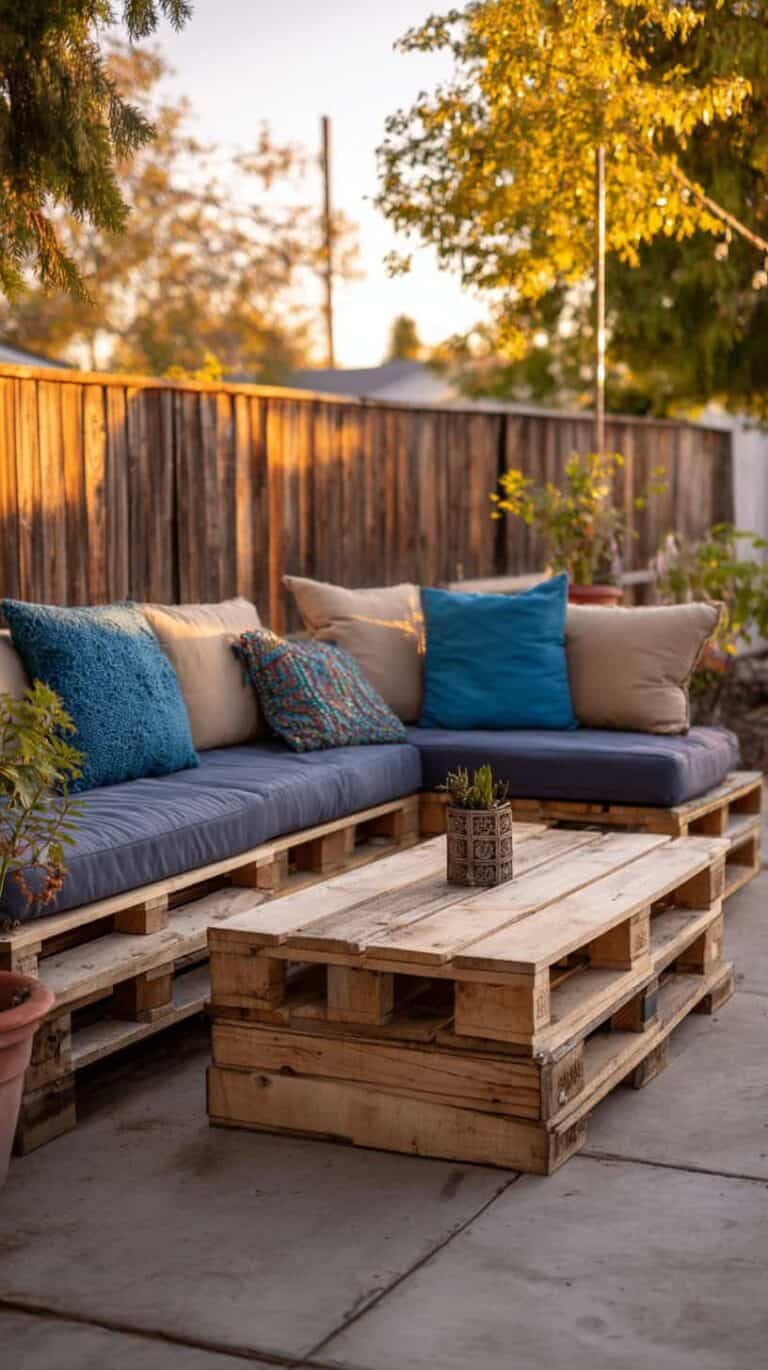
- Old Wooden Pallets: These were our starting point. Local hardware stores sometimes give them away free if you ask nicely. We sanded them down, stacked them two or three high, and used outdoor screws to keep them steady. A couple of coats of waterproof deck stain made them a lot tougher.
- Leftover Plywood: My husband had scraps in the garage, and we used that for the top. I made sure to cover it with tablecloth vinyl so it wiped clean fast. Dollar store tablecloths come in bright colors and patterns, and honestly, no one cares if they get messy.
- Repurposed Indoor Tables: One friend offered a chunky old dining table she didn’t want. After a little sanding and outdoor paint, it became our main prep space. It’s a solid choice and didn’t add a penny to our costs.
The best part? The boys helped out. My youngest handled the sanding. The older two learned how to use a drill (with help from their dad). Here are some simple, kid-friendly ways my boys helped:
- Holding boards in place while I measured or marked lines with tape
- Painting on the stain with big, messy brushes
- Lining up the plastic tablecloth and choosing the color
Giving the kids jobs made them feel important. Their favorite part was picking the tablecloth—go figure! And if I am being honest, seeing their little handprints in the first coat of paint just made it all the more “ours.”
Lesson learned: Nothing has to be perfect. In fact, crooked lines and funky colors have their own charm. The key is picking materials you don’t have to worry about. If a board cracks or a screw goes missing, it’s super easy to fix with spare parts or just swap it out. Short version: don’t overthink the counters. Simple and sturdy wins!
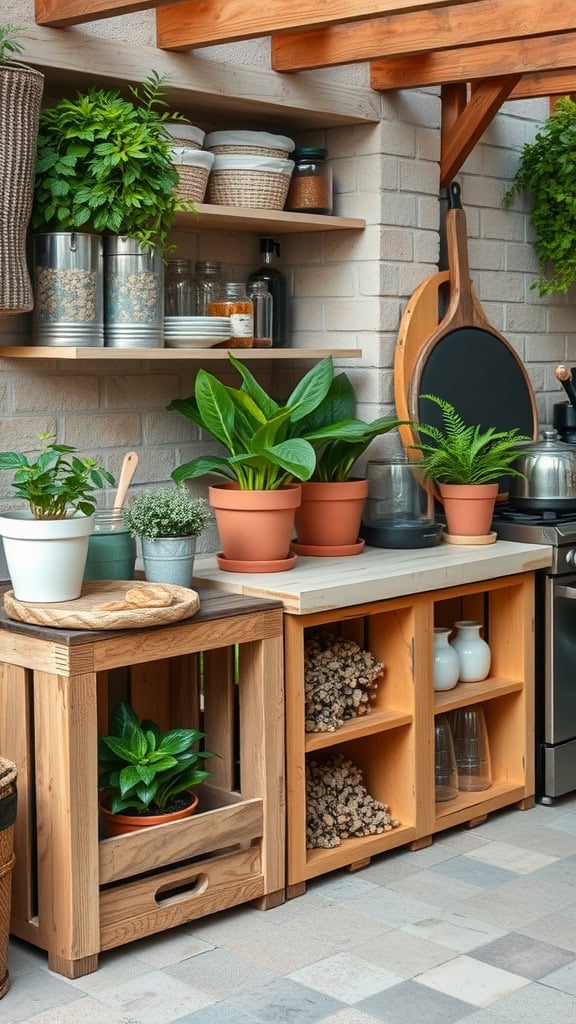
Finding Affordable Outdoor Appliances and Storage
Finding good tools for cooking and storing supplies can get expensive if you go for the “outdoor kitchen” section at the big stores. But there are so many ways to save if you know where to look.
Here’s how I found what we needed for less:
- Secondhand Goldmines: Facebook Marketplace, local buy/sell groups, and yard sales are full of treasures. We found a sturdy charcoal grill for $30 and a cute, functional portable burner for $10. Both just needed a deep clean and a little TLC.
- Clearance Aisles: Big box stores usually have seasonal clear-outs at the end of summer. If you plan ahead (or wait until fall), you can score open-box or discontinued appliances at a major discount. I picked up a rolling metal cart for half price and now use it for holding everything from buns to utensils.
- Indoor Kitchen Items, Outside: The best tip is to use what you already have. Plastic storage bins, old kitchen shelves, and even the laundry basket became part of our setup. Not everything needs to be labeled “outdoor” to work! My small rolling cart made snack time a breeze and doubled as a spot for napkins and paper plates.
Here’s a quick rundown of budget appliance and storage wins:
- Propane or charcoal grill (secondhand)
- Portable electric or butane burner (yard sale find)
- Weatherproof plastic bins (from the dollar store)
- Metal utility shelves (garage leftovers or free marketplace posts)
- Enamel or tin containers for utensils and condiments (found in thrift shops)
I also love using cheap hooks and hanging baskets from the garden center to keep towels and utensils within reach. Nothing gets lost, and cleanup takes two minutes, tops.
Have your kids help hunt for deals or spot “treasures” at thrift stores; you’ll be amazed by what they find. My youngest picked out a yellow tub that’s now our go-to chip bowl.
This is proof you do not need to spend a fortune to get a space that feels custom, organized, and totally fun for the whole crew. If something breaks or gets forgotten outside, it’s easy to replace. Less stress, more laughter. That’s a win in my book!
Keeping It Family-Friendly: Safety, Seating, and Easy Clean-Up
An outdoor kitchen for a busy family needs to be more than just creative. It has to be practical, too! I wanted all my cheap simple outdoor kitchen ideas to not just fit my budget, but also keep my boys safe, give us a spot to sit together, and be a breeze to clean up afterward. The chaos of juggling three hungry kids is real, so these became my top non-negotiables! Here is how I handled the basics so our space could be fun for everyone and easy for mom.
Protecting Little Hands and Curious Kids
Safety always matters, especially with little ones darting around. I never wanted to worry about burned fingers or someone tripping and scraping a knee while I cooked dinner outside. Before I even picked out seating or decided where to put the grill, I looked at the backyard through “mom goggles” to spot anything risky.
A few things really helped keep things safe:
- Barrier Between Cooking and Play: I set up our main grill station away from the boys’ soccer area, using old planters and some cute potted flowers to mark out a boundary. If you don’t have plants, even a line of storage bins does the trick! Kids naturally understand where they shouldn’t cross.
- No-Slip Surfaces: Sidewalk chalk was my secret weapon! I marked spots where the ground was uneven or slippery after a rain. It’s bright and wears off in the next storm.
- Safe Tool Storage: I hung basic hooks for spatulas and tongs well above kid reach and put a “no touch” sticker on the grill. Even my youngest respected that shiny red sticker—it saves so much worry.
- Quick Cover Options: We keep a metal lid handy or an old cookie sheet to toss over hot surfaces when we’re done, so the boys aren’t tempted to “help” before things cool off.
Taking the time to set these up means I can focus on the food without constant worry. My husband joked that the best safety tip is a pair of eyes in the back of my head, but honestly, a few easy systems work even better!
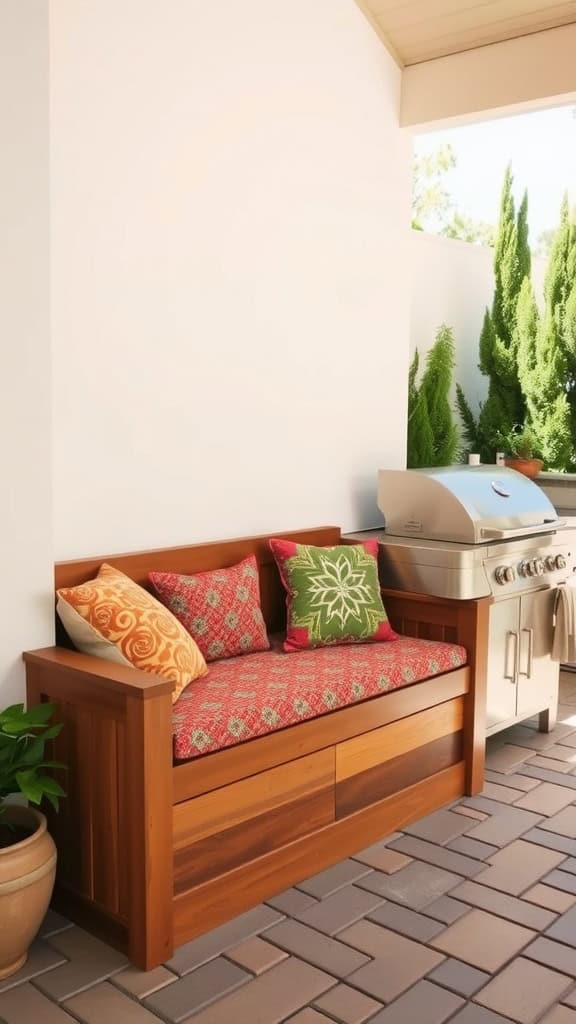
Smart, Comfy Seating for Everyone
Some days it feels like if you turn your back, half the chairs have vanished or become superhero towers in the yard! I learned pretty quickly: family seating needs to be simple, sturdy, and easy to move.
Here’s what worked for us:
- Mix and Match Chairs: We rounded up a few plastic lawn chairs, two old folding camp seats, and even a kid-sized picnic bench from a neighbor. None match, but no one cares. Every seat is safe for muddy shorts or spilled lemonade!
- Stackable and Foldable: Stackable chairs are a mom’s best friend. They take up almost no space, and I can move them back into the garage when it rains or if the kids want extra play space.
- Bench Seating: Our DIY bench out of scrap wood is the real MVP. It fits more wiggly kids in less space, and I can hose it off when someone leaves ketchup behind. No fuss.
- Comfy Touches Without Worry: I tossed a few old beach towels over the seats for “cushions.” They wash up fast if pizza sauce appears, plus the patterns make the whole spot look cheery!
I love how casual our seating feels. People plop down wherever, and it always feels welcoming. For bigger groups, we just drag out a couple more camp stools. If you don’t have a lot of chairs, picnic blankets are perfect, too—kids love sitting on the grass.
Quick and Simple Clean-Up Solutions
Clean-up is usually the least fun part of dinner, but outside, it doesn’t have to be a chore! Keeping things easy makes a big difference in how often I want to actually use our outdoor kitchen. I promise, these ideas keep messes from piling up or getting tracked inside.
Here are my favorite cleanup hacks:
- Plastic Tablecloths: I use bright plastic tablecloths or cut vinyl sheeting to cover our table and counters. They wipe clean in seconds, and if the mess is too much, I just shake them out and hose them off. Sometimes I even let the boys “wash” them with the squirter—that always turns into a giggle fest!
- Big Bins for Dishes: I keep one large plastic tub handy. After eating, everyone tosses their plates and cups inside. I carry it to the house for a fast rinse, and nothing gets dropped on the way inside. If you have little helpers, this is perfect for teaching clean-up habits.
- Wet Wipes and Paper Towels on Hand: I stash a roll of paper towels and a container of wipes right on our cart. Spills happen the second you turn your back, so I like keeping supplies ready. Sticky hands are dealt with before they sneak off and touch the patio door!
- Trash and Recycling in Easy Reach: We clipped a small garbage bag and a recycling bag to the side of our utility cart. The boys think it’s “their job” to check when they’re full. Giving kids a job always helps, and nothing gets forgotten in the yard.
Keeping these routines part of every meal helps everyone pitch in, and nobody minds helping out because it only eats up a few minutes. And when the kids are done, they’re free to run and play while I put my feet up—okay, at least for five minutes!
Taking a little time to plan for safety, comfy seating, and effortless cleanup changed everything about eating outside for us. With these cheap simple outdoor kitchen ideas, your space can handle all the wild energy and happy messes your family throws its way!
Our Favorite Everyday Meals and Memories Outdoors
When we switched to cheap simple outdoor kitchen ideas for our busy family, dinner time changed in the best way. Bringing meals outside stopped feeling like a hassle and actually became something my boys begged for. The food does not have to be fancy. The trick is picking meals that are easy, quick, and can handle a little mess. I promise, some of our best family memories happened with sauce-smeared faces and laughter echoing through the backyard. Let me tell you what really worked for us and how those simple meals turned into the stories my kids keep talking about.
Grilled Classics That Never Fail
Sometimes the easiest things end up being the most loved. Our grill became the heart of our outdoor kitchen, and I leaned on classic meals that took less than 30 minutes.
Here’s our go-to list:
- Burgers and Hot Dogs: I can grill a big batch fast, which is key with three hungry boys. I set up a “topping bar” and let them pick whatever they want—ketchup art is a thing at our house!
- Grilled Chicken Skewers: Chunks of chicken and veggies on sticks feel special to kids. Plus, I can prep everything earlier in the day.
- Quesadillas on the Grill: Just tortillas, cheese, and any leftovers; folded, grilled for five minutes, and sliced up for little hands.
- Corn on the Cob: We wrap them in foil with butter and let them cook right on the coals. The boys cannot resist getting buttery!
The best part of these easy meals is how everyone gets involved. The boys mix up burger patties with their hands (messy but fun). They help build their own skewers. Sometimes my husband takes over the grill and lets the kids call out “flip!” It’s simple, but these routines make everyone feel like they’re part of the action.
Picnic Style for Extra Fun
When I don’t want to deal with plates or a lot of clean-up, we switch to picnic-style meals. These are perfect for after-school snacks, lazy lunches, or those nights when the sun stays out forever.
Some favorites include:
- Wraps and Sandwiches: Everything from turkey and cheese to peanut butter and banana gets wrapped up and stacked in a basket.
- Snack Boards: I throw together crackers, fruit, cheese, and veggies with dips. The boys get to graze while running around.
- Cold Pasta Salads: I make a big batch in the morning and let it chill. Spoon it into cups for easy serving outside.
I love how little effort these take. The kids will grab their food and pick a spot on the grass or sit around our outdoor bench. Sometimes I lay out an old blanket and it feels like a real adventure, even though we’re five steps from the backdoor.
Homemade Pizza Nights
Pizza outside is a treat for us, but we do it the quick and easy way. We skip the fancy outdoor pizza oven and use the grill or a portable burner.
Here’s how I make it simple:
- Buy pre-made dough or flatbreads
- Set out bowls of toppings (let the kids pick—there’s no wrong combination)
- Everyone makes their own mini pizza and I toss them on the grill for a few minutes
Seeing my boys proudly eat their “creations” is the best! Even if it’s just bread with a mountain of cheese and four olives, they act like chefs. We snapped some hilarious photos of pizza dinners that still make me laugh.
S’mores and Story Time
No backyard kitchen is complete without a dessert night! Even on busy days, s’mores always fit into our family evenings. We just use a small fire pit or even the charcoal grill after dinner is done.
Our backyard s’more tradition:
- Classic marshmallow, chocolate, and graham crackers
- Change it up with peanut butter, cookies, or strawberries if we have them
- Everyone roasts their own, with the littlest always needing help but loving every sticky second
We love to sit together around the fire, tell stories, and watch the kids get gooey. Sometimes my husband strums his guitar or I peek at the stars with the boys. It feels like a little family celebration, even if it’s a random Tuesday night.
Weeknight Suppers with No Fuss
Some of our best dinners outside are the simplest:
- Rotisserie chicken from the store, sliced up and served with fresh veggies
- Taco night with a bowl of seasoned ground beef, tortillas, and whatever toppings we have
- “Breakfast for Dinner” with scrambled eggs, toast, and fruit—all cooked on the portable burner
These dinners keep everyone happy, fill little bellies, and don’t leave me with a mountain of dishes. I can actually sit down and chat instead of hustling in and out. Sometimes the boys eat barefoot at the table, and no one cares if syrup drips onto their shirts.
It’s funny how something as easy as a burger night or a makeshift picnic turns into a core family memory just by moving it outside. Using cheap simple outdoor kitchen ideas took away all the pressure of perfection. Meals feel more relaxed. The kids act wild, but in the best way. What matters most is the time together, the flavor of fresh air, and those little moments that turn into the stories you’ll tell for years.
Troubleshooting and Tips: What I’d Do Differently Next Time
When you try new cheap simple outdoor kitchen ideas for your backyard, bumps in the road are just part of the adventure. Trust me, with three boys and a tight budget, not everything went as planned the first time. There were days I wished I had a magic reset button! If you’re thinking about setting up your own budget-friendly outdoor kitchen, I want to help you skip some of the headaches I ran into. Here’s what I learned, what I’d change, and some hard-won advice I wish I’d known from the start.
Rethinking Material Choices for Weather
The first season caught me off guard. We used whatever we could find—old pallets, leftover plywood, and a table from a friend. Some of it held up well, but a few surprises popped up after the first rainstorm.
Here’s where I’d do it differently:
- Choose materials that can last outdoors all season.
- Treat wood with extra sealant. Even “weatherproof” wood needed a second coat for our rainy climate.
- Use plastic containers with tight lids instead of open baskets to keep out bugs and dirt.
- Spare yourself the stress and keep a roll of tarp handy so you can quickly cover anything you’re worried about.
If you’re picking up free furniture, give it a close look for soft spots or wobbly legs. Not all garage-sale treasures survive a wild summer with kids!
Design the Layout for Quick Access
Our first layout seemed cute and worked well—until we started actually cooking dinner during the dinner rush of hungry little ones. I realized fast that every step across the yard makes a difference when your hands are sticky and the kids need you.
Next time, I’ll:
- Place the grill closer to the prep table.
- Keep the cooler or fridge right beside the seating area (less running back and forth).
- Group utensils, napkins, and grilling tools in one big basket, not in three little bins all over the place.
It’s amazing how a few steps saved can mean the difference between catching a flying soccer ball and missing it because you were chasing ketchup.
Prepping for Proper Shade
A shady kitchen area is important for my setup. The first year, our beach umbrella tipped over three times in one week, and I learned that quick-fix shade doesn’t always do the trick with summer wind.
What I’ll try next time:
- Look for cheap canopy tents at end-of-summer sales and set up a sturdier spot.
- Use zip ties or strong bungee cords to secure umbrellas or tarps safely to a fence or post, instead of just popping them in the grass.
- Consider planting a fast-growing shrub or two as a natural sun blocker. The right green helps and makes the area feel cozy.
I learned the hard way that melted butter and direct sun just don’t mix. Planning reliable shade means less whining (from everyone, including me).
Upgrading Storage to Prevent Misplaced Supplies
My kids are pros at losing spatulas, tongs, and that bottle opener I like best. Early on, supplies seemed to disappear overnight. That’s when I decided my storage system just was not working.
Next time, I’ll:
- Use see-through storage bins so I can spot things right away.
- Label everything clearly, even if it’s just with big marker scribbles.
- Set up a single “grab-and-go” spot for kids to return anything they borrow.
It seems simple, but grouping supplies together makes cleanup easier and keeps things from ending up in the sandbox.
Planning for Changing Weather
Our first big cookout ended with a pop-up rainstorm. I scrambled, trying to cover food and supplies, and lots of our stuff got soaked. A little messy, a lot frustrating.
Things I’d do to be ready:
- Keep extra tablecloths nearby for emergency covers.
- Store dry snacks and anything sensitive in stackable bins.
- Keep an inexpensive foldable drying rack to quickly lay out wet cloths or kitchen towels after a sudden shower.
Being ready for those “whoops” moments means less stress when the weather turns. It’s not about avoiding problems, but having a quick Plan B when things happen.
Making Cleaning Even Easier
Outdoor life is full of spills, sticky fingers, and crumbs in the grass. I loved my quick-clean tricks, but a few more upgrades would’ve saved time.
Next time:
- Set up a bigger outdoor trash can with a lid (one small bag just fills up too fast).
- Keep an old dishpan next to the wash bin for a quick dunk-and-rinse.
- Clip a roll of paper towels to a chair or the prep table so it never gets lost under a pile of plates.
Anything you can do to make cleanup a group effort means less work for mom and more time for fun.
Let Go of “Perfect” and Lean Into Family Help
Maybe my biggest lesson wasn’t about equipment or supplies, but about my own expectations! Kids will spill, paint will chip, and chairs will wobble. Not a single meal outside looked like the glossy Pinterest pictures I first saved.
What I’d really do differently? Give up on perfect! Let the kids help more. Their ideas—like painting rocks for the table centerpiece—brought a lot more joy than any fancy gadget. If a project takes longer because little hands are involved, that’s okay. The best memories are the messy ones!
If you’re a parent like me, elbow-deep in paint, surrounded by snack wrappers and shouts from the backyard, you’re doing it right. Don’t stress the hiccups. Laugh them off, write down what you’d change, and try something new next season. Every year, our cheap simple outdoor kitchen ideas get a little more “us”—and that’s what really counts.
Conclusion
Looking back, creating our outdoor kitchen with cheap simple outdoor kitchen ideas brought more joy to our family life than I ever hoped. Dinners feel easy now. We get to laugh, share stories, and let the boys be wild without worry or mess inside. The best part is how every meal turns into a memory, even on busy weeknights or those unexpected weekends when friends drop by.
If you’re a mom like me, juggling a busy household and a tight budget, I hope my story gives you the push to try your own backyard adventure. Start small. Use what you have. Let the kids pitch in, even if it gets messy. It is worth it, I promise.
Thank you for reading about our journey! If you’ve tried your own cheap simple outdoor kitchen ideas, or have questions about what works (or flops), I would love to hear from you in the comments. Let’s inspire and help each other make mealtime fun, stress-free, and full of happy memories!
This post may contain affiliate links. Read the full disclosure here.