Christmas lights and snow have a special way of turning any home into a cozy, magical spot during winter. As a mom of three busy boys, I love how these simple touches bring out their wonder and joy (which is hard to beat!).
Creating that whimsical, winter wonderland feel doesn’t have to be complicated or expensive—it’s all about layering the right lights and adding some soft snow accents to set the scene. In this post, I’m excited to share easy ideas and tips to make your house sparkle with that charming, playful holiday spirit your kids will talk about all season long!

Planning Your Magical Winter Display

When it comes to creating a magical winter display, combining christmas lights and snow is where the magic really begins. I love planning this part because it’s where all the pieces come together to make the kids’ eyes light up. Getting the right lights, choosing the perfect snow effects, and designing your layout with a little thought all add up to a scene that feels cozy and festive. Here’s how I approach it so your winter wonderland feels lively, inviting, and just right for families.
Choosing the Right Christmas Lights

First things first, the kind of lights you pick will set the whole mood. There are three main types you’ll find:
- LED lights
- Incandescent lights
- Solar lights
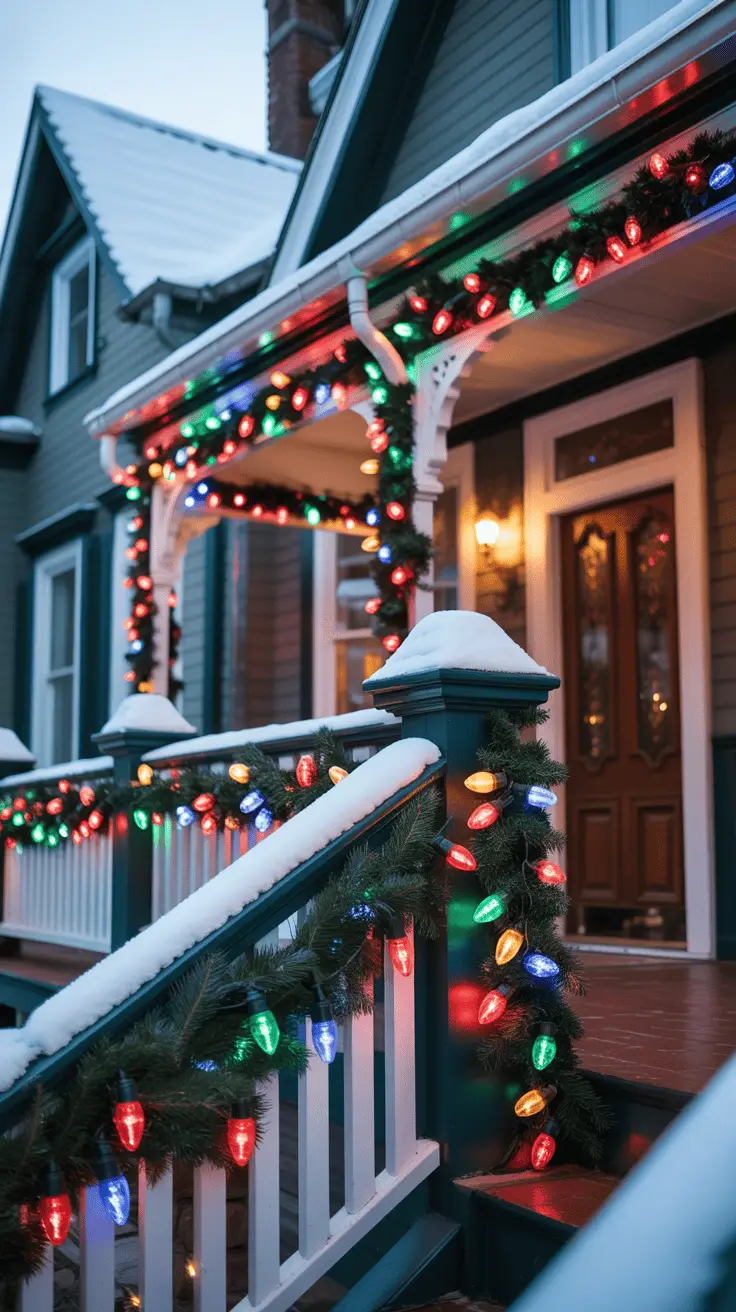
I almost always go for LED lights because they are bright, safe, and use very little power. This means you can keep them on longer without worrying about a big jump in your electric bill or overheating. LEDs come in so many colors and styles—from classic warm white to bold multicolored strands, and even twinkling or flashing options. For that extra magical feel, I mix soft white with splashes of icy blue or gentle pastel shades. Those cooler tones bring a little winter sparkle.
Incandescent lights look nice too, often giving off a warm glow. But they tend to get hot and don’t last as long. Solar lights are great if you want to avoid plugging in a lot, but they won’t be as bright or reliable when winter days are short and cloudy, which can be a bummer when you want that magical glow after dark.
Think about the shapes too. Icicle lights hanging from the eaves or net lights draped over bushes add texture and charm. String lights on trees or lining pathways are simple to do but pack a big punch visually. The right light placement really helps set the stage for your winter scene.
Selecting Snow Decorations and Effects

Now that the lights are picked, it’s time for snow! Snow adds softness and that “wow” factor, even if you don’t live where snow falls naturally. Here are my favorite options:
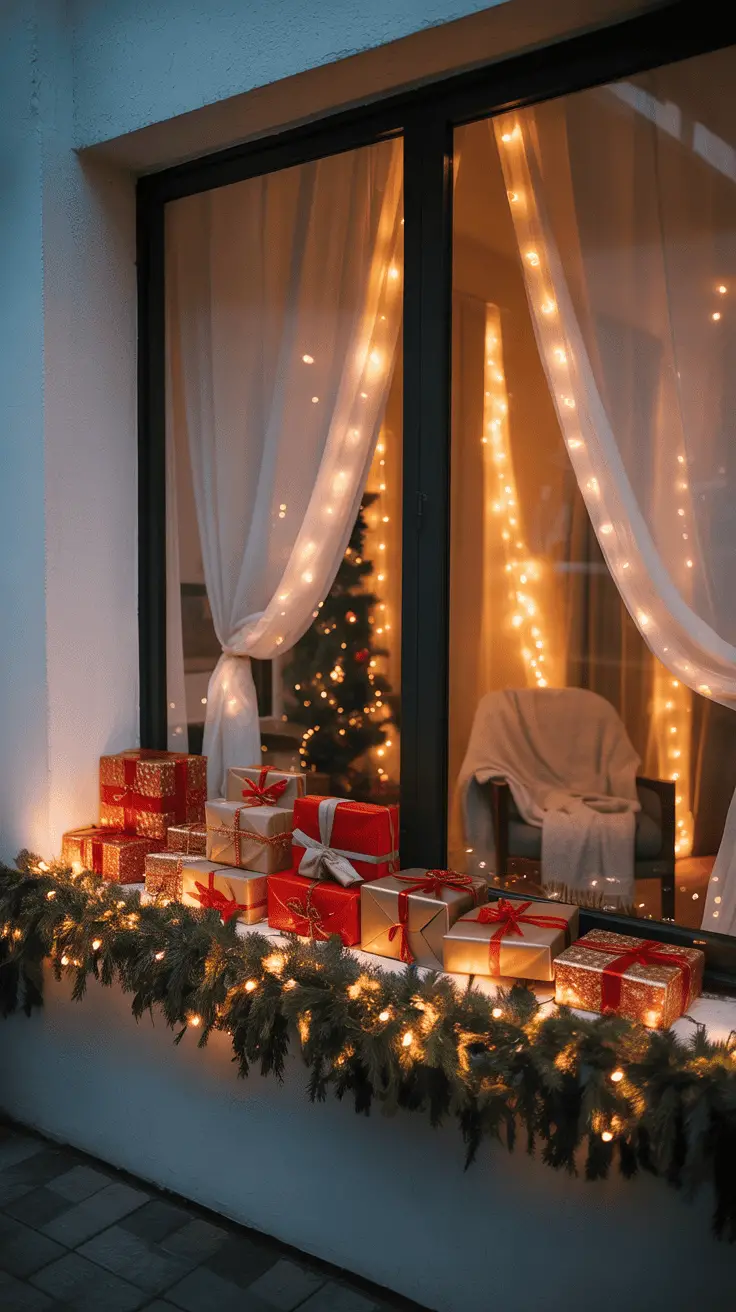
- Artificial snow sprays: These fake snow sprays are fun and easy. You can spray window panes, outdoor plants, or even create a frosted look on your porch. They’re affordable and washable, so perfect for a small touch.
- Snow blankets: These white fabric mats mimic fresh snow and are great for covering flower beds, steps, or around yard decorations. I love that they don’t melt or blow away, giving you a clean, consistent look.
- Snow machines: If you want to crank up the magic, snow machines blow fluffy artificial snowflakes into the air. They’re super fun for kids and create a wintry effect even in dry areas. They do need some investment but seriously bring your display to life.
Choosing the right snow effect comes down to your budget and how much fuss you want to make. For everyday magic with less hassle, I use snow blankets along with a can or two of snow spray around key spots. For special occasions, a snow machine is something we rent or borrow—it’s always a big hit at neighborhood gatherings.
Designing the Layout for Maximum Impact

Finally, let’s talk about design. I try to think like the kids—what will catch their eyes and pull them in? Creating a display they can explore and enjoy makes everything come alive.
Start with a few focal points—these could be a brightly lit tree, a snow-dusted gnome, or a glowing reindeer by the walkway. Kids love clear centers of attention where they can picture holiday stories.
Layer your lights and snow so things have depth. For example, put net lights over shrubs in front, wrap string lights around tree trunks in the middle ground, and hang icicle lights or snow blankets farther back. This creates a feeling of space, like you’re stepping into a little winter world.
Try to keep your color scheme consistent. I stick with cool blues, crisp whites, and warm whites so nothing competes but everything feels connected.
A few small details can make a big difference: add lighted lanterns along paths, tuck in a snow blanket under a bench, or spray a light dusting of artificial snow on garlands. These touches invite kids to come closer and explore.
Planning your holiday display is simple and fun when you think about these basics. Choosing safe, bright lights, picking snow decorations that fit your style and budget, and designing your layout to charm and invite can make your winter scene something your whole family will enjoy every night.
Installing Christmas Lights Safely and Effectively

Getting your home ready with christmas lights and snow is one of the most joyful parts of the season, but it can also be a little tricky if you don’t have the right plan in place. Over the years, I’ve learned that having the right tools, following a clear process, and adding some smart automation makes the whole experience easier and safer for everyone. This way, you spend less time wrestling with cords and ladders, and more time enjoying those magical moments with your family.
Gathering the Right Tools and Supplies

Before climbing up ladders or untangling endless light strands, I always make sure I have my essentials in hand. Having everything ready before you start saves frustration and time.
Here’s my go-to tool and supply list:
- Ladders: A sturdy step ladder or extension ladder is a must. Safety first, right? Check the ladder’s condition and have someone hold it steady if you can.
- Light clips and hooks: These clips help secure lights without damaging your paint or gutters. They keep lights in place and make takedown much faster.
- Outdoor-rated extension cords: Pick heavy-duty cords designed for outdoor use. They handle the weather better and reduce fire risks.
- Timers: Simple timers keep your display on schedule without needing to plug and unplug every day.
- Safety gear: Gloves protect your hands from scratches or cold, and non-slip shoes make climbing ladders safer. I always keep a flashlight nearby if dusk sneaks up on me as I work.
- Zip ties and tape: Great for bundling cords and keeping everything tidy where clips won’t work.
Having these tools laid out before I start helps me stay organized and confident all through the decorating process.
Step-by-Step Light Installation Tips

When I hang lights, I follow a clear order that works for me. This keeps things organized, safe, and helps avoid common slip-ups.
- Test all your lights before hanging. This prevents surprises later on, like burnt-out bulbs or broken strands.
- Plan your layout. Think about where you want your lights on the house, trees, and bushes. Draw a quick sketch if that helps.
- Start with the house’s outline. Begin at the power source and work along gutters, eaves, or window frames. Use light clips instead of nails or staples—they’ll keep your siding looking good and make removal easier.
- Wrap tree trunks and branches carefully. Lights look cozy when wrapped around trees, but don’t wrap too tight; leave room for growth and avoid damaging bark. Start from the bottom and work your way up to keep cords neat.
- Drape net lights or string lights on bushes. For a fuller look, spread net lights evenly or gently wrap string lights in and around the branches.
- Secure loose cords. Use zip ties or tape to keep cords off the ground and minimize tripping hazards.
- Keep plugs and connections off wet surfaces. Elevate plugs with a small platform or hook to protect them from rain or snow.
With these steps, hanging Christmas lights becomes a smooth, enjoyable part of the process instead of a frustrating chore. And of course, having the kids help from the ground with handing you lights or placing clips makes it a little family project (and way more fun)!
Using Timers and Smart Controls for Convenience
I’m all about making things easier, especially when I’ve got three little helpers at home! That’s why timers and smart plugs are my secret weapon for running Christmas lights.
Here’s why they matter:
- Save energy and money. You don’t have to worry about forgetting to turn the lights off. Timers switch them on at dusk and off at bedtime automatically.
- Extend the life of your lights. Lights aren’t running all day but are still on when it looks best, which means fewer burnt-out bulbs and longer-lasting strands.
- Convenient and hassle-free. With smart plugs, you can even control your lights from your phone. If you’re cozy inside but want to switch them on or off, it’s just a tap away.
- Create custom schedules. You can set lights to match your family’s schedule or even sync with music or other decorations for a playful show.
Setting timers or smart plugs is simple and totally worth it. Just plug your lights in, program the on/off times, and enjoy the perfect glow every evening without lifting a finger (once you’re done with the hard part, that is).
Using these tools means more time making memories by your brightly lit and snow-dusted home, and less time fussing with cords in the cold!
Bringing Christmas Lights and Snow Together for a Magical Winter Display

Creating a magical winter scene with christmas lights and snow is such a treat, especially when you want to capture that cozy, festive spirit for your kids. Adding snow effects can feel like the final flourish that turns a simple setup into a winter wonderland. But making snow look natural and beautiful means thinking about safety, placement, and how it mixes with the lights. I want to share everything I’ve learned about using snow sprays, snow machines, and how to blend it all seamlessly with lights to get that stunning, playful look.
Applying Artificial Snow Safely Around Your Home

If you’re adding artificial snow spray or blankets around your home, safety comes first—especially with curious kids and playful pets around. I always keep a few rules in mind so everyone stays safe and happy:
- Use sprays in well-ventilated areas. Spray snow has a quick-drying formula but it can have fumes. Make sure windows are open or you’re outside when using it. Keep kids and pets away while the spray is fresh.
- Choose non-toxic products. Look for sprays labeled safe for children and animals to avoid any allergic reactions. I always check the ingredients before bringing them inside.
- Spray gently on surfaces. Avoid thick layers that can get slippery or sticky, especially on steps or walkways where little feet might run. A light dusting on windowsills, porch railings, or bushes does the trick.
- Cover floors or grass with snow blankets carefully. These are great for yards and flower beds but make sure blankets are secured so they don’t blow around and create tripping hazards.
- Keep pets away from sprayed or blanket areas until completely dry or set. My pups love to sniff everything, so this part is crucial!
Taking these steps gives you the pretty snowy effect without any worry. If your kids ask to help, I let them decorate spots farther away from walkways or windows, so they feel involved but safe.
Setting Up a Snow Machine for Outdoor Magic

One of the coolest ways to bring a snowy feeling to your yard is with a snow machine. I always say it’s worth the little effort because it makes the whole scene feel playful and real—like actual snow falling on a chilly winter day.
Here’s what I keep in mind when picking and using a snow machine:
- Choose the right size and type. Smaller machines are good for patios or porches, while bigger ones work better for front yards or open spaces. Consider where you want the snow to fall and how big an area the machine can cover.
- Find a solid, flat spot for setup. Position your machine where it can blow snowflakes in the direction you want, keeping it stable so it won’t tip over. I usually put ours near a walkway or by a tree to create a snowy focal point.
- Keep power sources dry and safe. Use outdoor-rated extension cords and place plugs off wet ground. I always double-check connections to avoid surprises when it’s cold or wet outside.
- Run the machine for short bursts. Continuous blowing uses more solution and can get messy, so I turn it on for 15-20 minutes at a time. The kids love running in and out during the “snowfall”!
- Store and clean after use. After the fun, I drain the machine and store it somewhere dry to keep it ready for next year.
If you don’t want to buy one, renting or borrowing a snow machine works great too. It’s a simple way to add that snowy magic without the long-term commitment.
Combining Lights and Snow for a Stunning Visual
The best part about adding snow effects to your Christmas lights is how they play off each other to create that glow and sparkle you can’t get any other way. Here are some tips I love to keep the look natural and warm, not over-the-top or messy:
- Use cool white or icy blue lights with snow. These shades highlight that fresh, crisp feel of snow. Warm white lights can work too but mixing the tones carefully makes the scene feel more layered and interesting.
- Place snow blankets where lights can shine through. Draping soft blankets under string lights on bushes or steps lets the light bounce softly, creating a snowy shimmer.
- Light up sprayed snow surfaces. Spray snow on windowpanes or garlands looks magical when hit by a soft, warm spotlight or a string of fairy lights. This adds depth and focus to your display.
- Think in layers. Lights on trees, then snow blankets below, then a dusting of spray on fences or ornaments creates a cohesive look. It’s like combining textures in a cozy sweater.
- Add reflective touches. Metallic or glass ornaments catch and reflect light, making the snow look even more sparkling and real. I always tuck a few shiny bits close to snowy spots.
- Balance brightness. Don’t flood every corner with too many lights or too much snow; pick a few areas to highlight and keep others simpler. This guides the eye and makes your display feel more natural.
When you blend lights and snow thoughtfully, the whole yard transforms into a magical place where kids can’t stop staring or running to touch the “snow.” It’s that mix of sparkle and softness that brings winter to life right at your doorstep.
Adding snow effects to your christmas lights has always been one of my favorite ways to make holiday decorating fresh and playful. With a little care in choosing and setting up your snow sprays, blankets, or a machine, plus smart lighting combos, you get a winter wonderland that’s both beautiful and safe for the whole family.
Let your kids feel that magic up close; it’s a joy to watch their eyes light up under softly falling snowflakes and twinkling lights.
Fun Activities and Traditions to Enhance the Experience

Getting your home glowing with beautiful christmas lights and snow is just the start of making winter truly magical. What really makes it special is involving the whole family, creating spots for memories, and adding little extra touches that bring everything to life. These activities and traditions add warmth and playfulness that kids remember for years. Here’s how I turn decorating into a joyful family event with charm and plenty of fun!
Decorating Together as a Family
Getting the kids involved makes decorating more than just a task—it’s a special tradition. My three boys love when I hand them their own strings of lights or let them sprinkle artificial snow. To keep things safe and fun, I always pick simple tasks they can manage:
- Kids can help clip lights on lower branches or bushes where they can reach without ladders.
- They love arranging snow blankets on flower beds or steps, smoothing out wrinkles like a giant winter quilt.
- Using snow spray is always a highlight—they get creative with frosting windows or pinecones but I stay close to keep sprays light and safe.
We put on holiday music, sip on hot cocoa, and chat as we decorate. These moments turn the work into bonding time. Plus, having kids handle softer tasks keeps them busy and happy without any safety worries. Before long, they’re proud to point out the spots they worked on, and that pride is the real glow of the season.
Creating Holiday Photo Opportunities
Nothing captures the magic like photos with your festive display. I love setting up a few go-to spots that show off the lights and snow just right, with minimal hassle but maximum charm. Here’s what has worked best for us:
- Pick a brightly lit tree or front porch wrapped in twinkling lights and soft blankets of snow for a natural backdrop.
- Add little touches that catch the eye: a glowing lantern, a wreath dusted in snow spray, or a favorite holiday character.
- Keep a blanket and props nearby—think fuzzy scarves, Santa hats, or even a cute sled—to add fun layers to pictures.
Having these spots ready means spontaneous family pics happen often, not just on “photo day.” It’s so easy to grab the camera or phone and get a quick shot, catching all those smiling, cozy faces with snowflakes falling softly in the background.
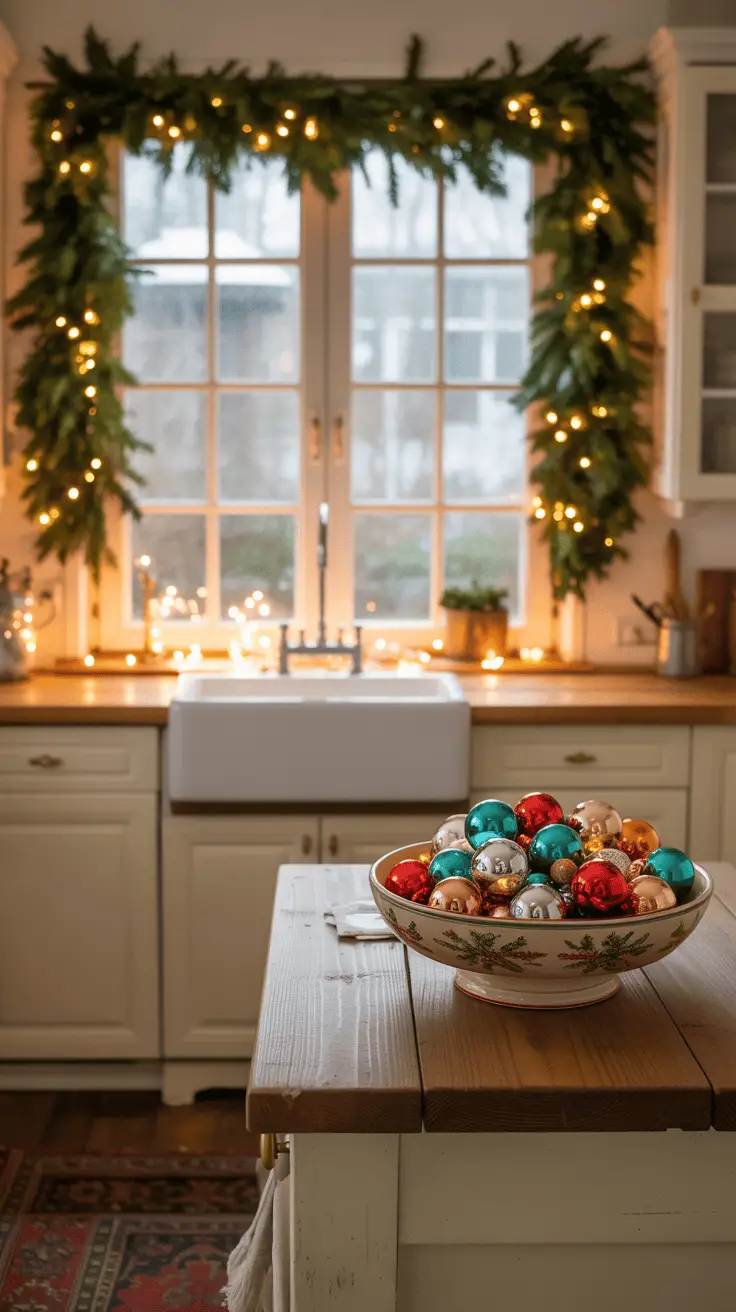
Adding Other Winter Decorations and Touches

Lights and snow are the heart of the display, but I like adding smaller details that bring extra warmth and texture. These bits make the scene pop and make your winter wonderland feel complete:
- A festive wreath on the door welcomes guests with classic holiday cheer.
- Garlands with a dusting of fake snow along railings or mantels add softness between light clusters.
- Ornaments, both shiny and matte, tucked into bushes or hanging from tree branches catch light and add sparkle.
- Pinecones, berries, and cinnamon sticks placed around planters or on tables bring cozy winter scents and natural charm.
These little touches create layers of interest your family and neighbors will notice. Plus, mixing in natural elements feels more inviting and less “overdone.” I keep it simple but playful, knowing these small efforts make the whole display feel truly special.
Bringing your family into decorating, setting up lovely photo spots, and mixing in winter decorations is what turns christmas lights and snow from a pretty scene into a lived experience. That’s the magic I want my kids to remember—not just the lights, but the fun we had making it all come together!

Conclusion
Combining christmas lights and snow creates a magical winter look that brings warmth and joy right to your doorstep. It’s a simple way to spark excitement and wonder for your whole family, especially the kids, who love watching the glow and feeling the soft snow around them.
For moms like me, it’s all about having fun and getting creative without stress. Whether you use twinkling lights, cozy snow blankets, or a burst from a snow machine, these touches make holiday memories that stick.
Go ahead and try mixing your favorite snow effects with bright, cheerful lights. Your winter display will shine with charm and invite your family to step into a playful, festive world every evening.
Thanks for spending time here—I hope your holiday decorating is full of magic and laughter! What fun traditions will your christmas lights and snow inspire this year?
This post may contain affiliate links. Read the full disclosure here.