Fall decorating doesn’t always have to be orange and brown! As a mom of three rambunctious boys, I’ve learned that adding unexpected pops of color to our seasonal decor makes everything feel fresh and exciting. Pink pumpkins have become my absolute favorite way to brighten up our autumn displays, and honestly, even my boys think they look pretty cool (though they’d never admit it to their friends!).
Whether you’re going for soft blush tones or bold hot pink statements, pink pumpkin painting ideas offer endless possibilities for creating a gorgeous fall aesthetic. These painted beauties work perfectly on your front porch, dining table, or mantel, and the best part is that painting pumpkins is an activity the whole family can enjoy together. Let me share my favorite techniques that’ll have you creating Instagram-worthy pumpkins in no time!
Ombre Pink Sunset Pumpkin
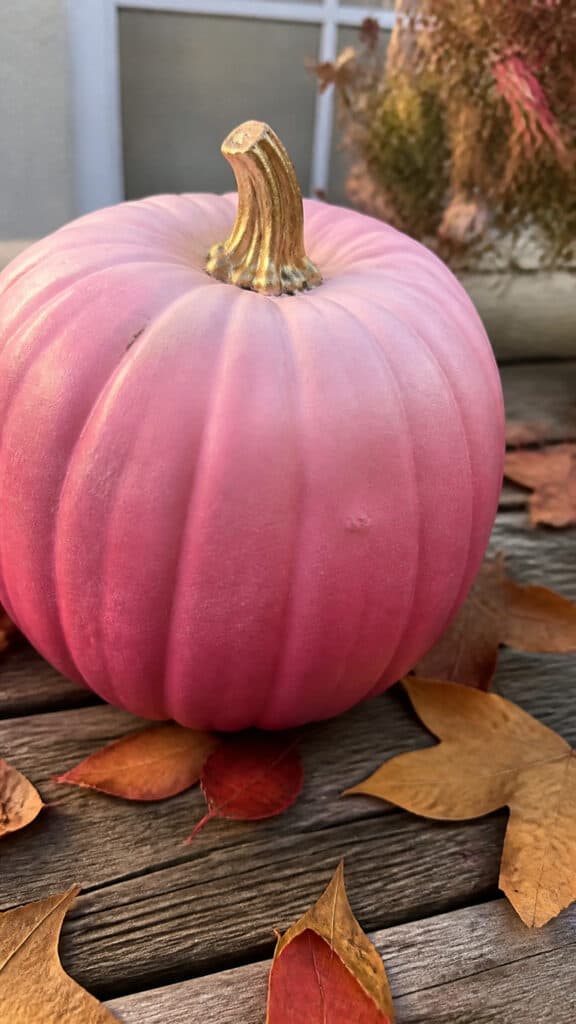
This gorgeous gradient effect is easier than it looks, I promise! The ombre pink pumpkin creates a stunning visual impact that transitions from deep rose at the bottom to the palest blush at the top. I love how this technique adds dimension and sophistication to what could be a simple painted pumpkin.
Start by selecting three shades of pink paint – a deep rose, a medium pink, and a light blush. Apply the darkest shade to the bottom third of your pumpkin, the medium shade to the middle section, and the lightest to the top. Here’s where the magic happens: while the paint is still wet, use a damp brush or sponge to blend where the colors meet, creating that seamless gradient effect.
The key to success with this pink pumpkin painting idea is working quickly before the paint dries. I learned this the hard way when I got distracted by my youngest asking for a snack, and came back to find my paint had already dried into distinct stripes instead of a smooth blend! Keep a spray bottle of water nearby to lightly mist the pumpkin if needed to keep the paint workable.
For extra glamour, consider adding gold leaf flakes to the top portion while the paint is still tacky. This creates an absolutely stunning effect that catches the light beautifully. You can also try this technique in reverse, starting with the darkest shade at the top and fading to light at the bottom for a different look!
Blush Pink with Gold Polka Dots
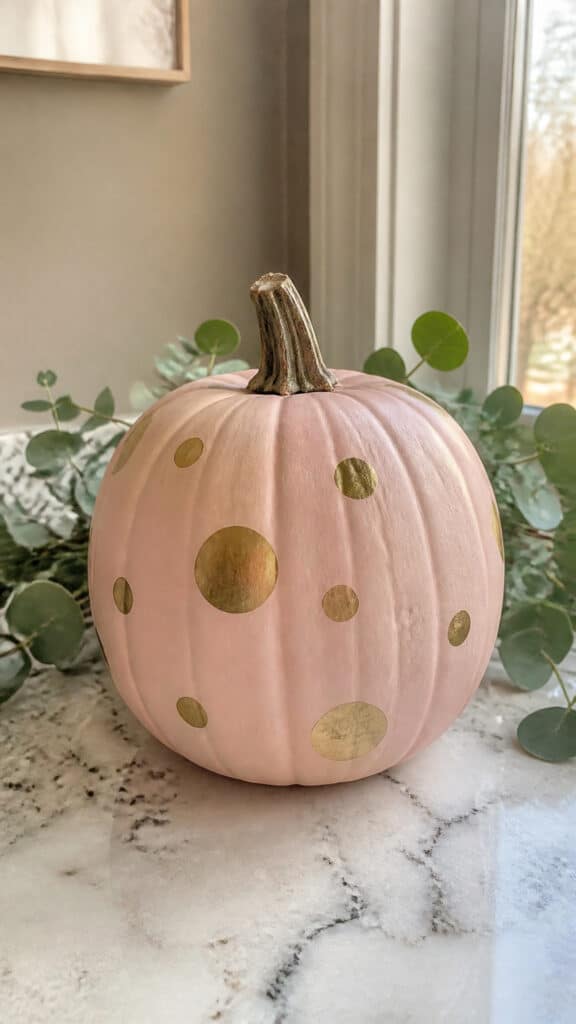
If you want something playful yet elegant, this combination is absolutely perfect! The soft blush pink base creates a romantic foundation, while the gold polka dots add just enough whimsy without looking too juvenile. This has become one of my go-to pink pumpkin painting ideas because it’s surprisingly kid-friendly – my boys actually had a blast helping with the dots!
Begin by painting your entire pumpkin in a beautiful blush pink shade. I prefer using at least two coats for solid, even coverage. Let it dry completely between coats – I usually paint one coat before breakfast and the second coat after lunch. Trust me, patience here makes all the difference in achieving that flawless finish.
Once your base is completely dry, it’s time for the fun part! You can create perfect polka dots using a round sponge dauber, the eraser end of a pencil, or even a small circular sponge. Dip your tool into metallic gold acrylic paint and gently press it onto the pumpkin surface. I like to vary the sizes slightly by using different sized tools for a more organic, hand-crafted look.
For placement, you can go completely random (which is very forgiving!) or create a more structured pattern. I’ve done both, and honestly, the random approach is more forgiving when little hands want to help. Space your dots about an inch or two apart for a balanced look. If you make a mistake, just wipe it off quickly with a damp cloth before it dries!
To take this design up a notch, try adding a second size of dots in between your larger ones, or use rose gold paint for some of the dots to create more depth and interest. The combination of soft pink with metallic accents creates such an elegant fall display that works beautifully from September straight through Thanksgiving!
Hot Pink Modern Geometric Design
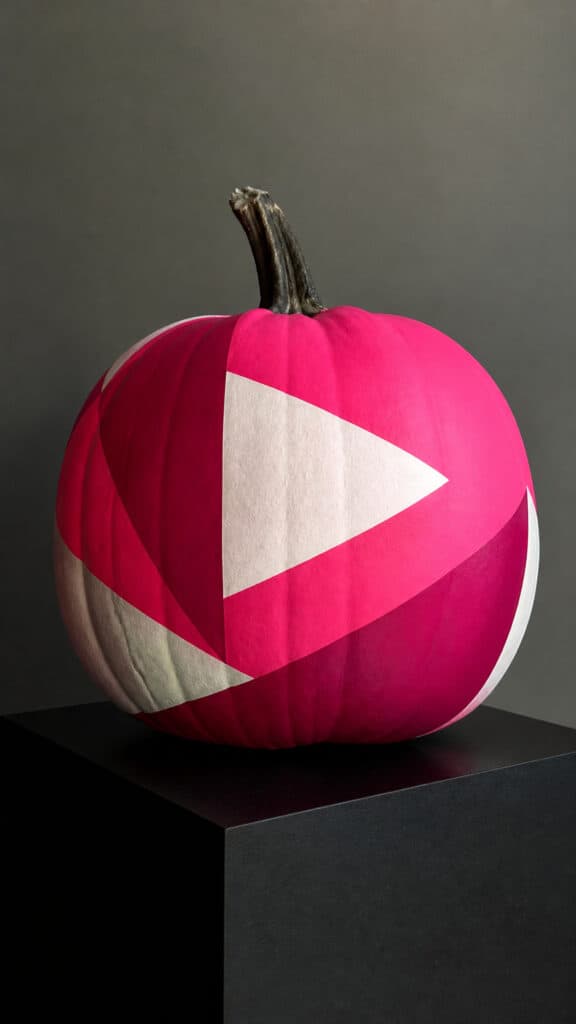
For those who love bold statements, this hot pink geometric pumpkin is where it’s at! This design proves that pink pumpkin painting ideas don’t have to be soft and romantic – they can be vibrant and contemporary too. My middle son actually requested this one because he said it looked “cool and modern,” which I’m taking as a major win!
Start with a base coat of vibrant hot pink paint. This shade makes such a statement on its own, but we’re going to take it even further! Once your base coat is completely dry, use painter’s tape to create geometric shapes. Triangles, chevrons, and abstract angular designs all work beautifully for this modern look.
I love creating a color-blocked effect by painting some sections in white, others in a deeper magenta, and leaving some areas in the original hot pink. The contrast creates such visual interest! You can also try metallic silver or copper for some sections to add an extra contemporary edge. The key is keeping your shapes clean and angular rather than curved.
When working with painter’s tape on a pumpkin’s curved surface, press down firmly along the edges to prevent paint from seeping underneath. I use a credit card or my fingernail to really seal those edges. Apply thin coats of your accent colors and remove the tape while the paint is still slightly wet for the crispest lines.
This design works especially well on artificial pumpkins because their smooth surface makes the geometric lines even sharper and more dramatic. Display several of these hot pink beauties together in varying heights for a modern fall vignette that’s totally unexpected and absolutely eye-catching!
Dusty Rose with White Floral Details
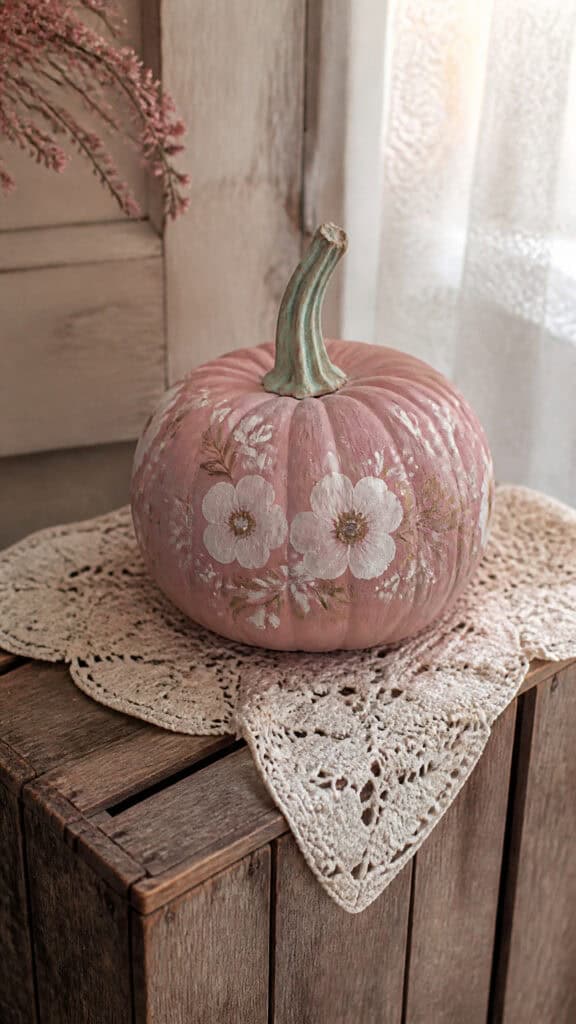
This romantic design is probably my personal favorite among all the pink pumpkin painting ideas I’ve tried! The dusty rose shade is so sophisticated and pairs beautifully with white hand-painted flowers. It creates a vintage, shabby-chic vibe that works perfectly with farmhouse decor styles.
Paint your pumpkin in a lovely dusty rose or mauve pink shade. This muted tone is more subtle than bright pink but still makes a beautiful statement. I typically use two to three coats for full coverage. While you’re waiting for it to dry, sketch out some simple flower designs on paper to practice – daisies, roses, and wildflowers all work wonderfully!
Once your base is dry, use a small detail brush and white acrylic paint to add your floral designs. Don’t worry if you’re not an artist – simple five-petaled flowers with yellow centers are charming and easy to create! I like to scatter flowers randomly around the pumpkin, clustering some together and leaving other areas more sparse for a natural, organic feel.
For the flowers, start by painting small white circles for the petals, then add a tiny dot of yellow or gold in the center. You can also add simple leaves using sage green paint, or create delicate vines connecting your flowers. If you’re feeling nervous about freehand painting, try using a stencil for your first attempt – there’s absolutely no shame in using tools to achieve the look you want!
To enhance the vintage feel, consider adding a light dry-brushing of white paint over the entire pumpkin after your flowers are dry. This creates a slightly weathered, distressed look that’s so charming. Seal everything with a matte sealer to protect your artwork and give it a soft, velvety finish!
Two-Tone Pink and Cream Striped Pumpkin
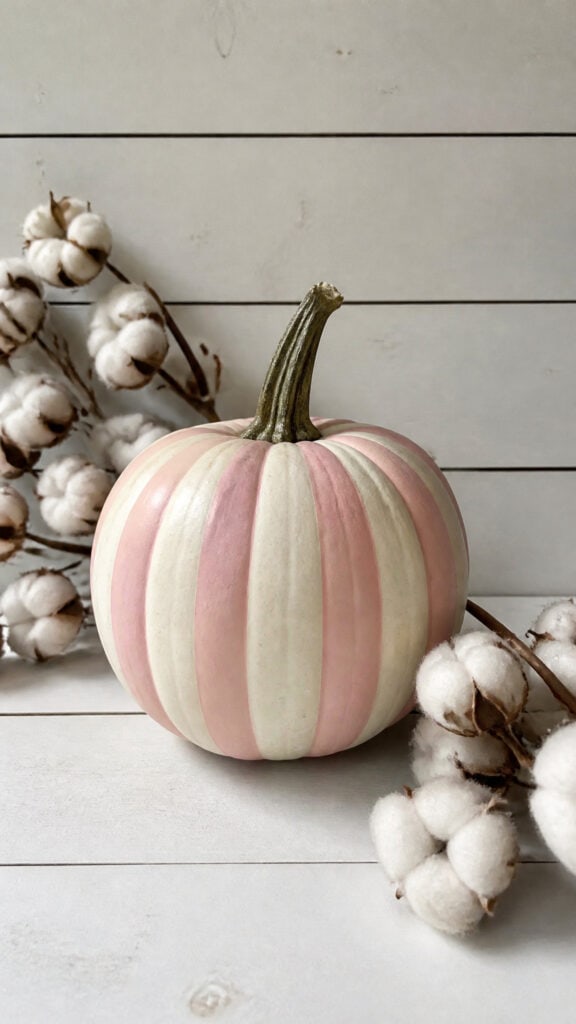
Stripes are classic, timeless, and surprisingly easy to achieve! This two-tone design combines soft pink with creamy white for a look that’s both elegant and playful. It’s one of those pink pumpkin painting ideas that looks way more complicated than it actually is, which makes it perfect for impressing your friends!
The beauty of this design is that you have options for how to create your stripes. You can follow the natural ridges of the pumpkin for vertical stripes, or you can create horizontal stripes around the pumpkin. I’ve done both, and each creates a completely different effect. Vertical stripes emphasize the pumpkin’s height, while horizontal stripes make it appear wider and more substantial.
For vertical stripes following the ridges, simply paint alternating sections in pink and cream. Start at the stem and work your way down, using a small angled brush to get into the grooves. This method is actually the easiest because the pumpkin’s natural shape guides you! For horizontal stripes, you’ll want to use painter’s tape to mark off even sections around the pumpkin’s circumference.
I recommend painting the entire pumpkin in your lighter color first (cream or pale pink), letting it dry completely, then taping off and painting the contrasting stripes. This gives you the cleanest results and means you only need to tape once. Make your stripes whatever width feels right to you – I’ve done everything from thin candy-cane stripes to bold, chunky bands!
For a fun twist, try making the stripes different widths for a more modern, irregular look. Or add a third color like gold or blush for tri-colored stripes! You can also paint just the top half of the pumpkin in stripes and leave the bottom solid for an interesting variation. Group several striped pumpkins together in different color combinations for a cohesive yet varied display!
Millennial Pink with Copper Leaf Accents
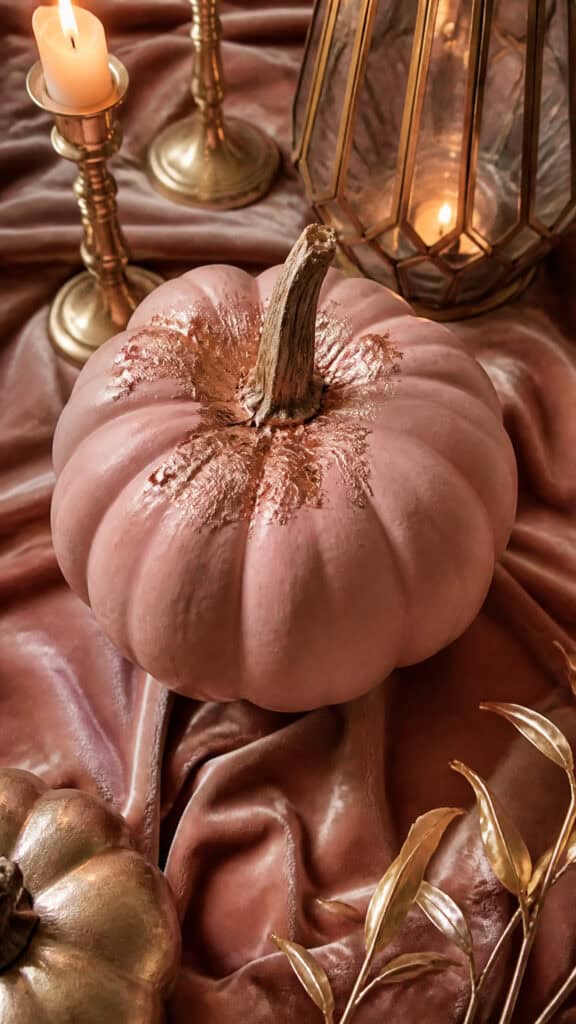
Millennial pink isn’t going anywhere, and it looks absolutely stunning on pumpkins! This sophisticated pink pumpkin painting idea combines that perfect peachy-pink shade with elegant copper leaf accents for a look that’s trendy, chic, and totally Instagram-worthy. Even my husband admitted these looked “actually pretty cool,” which is high praise coming from him!
Start by painting your pumpkin in that signature millennial pink shade – it’s that perfect balance between pink and peach that somehow works with everything. Apply two to three coats for solid coverage. The beauty of this particular shade is that it’s bold enough to make a statement but neutral enough to blend with various decor styles.
Once your base is dry, it’s time to add the copper leaf! You can purchase copper leaf sheets at any craft store, and they’re easier to work with than you might think. Apply a thin layer of adhesive (mod podge or leaf adhesive) to random sections of your pumpkin – I like to focus on areas around the stem and create irregular patches that look organic and natural.
Wait until the adhesive becomes tacky (usually about 15-20 minutes), then gently press pieces of copper leaf onto the adhesive areas. The leaf will stick to the tacky adhesive and you can brush away the excess with a soft brush. Don’t worry about making it perfect – the imperfect, torn edges of the copper leaf actually add to the artisanal look!
For extra dimension, try adding some hand-painted copper details using metallic copper paint. Simple dots, small leaves, or delicate lines connecting your copper leaf sections create a more cohesive design. Seal everything with a clear sealer to prevent the leaf from tarnishing and to protect your beautiful creation. These pumpkins look absolutely gorgeous grouped with white pumpkins and natural wood elements!
Watercolor Pink Wash Effect
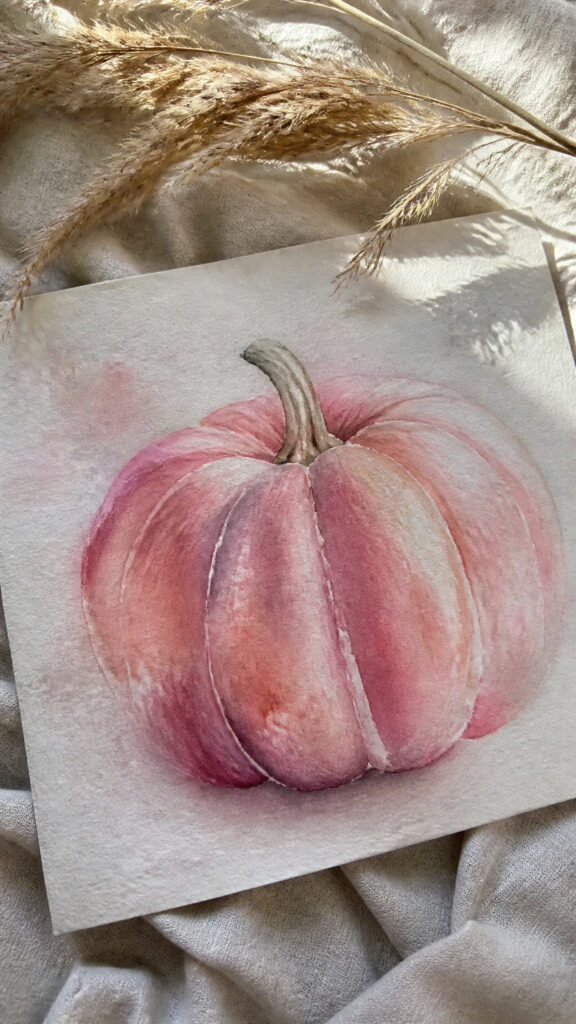
If you love the soft, dreamy look of watercolors, you’re going to adore this technique! This pink pumpkin painting idea creates a beautiful, ethereal effect that’s perfect for a romantic fall aesthetic. It’s also wonderfully forgiving, which makes it ideal if you’re painting with kids or if you’re just not confident in your artistic abilities!
The secret to achieving this watercolor look with acrylic paint is diluting your paint with water. Mix your pink paint with water until it reaches a thin, watery consistency – think more like colored water than paint. You want it thin enough to be translucent but not so thin that it just runs right off the pumpkin.
Apply your diluted paint to the pumpkin using a large, soft brush or a damp sponge. Work in random, overlapping strokes, allowing some areas to be more saturated with color and others to be very light and barely there. The beauty of this technique is in its imperfection! Let the paint pool naturally in the grooves of the pumpkin and don’t try to control it too much.
You can layer multiple shades of pink to create more depth and interest. Start with a very pale pink wash over the entire pumpkin, let it dry, then add a medium pink in some areas, followed by a deeper rose in just a few spots. Each layer adds dimension and creates that beautiful watercolor effect. I love adding a touch of purple or coral pink in some areas for even more variation!
For an extra artistic touch, while your final layer is still wet, sprinkle on some coarse salt. The salt will absorb some of the paint and create interesting texture and patterns as it dries. Once everything is completely dry, brush off the salt and seal your pumpkin with a matte sealer. This technique creates such a soft, artistic look that’s perfect for a more subtle, romantic fall display. Display these beauties with dried flowers and soft fabrics for a dreamy autumn vignette!
Bringing Your Pink Pumpkin Dreams to Life
These pink pumpkin painting ideas prove that
Don’t be afraid to experiment and make these ideas your own! Mix techniques, try different shades of pink, or add your own creative touches. The beauty of painted pumpkins is that there are no rules – if you love how it looks, then it’s perfect! Grab some pumpkins, gather your paint supplies, and create a stunning pink pumpkin display that’ll make your
This post may contain affiliate links. Read the full disclosure here.