October is here and that means it’s time to break out the pumpkins! As a mom of three energetic boys, I’ve learned that carving pumpkins can be a bit too messy (and honestly, a little dangerous with those sharp knives). That’s why we’ve switched to painting our pumpkins instead, and let me tell you, it’s been a total game-changer! The kids can get as creative as they want without me worrying about anyone losing a finger!
These spooky pumpkin painting ideas are perfect for families who want all the Halloween fun without the hassle of traditional carving. Whether you’ve got toddlers who love to smear paint everywhere or older kids who want to create something truly spooky, there’s something here for everyone. Plus, painted pumpkins last so much longer than carved ones, which means your hard work will stay beautiful throughout the entire Halloween season!
Classic Ghost Faces That Are Simply Boo-tiful
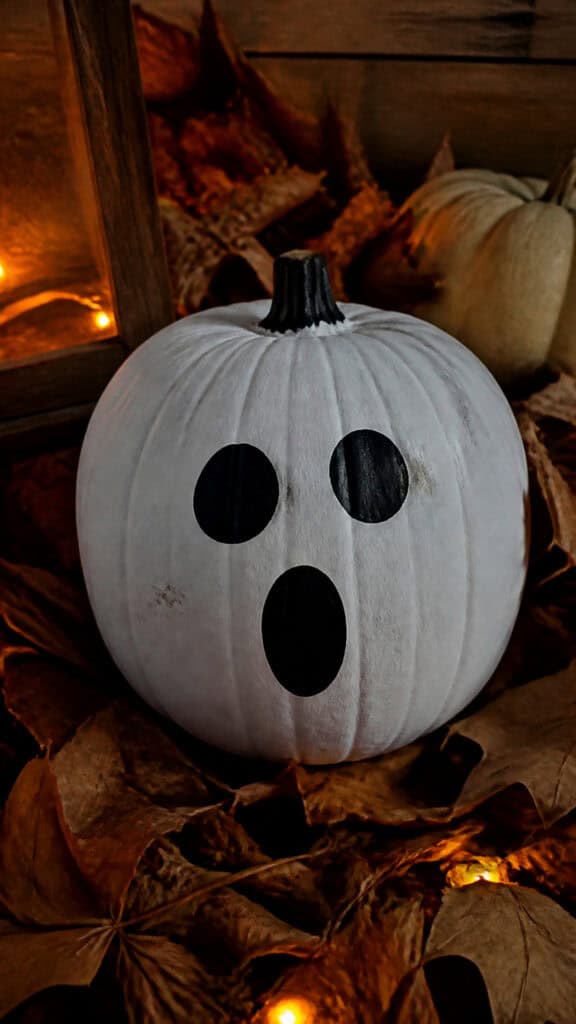
You can never go wrong with a classic ghost pumpkin! This is honestly one of my boys’ favorite designs because it’s super simple but still looks amazingly spooky. Start by painting your entire pumpkin white – we usually need two coats to get that nice, opaque ghost look. Let it dry completely between coats (this is the perfect time for a snack break!).
Once your white base is dry, grab some black paint and create those iconic ghost features. We like to make big, round eyes and an open mouth like the ghost is saying “Ooooh!” You can make your ghost happy, surprised, scared, or silly – each one turns out with its own personality! My middle son always insists on giving his ghost a wonky smile, and it cracks me up every time!
Here’s a fun twist: add some glow-in-the-dark paint to the eyes and mouth! We discovered this trick last year and the boys absolutely lost their minds when they saw their ghosts glowing in the dark. It’s such a simple addition but makes the pumpkins extra special for nighttime trick-or-treating. You can find glow-in-the-dark paint at any craft store, and trust me, it’s worth every penny for the excitement it brings!
For an extra spooky touch, try draping some cheesecloth or gauze over your ghost pumpkin. It gives it that ethereal, floating ghost vibe that looks incredible on your front porch. My youngest likes to add little painted chains around his ghost like it’s been trapped, which I thought was pretty creative for a five-year-old!
Creepy Crawly Spider Pumpkins
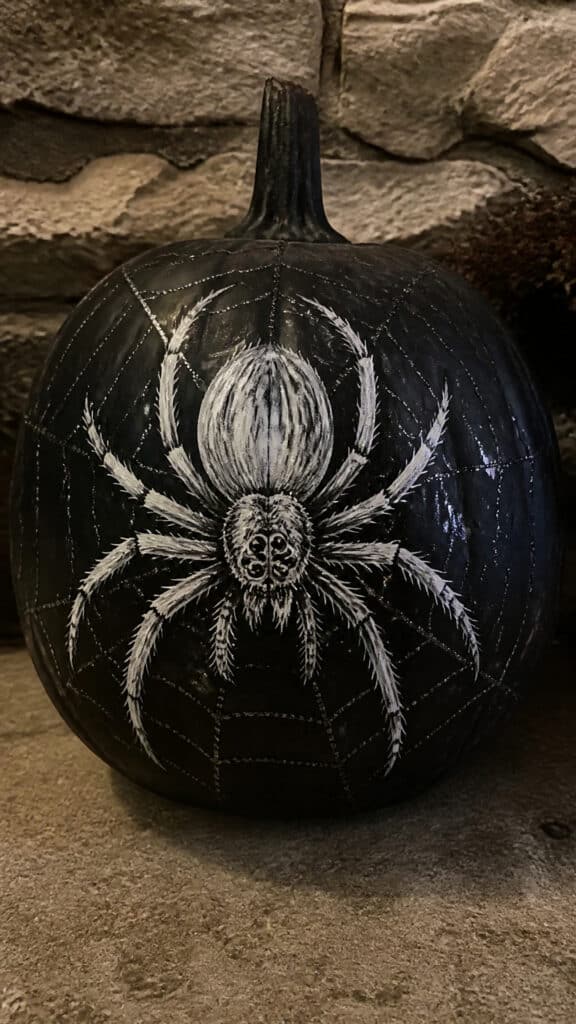
If your kids love all things creepy crawly like mine do, spider pumpkins are where it’s at! We usually paint the base of the pumpkin black, which creates such a dramatic look. The great thing about using black paint is that it covers really well, and any little imperfections in the pumpkin skin just add to the spooky texture!
Once your black pumpkin is completely dry, it’s time to add your spider! You can either paint the spider directly onto the pumpkin or do what we do and create a 3D spider using pipe cleaners. For the painted version, use white or bright green paint to create a spider body in the center of the pumpkin. Add eight legs extending outward, and don’t forget those creepy little eyes! We like to add at least six eyes because it makes them look extra spooky!
The pipe cleaner method is fantastic for younger kids who might struggle with detailed painting. Simply poke four black pipe cleaners through the pumpkin on each side to create legs, then paint or glue on some googly eyes. My boys love this version because they can pose the legs however they want, and it looks like the spider is actually crawling on the pumpkin! Just be careful when poking the pipe cleaners through – I usually do this part while the kids paint other details.
Want to take it up a notch? Paint a spiderweb across your pumpkin using white paint! Start from the stem and create radiating lines outward, then connect them with curved lines. It doesn’t have to be perfect – actually, the more irregular your web looks, the more realistic it appears! We usually add a few “dew drops” using clear glitter glue, which catches the light beautifully when the pumpkins are displayed outside.
Frankenstein’s Monster for Monster-Loving Kids
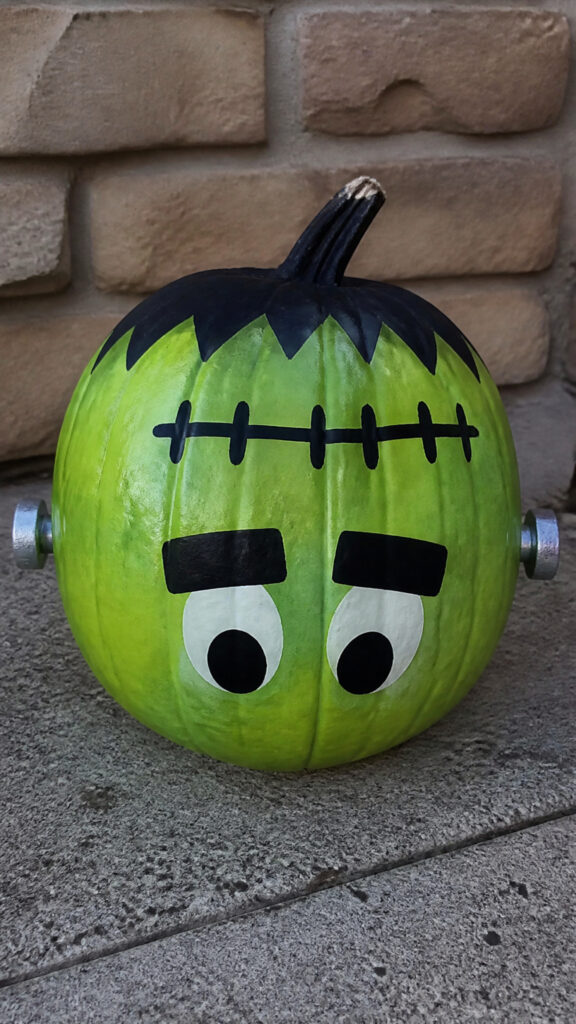
Frankenstein’s monster is such a fun character to paint on pumpkins, and it’s actually easier than you might think! We start by painting the entire pumpkin a light green color. You can use lime green for a brighter, cartoonish look, or mix in a bit of gray for a more classic monster appearance. My oldest son is very particular about getting the “right” shade of green, so we usually let him mix the colors himself!
Once the green base is dry, it’s time for the fun details! Use black paint to create thick, blocky eyebrows and big stitches across the forehead. The stitches are my favorite part – just paint a line and add little cross-marks along it to make it look sewn together. We also add stitches on the cheeks and sometimes even down the sides of the pumpkin. The more stitches, the better!
For the eyes, we keep them simple with white ovals and black pupils. You can make them look in different directions for a goofy effect, or keep them straight ahead for a more serious monster. Don’t forget the mouth! We usually paint big, squared-off teeth or just a simple grimace. My middle son always wants to add a tongue sticking out, which makes his Frankenstein look hilarious instead of scary!
The finishing touch is adding those iconic bolts on the neck! You can paint silver circles on each side of the pumpkin near the bottom, or get creative and use actual bolts from your toolbox (just stick them in carefully). We tried using painted wine corks one year, which worked surprisingly well and added a fun 3D element. Top it all off by painting the stem black to represent Frankenstein’s flat-top haircut, and you’ve got yourself one adorable monster!
Witch Pumpkins With Personality
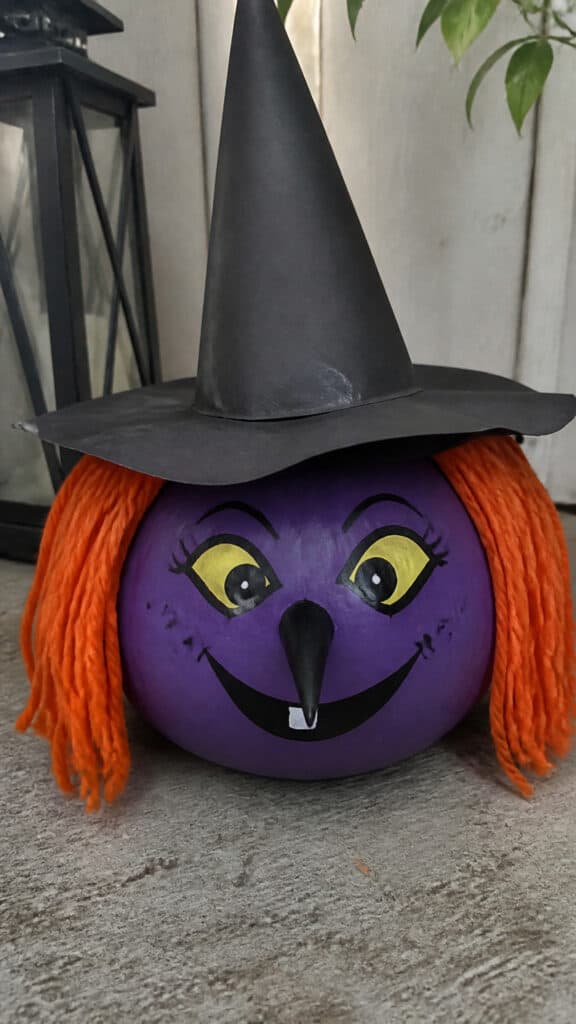
Witch pumpkins are absolutely adorable and give you so much room for creativity! We typically paint the pumpkin purple, green, or even keep it orange for the witch’s face. The beauty of this design is that you can really let your kids’ personalities shine through. Each witch ends up looking completely different, and that’s what makes them so special!
Start by painting a witchy face on your pumpkin. We use black paint to create a long, pointy nose (just paint a triangle!), a wicked smile with maybe a few missing teeth, and some dramatic eyes. My boys love giving their witches crazy expressions – one year we had a surprised witch, an angry witch, and a laughing witch all sitting on our porch together! You can add warts, wrinkles, or a big mole for extra witchy character.
The hat is what really makes this design come together! You can paint a witch hat directly onto the top of the pumpkin using black paint, but we prefer making actual mini witch hats from black construction paper or felt. Just create a cone and a circular brim, glue them together, and pop it right on top of your pumpkin! The kids love decorating the hats with ribbons, buckles, or even tiny plastic spiders.
Don’t forget the hair! We use orange or green yarn to create wild, witchy hair. Just cut pieces of yarn and glue them around the sides of the pumpkin under the hat. My youngest goes absolutely crazy with this part and uses way more yarn than necessary, but honestly, the wilder the hair, the better the witch looks! You can also add some painted-on earrings or a necklace to give your witch some extra flair. Last year, we even gave one of our witches purple eyeshadow, and she looked fabulous!
Silly Monster Faces in Every Color
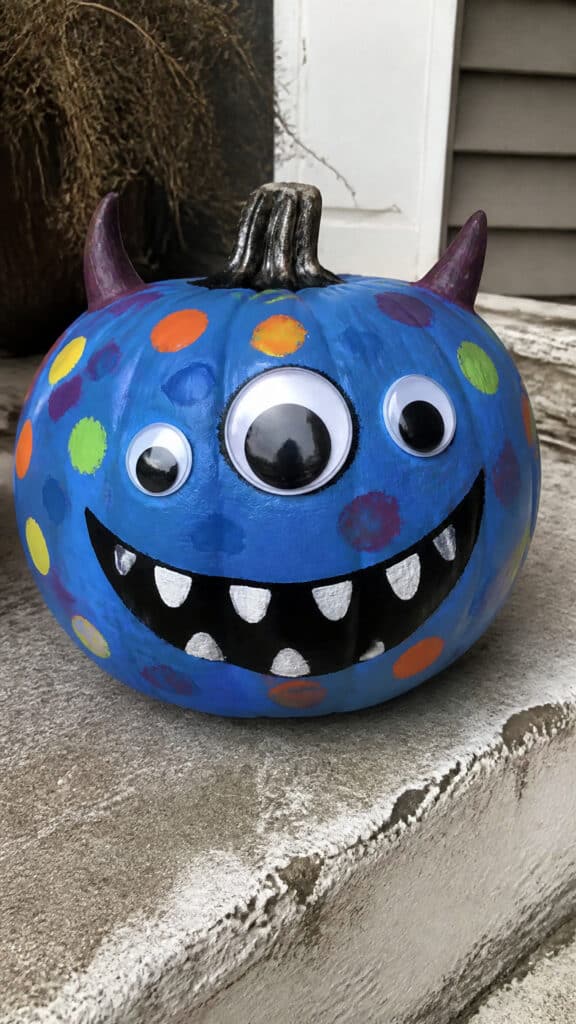
This is where you and your kids can really let loose and get creative! Monster pumpkins can be absolutely any color you want – we’re talking bright pink, electric blue, neon orange, or even rainbow! There are no rules when it comes to monsters, which makes this one of our favorite spooky pumpkin painting ideas. My boys love that they can make their monsters as wild and crazy as they want!
Start by choosing your base color and painting the entire pumpkin. We usually let each kid pick their own color, and the variety makes for an amazing display! Once the base is dry, it’s time to add features. Monsters can have one eye, three eyes, or even ten eyes! They can have sharp teeth, no teeth, or one giant tooth. We use white paint for the eyes and teeth, then add black pupils and outlines to make everything pop.
Here’s where it gets really fun – add texture and details! Use different colors to create spots, stripes, or scales all over your monster. We love adding horns using painted paper cones or even real twigs stuck into the top of the pumpkin. Pipe cleaners make fantastic antennae, and you can curl them for a springy effect. My middle son discovered that you can use pom-poms as noses, which is now a staple in all our monster designs!
The messier and more chaotic your monster looks, the better! We always end up with paint everywhere (thank goodness for washable paint!), but the results are absolutely worth it. Try adding fur using painted cotton balls, or create spikes using painted cardboard triangles. You can even give your monster accessories like a bow tie or glasses. One year, my oldest made a hipster monster with painted-on glasses and a mustache, and it was the hit of the neighborhood!
Vampire Pumpkins That Don’t Bite
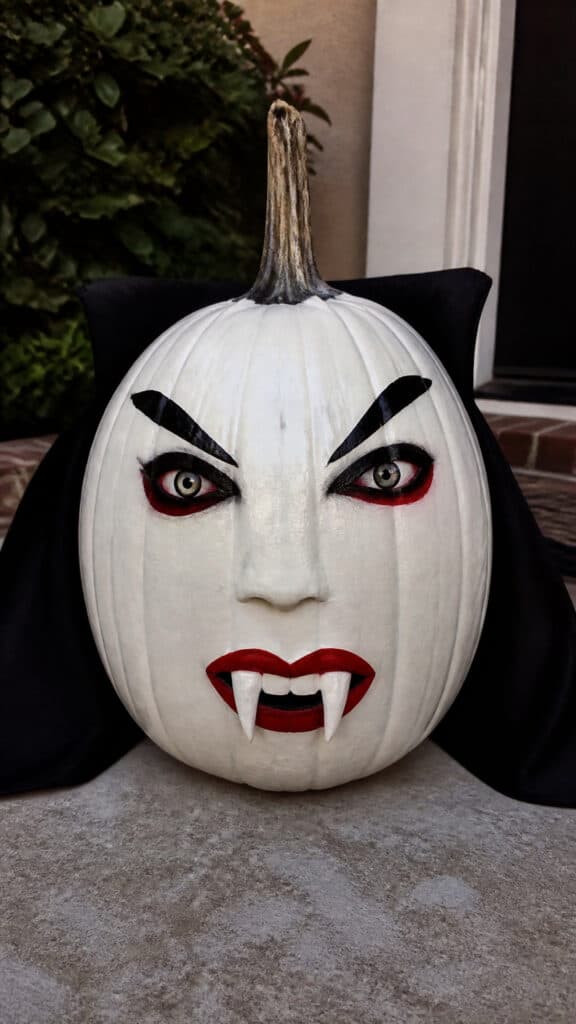
Vampire pumpkins are sophisticated and spooky, perfect for kids who want something a little more classic! We usually paint these pumpkins white or pale gray to give them that undead, pale complexion. It takes a couple of coats to get good coverage, but the end result is so worth it! While the paint dries, we talk about vampire stories and the kids get so excited about creating their own Count Dracula!
The key features of a vampire pumpkin are, of course, the fangs! Paint a simple mouth with red lips using red or dark pink paint, then add two white fangs hanging down from the top lip. You can make them long and dramatic or short and subtle – we usually end up with a variety because each kid has their own vision! Add some blood drips coming from the corners of the mouth using red paint for extra spookiness. My boys always want to add WAY more blood than necessary, which makes for some pretty dramatic vampires!
For the eyes, we create a mysterious, slightly menacing look. Paint them white with small black pupils, and add black eyebrows that angle downward toward the center for that classic vampire glare. You can also add some purple or gray paint around the eyes to create a sunken, tired look – because vampires never sleep during the day, right? My oldest likes to add red eyes instead, which definitely amps up the creep factor!
The finishing touches really bring your vampire to life! Paint the stem black and add a black cape by cutting a semi-circle from black fabric or construction paper and attaching it to the back of the pumpkin. We use safety pins or hot glue (mom does this part!) to secure it. You can also add a little painted-on bow tie or a collar to make your vampire look fancy. Some years we’ve added slicked-back hair using black paint, and we always add those signature pointy ears on the sides. Don’t forget to give your vampire some pale hands reaching around the front of the pumpkin – just trace your kid’s hands on white paper, cut them out, and glue them on!
Mummy Pumpkins Wrapped Up Perfectly
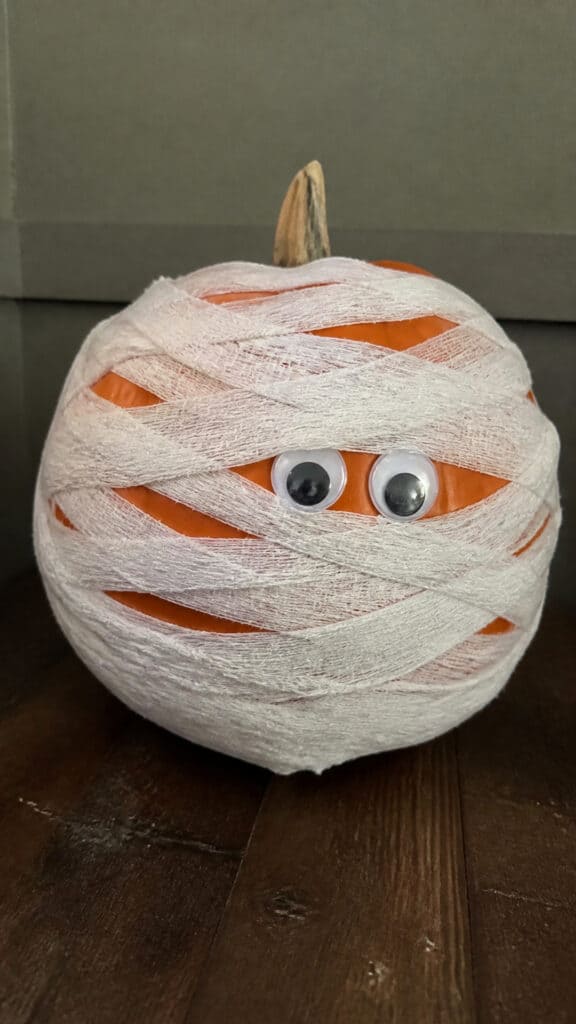
Mummy pumpkins are absolutely adorable and surprisingly easy to create! This is one of those spooky pumpkin painting ideas that looks super impressive but doesn’t require any advanced painting skills, which makes it perfect for younger kids. My five-year-old can do most of this design by himself, and he’s so proud of the results!
There are two ways to create a mummy pumpkin, and we’ve tried both with great success! The first method involves painting white stripes all over your pumpkin in a crisscross pattern to look like mummy wrappings. Leave some gaps between the stripes so the orange pumpkin shows through – this creates depth and makes it look more realistic. The stripes don’t have to be perfect or even! In fact, messy, irregular stripes look more like actual bandages. We use a flat brush and just go crazy with white paint all over the pumpkin.
The second method is even more fun and tactile! Instead of painting, wrap actual gauze or cheesecloth around your pumpkin. You can secure it with glue or just tuck the ends in as you wrap. This creates an amazing 3D texture that looks so cool! My boys love this method because they can really get hands-on with it. We usually let them wrap the gauze however they want, and it always turns out great. You can leave the gauze white or paint it with a bit of diluted tan or gray paint to make it look old and dusty!
No matter which method you choose, the eyes are what really bring your mummy to life! We paint two large white circles (or ovals) for the eye area, then add black pupils. You can make the eyes look scared, surprised, or even sleepy! My middle son always makes his mummy look confused, which cracks me up every time. Some years we’ve used googly eyes instead of painting them, which adds a fun, silly element. You can also add a few drops of red paint near the eyes for a spooky, ancient mummy effect. Display your mummy pumpkins with some fake cobwebs draped around them, and they’ll look like they just emerged from a tomb!
Time to Get Painting!
There you have it – tons of spooky pumpkin painting ideas that’ll keep your family busy and creative all October long! The best part about painting pumpkins instead of carving them is that kids of all ages can participate safely, and you don’t have to worry about the mess of pumpkin guts everywhere. Plus, these painted beauties will last on your porch for weeks without rotting or attracting fruit flies!
Grab some pumpkins, break out the paint, and let your kids’ imaginations run wild! Don’t worry about making everything perfect – the wonky smiles, mismatched eyes, and creative interpretations are what make these pumpkins special and uniquely yours. My boys still talk about their favorite pumpkins from years past, and we love looking back at photos of all our creations. Happy painting, and have a wonderfully spooky Halloween!
This post may contain affiliate links. Read the full disclosure here.