Unique Scary Pumpkin Carving Ideas That Stand Out
I love how pumpkin carving brings the whole family together, especially with three energetic boys running around! Finding unique scary pumpkin carving ideas that stand out makes the experience even more exciting for us!
It’s not just about carving a pumpkin… it’s about sharing laughs, creativity, and making memories that last!
This pumpkin carving kit has everything you need to make creative, spooky designs that really shine.
If you want to turn this Halloween tradition into a fun, hands-on activity for your kids, you’re in the right place!

Classic Scary Pumpkin Carvings with a Unique Twist


When it comes to pumpkin carving, sticking to the classics is comforting, but adding a little twist can make your pumpkin the star of the neighborhood. After all, unique scary pumpkin carving ideas don’t have to mean complicated or fancy—they just need that special something to catch everyone’s eye, especially when you’ve got curious kids watching your every move! Here’s how I’ve mixed traditional spooky with fresh details to create pumpkins that feel both familiar and exciting.
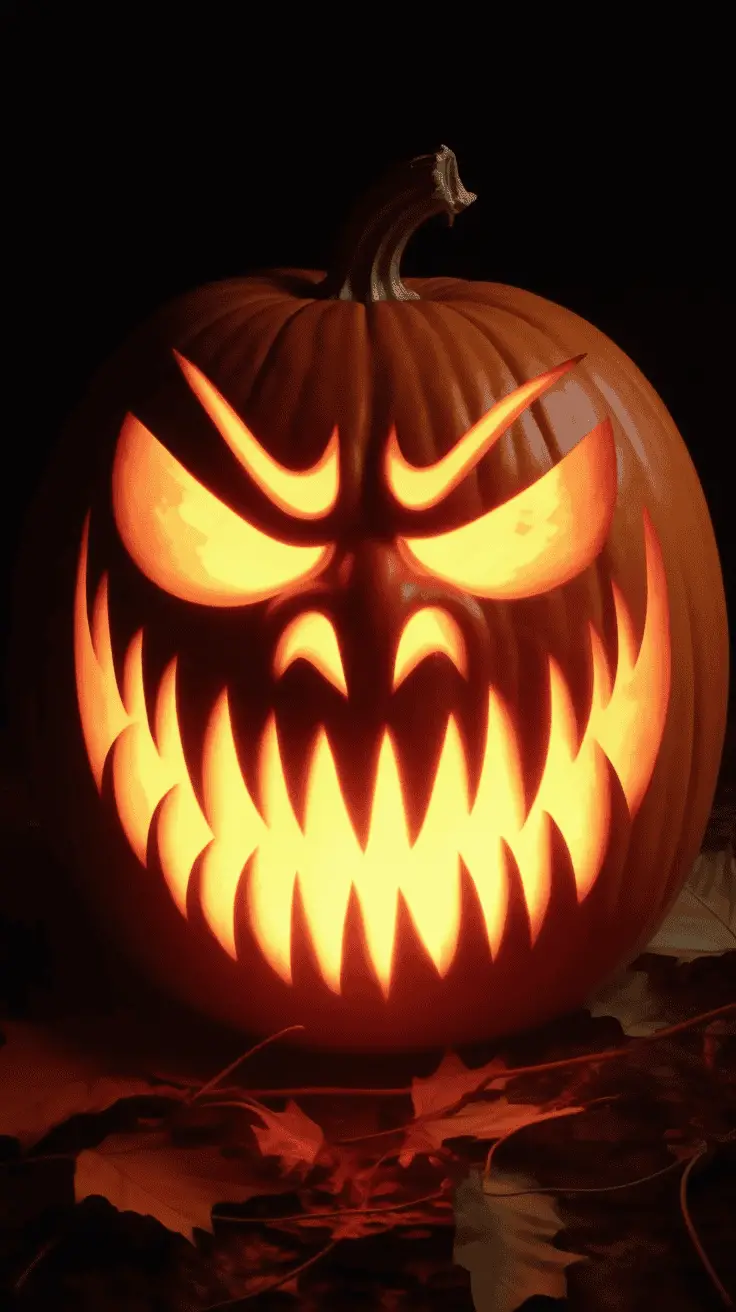
Twisted Faces with Unusual Expressions


Forget the usual scary grins or simple angry faces! A pumpkin with an unexpected or mixed expression really grabs attention and makes people stop. You can play with exaggerated features like:
- Oversized eyes popping out with surprise or confusion
- A mouth that’s part grin, part grimace—like your pumpkin can’t decide whether it’s happy or terrified
- Raised eyebrows combined with a crooked smile for a cheeky, mischievous vibe
- Half the face smiling while the other half frowns or scowls—it’s like your pumpkin has two moods at once
I love using these types of faces because they spark conversation and add character that’s beyond the usual scary pumpkin. Plus, kids get to join in by guessing what the pumpkin might be feeling, which turns carving time into a fun guessing game!
Intricate Horror Movie Inspired Designs

If you want to get creative but keep it classic, try carving pumpkins inspired by horror movies. Instead of just copying icons like Freddy Krueger or Jason, give them a spin:
- Focus on an iconic, lesser-known scene or object from the movie rather than the whole character
- Mix elements from two different villains—imagine a pumpkin face that’s half Michael Myers, half Chucky!
- Use negative space to hint at shapes instead of carving full details for a shadowy, spooky effect
This is a great way to impress adults and older kids who recognize the references, while still keeping the design fresh and original. It took me one Halloween to carve a pumpkin that looked like the creepy doll from a movie but with exaggerated features like giant eyes and exaggerated cracks—and it was a big hit!
Incorporating 3D Elements and Accessories

Sometimes your pumpkin doesn’t have to be just about what you carve. Adding extra stuff can bring a simple design to life and make it truly one of a kind. Try these ideas to upgrade your pumpkin:
- Attach fake spiders, bats, or other creepy crawlies on or around it for a playful yet eerie setup
- Use LED lights in different colors—green, purple, or red make a huge difference and add depth to the carving’s glow
- Layer parts of the pumpkin by carving out sections at different depths to create shadow and texture, like wrinkles or scars
- Add props like hats, miniature witches brooms, or tiny hands reaching out for an interactive, spooky vibe
I used a set of twinkling orange and purple LED lights inside one pumpkin last year, and it instantly looked more magical and spooky. It’s simple and fun to do, and even the little ones love helping place the extras.
These touches don’t just make your pumpkins stand out—they turn them into mini Halloween art pieces! When you blend classic scary with these unique twists, you get spooky decorations that feel fresh, fun, and perfect for a family Halloween to remember.
Creative Ways to Make Your Unique Scary Pumpkin Carving Ideas Stand Out

When it comes to unique scary pumpkin carving ideas, sometimes it’s the techniques you use that turn a simple pumpkin into a showstopper. I’ve found that trying a few different methods keeps pumpkin carving fresh and exciting for my boys and me. These creative approaches help you mix things up without needing fancy tools or tons of time. If you want your pumpkins to really catch the eye this Halloween, these ideas are easy to try and perfect for making your display one-of-a-kind.
Shaving and Etching Instead of Full Carving

One of my favorite ways to add creepy details is by shaving or etching the pumpkin skin instead of cutting all the way through. This technique creates an eerie glow that’s softer and more mysterious than your typical pumpkins with big holes. Instead of hollowing out huge chunks, you scrape away just the outer skin to reveal lighter orange or even white flesh underneath. With a sharp paring knife or specialized etching tools, you can add delicate lines, patterns, or textures.
This method is great for:
- Creating ghostly faces or creepy shadows that look like they’re lurking inside the pumpkin without being fully cut out
- Adding fine details such as wrinkles, veins, or spider webs that would be difficult with full carving
- Letting light shine through thin layers of pumpkin skin, giving a glowing, almost 3D effect
You don’t need to carve deep, so the pumpkin stays sturdier longer. Plus, shaving is perfect for the kids if you want to let them play with safer, gentler designs.
Using Multiple Pumpkins for a Scene or Story
This year I decided to think beyond a single pumpkin and combine several for a spooky little scene. Using multiple pumpkins lets you tell a story or create a tableau that really draws people in. Instead of one scary face, you can arrange pumpkins as characters or parts of a creepy setup.
Here are some ideas to try with your family:
- A pumpkin graveyard: Carve tombstone shapes on some, add spooky faces or ghost shapes on others, scatter fake bones or cobwebs in between
- A haunted campfire: Use carved pumpkins as faces around a “fire” made from orange and yellow cellophane or lights; add twigs and leaves for atmosphere
- Pumpkin monsters in action: Combine carved pumpkins of various sizes and shapes, each with different scary expressions, positioned like they’re creeping toward you
The best part of working with multiple pumpkins is how it turns your porch or yard into a mini Halloween scene, not just a single decoration. My boys love coming up with stories about what the pumpkins are doing!
Painting and Carving Combo for Dramatic Impact
Painting a pumpkin before carving adds so much to the final look, especially with scary designs. I learned this after trying plain carvings that looked good but lacked depth. Once I started combining paint and carving, the pumpkins really jumped out!
Here’s how painting helps:
- Highlight certain features like eyes, teeth, or scars with black or white paint to make them pop against the orange
- Use dark paint to create shadows or a background that frames your carving, which adds contrast and makes the design stand out at night
- Try glow-in-the-dark paint or metallic shades for a spooky shimmer effect that catches the light differently
You can paint first, let it dry, then carve, or carve first and paint afterward to add details inside the cuts. Sometimes a simple touch of black paint inside the eyes gives your scary pumpkin a much meaner look. When you mix paint and carving, the pumpkin almost looks like a costume itself—layered and full of personality!
These three techniques have become my go-to ways when I want my unique scary pumpkin carving ideas to really shine. They keep the carving fun and let you play with light, shadow, and storytelling in creative ways. Plus, the kids get involved in different parts of the process, making our Halloween pumpkins even more meaningful every year!
Kid-Friendly Unique Scary Pumpkin Carving Ideas

Finding unique scary pumpkin carving ideas that are fun for the whole family can be a bit tricky, especially when you want to include the kids without making the pumpkins too spooky. With three little boys, I’ve learned how to balance creepy and charming so everyone has a blast. Whether your kids want to carve themselves or just join in the fun, these kid-friendly ideas will keep things light, playful, and memorable.
Simple but Spooky Faces for Little Hands
When your kids are small, carving a pumpkin can feel overwhelming. That’s why I love starting with simple but spooky faces that are easy for little hands to help with. You don’t want the designs to be too scary (we want happy Halloween, not nightmares, right?), but adding a little twist makes each pumpkin stand out.
Try these ideas:
- Big round eyes with tiny fangs — it’s scary but cute, like a little pumpkin vampire
- Triangle nose and a crooked smile — a classic that kids love to point out
- Wide eyes with little “stitch” marks around the mouth for a Frankenstein-inspired look
- Goofy ghost faces with uneven eyes and a silly open mouth
When the kids help draw or poke out the shapes with safe tools, they feel proud and involved. It’s simple and fun, and trust me, those quirky little faces are always a hit with neighbors walking by.
Collaborative Family Pumpkin Projects
Carving pumpkins with your kids can get a bit chaotic, but when you turn it into a family project, everything flows better. I like to pick a big pumpkin and let each child add their own scary touch. It feels like making one big Halloween story where everyone has a part.
Here are some ways to make this work:
- Divide the pumpkin surface into sections so each kid designs their own spooky face or symbol
- Make a “scary pumpkin family” with smaller pumpkins carved by each family member, then display them all together
- Add accessories for each section, like paper bats, colored tissue “bloody” patches, or googly eyes
This teamwork brings out their creativity and keeps their attention longer. Plus, it’s fun watching how each pumpkin piece reflects the unique personality of each kid — we end up with a wild mix of scary, silly, and sweet.
Using Safe Tools and Alternatives to Carving
Carving pumpkins with sharp knives isn’t always safe for little kids, but you don’t have to skip pumpkin decorating! There are plenty of kid-friendly alternatives that still look festive and spooky without the risk.
Here are some safe decorating ideas:
- Pumpkin stickers that come in spooky shapes like bats, spiders, and ghosts
- Washable markers or paint pens to draw faces or patterns without any carving
- Plastic pumpkin carving kits with kid-safe saws and pokers designed just for little hands
- Stick-on googly eyes and felt pieces to create fun, textured pumpkins
I’ve found that combining these tools keeps the kids engaged and safe. Even the ones who don’t want to hold a knife yet can make their own creepy creations. Plus, these options are perfect when you want a quick decoration or need to carve pumpkins indoors without much mess.
Making unique scary pumpkin carving ideas accessible and enjoyable for kids means keeping things simple, fun, and safe. Whether it’s a goofy ghost face, a shared family design, or brightly decorated alternatives, these ideas let your Halloween glow with personality — and nobody gets left out!
Enhancing Your Unique Scary Pumpkins with Creative Displays
With so many unique scary pumpkin carving ideas out there, how you light and display them can make all the difference. After carving some fun (and frightful) faces with my boys, I always find that the way I arrange and light the pumpkins really brings those scary details to life. Putting a little thought into lighting, themes, and natural touches turns ordinary pumpkins into spooky masterpieces. Here’s how I boost the scary factor while keeping it playful and approachable for the whole family!
Lighting Techniques to Maximize the Scary Effect
Lighting is where your scary pumpkin goes from “nice” to “yikes”! I like to mix things up depending on the mood I want. Trying out different lighting effects adds depth and makes the pumpkins pop in the dark:
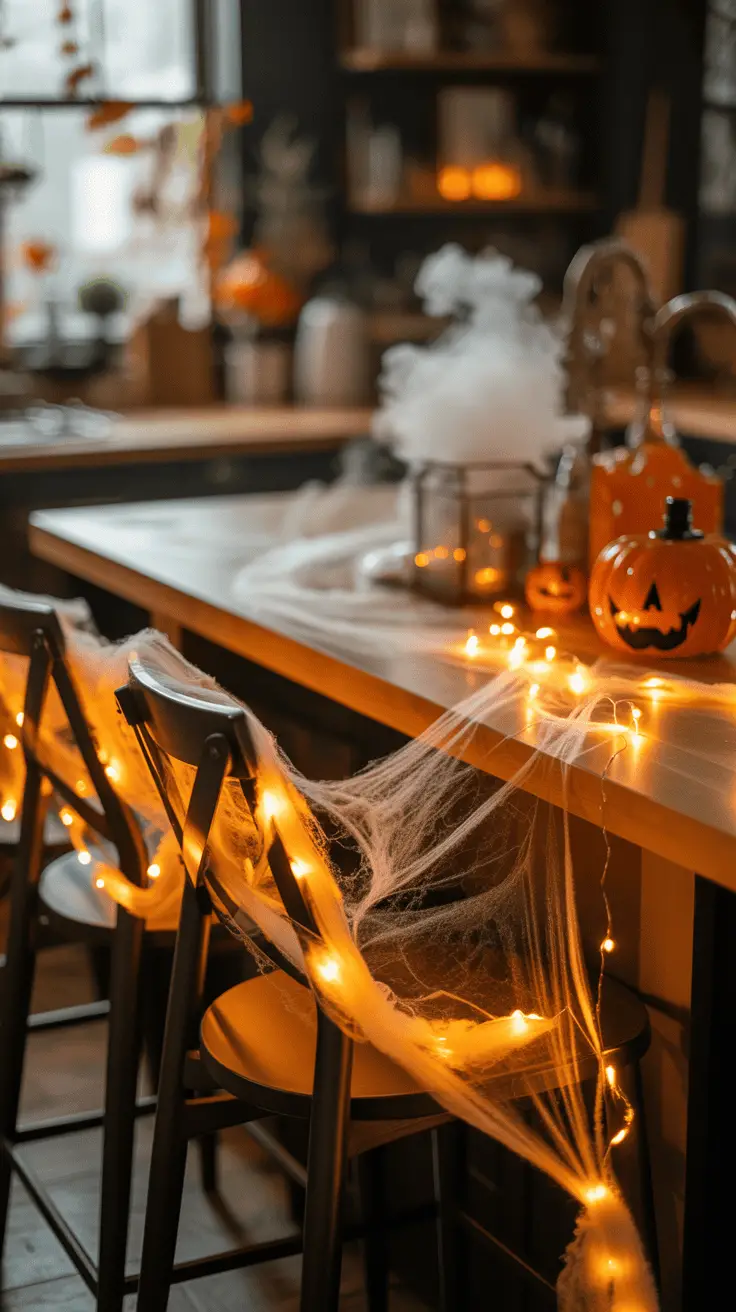
- Colored LED lights are a favorite. Red or green inside the pumpkin give a creepy glow, and you don’t have to worry about candles going out or tipping over. Purple LEDs add a mysterious vibe too!
- Flickering candles create that classic haunted look. The gentle, uneven flicker makes shadows dance inside the pumpkin’s face. Just remember to keep real flames safe around kids and little hands.
- Spotlights or small floodlights shining from outside can highlight multiple pumpkins or reveal carved details you might miss by candlelight alone. Angling the light low lets scary features cast long shadows on walls or around your porch.
If you combine these, like flickering candles inside with colored LED floodlights outside, your pumpkins will feel alive. The glow shifting inside and those spooky outlines make your unique scary pumpkin carving ideas really stand out after dusk!
Themed Pumpkin Displays and Arrangements
I’ve learned that grouping pumpkins with a story in mind can make all your carving efforts feel like part of a spooky scene. Instead of setting one lonely pumpkin on the porch, try these ideas for themed displays:
- A haunted family gathering: Line up pumpkins carved with faces that “talk” to each other—mom, dad, monster kids, and the family pet. You can even add little costume props or hats to each for character.
- Classic Halloween creatures: Group pumpkins as witches, ghosts, zombies, or skeletons with matching props or colors. I love arranging them so it looks like they’re all sharing a secret or plotting some mischief.
- Creepy party: Use different-sized pumpkins and pile them high on a table with fake fog or dry ice. Add glow sticks or little toy spiders crawling up, and you’ve created a mini haunted hill!
These set-ups invite passersby to explore and imagine a story behind the pumpkins, rather than just glance and move on. My boys love making up tales about the pumpkin “cast” every year—it’s a fun way to extend Halloween spirit beyond carving.
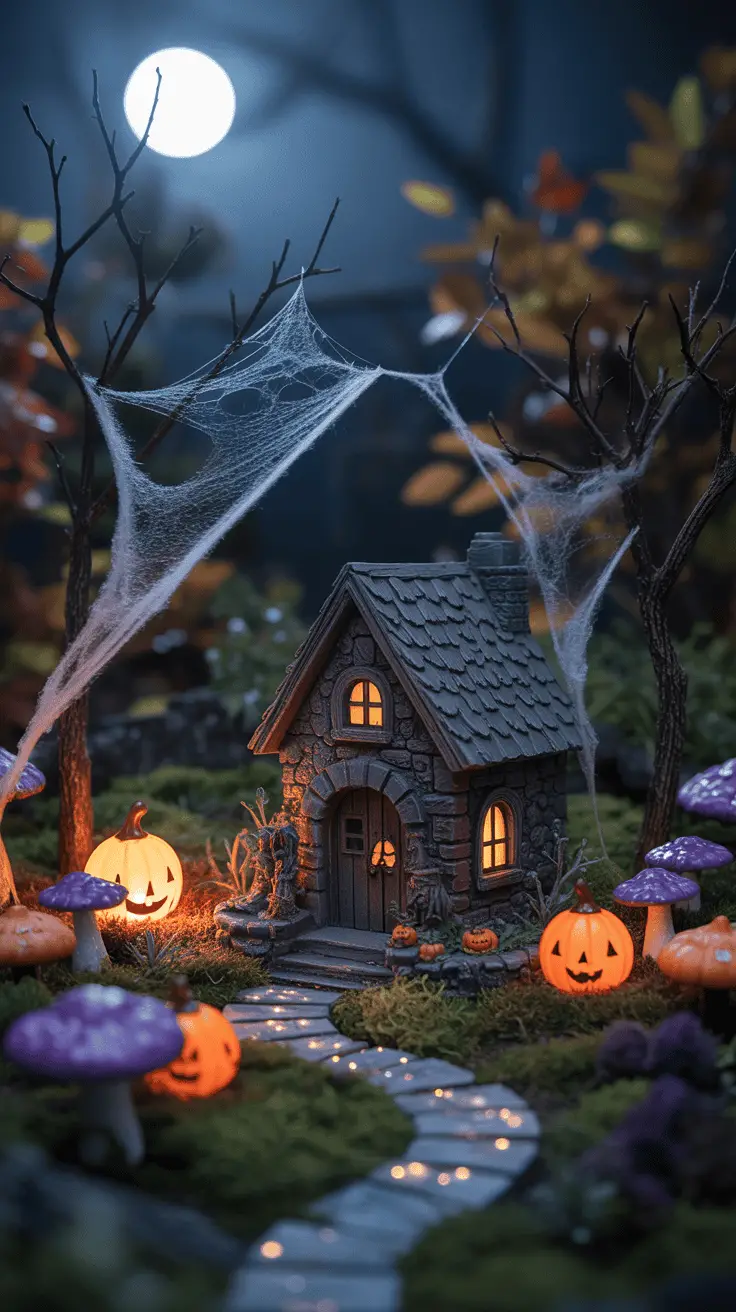
Using Natural Elements and Props to Amplify the Look
Nothing ties a pumpkin display together like the details around it. I like to gather natural bits from outside with my kids before decorating. With just a bit of fallen leaves, twigs, and some fake cobwebs, your pumpkin scene comes alive and looks more authentic—chilling and charming all at once.
Try these quick additions:
- Dried leaves and branches arranged at the base or around the pumpkins add a wild, abandoned vibe. Picking up some colorful autumn leaves with your kids lets them feel part of the process.
- Stretchy cobwebs draped over pumpkins and scattered nearby bring that spooky spider lair look. Adding a few plastic spiders or bugs ups the creepy factor without much work.
- Pinecones, acorns, and moss tucked here and there make the setup look gathered from a mysterious forest. Natural textures contrast nicely with smooth pumpkin skin.
- Old gloves, small bones, or doll parts nestled among your pumpkins can add a subtle but eerie detail. My kids have fun hunting for odd little props at thrift stores or around the house to create these effects.
These small touches pull everything together and make your unique scary pumpkin carving ideas feel like more than just a decoration—they become part of a Halloween scene that draws people in and sparks imaginations. Plus, it’s a great chance to get outdoors and explore with the family before the big night!
Troubleshooting and Tips for Successful Unique Scary Pumpkin Carving
I’ve learned that making unique scary pumpkin carving ideas really stand out takes more than a sharp knife and a wild imagination. Picking the right pumpkin, having the right tools, and knowing how to preserve your masterpiece go a long way toward a smooth and satisfying experience. Plus, avoiding some common mistakes will save you from frustration and keep your pumpkins looking eerie and awesome until Halloween night. Here are my go-to tips that keep our family’s carving sessions fun and successful every year!
Choosing the Right Pumpkin and Tools for Unique Carvings
The pumpkin you pick sets the stage for everything! If you want to try detailed or unusual designs, you’ll want a pumpkin that can handle the job.
Look for pumpkins that are:
- Firm and heavy for their size with no soft spots or bruises. Soft spots mean your pumpkin won’t last long, especially when carved.
- Smooth and flat surfaces make carving easier, especially for intricate shapes and faces that need space to show detail.
- Medium to large size, but not overly huge. Bigger pumpkins give space to get creative without squeezing your design into a tiny face.
As for tools, don’t just grab the kitchen knife and hope for the best! Some simple but effective tools make carving safer and more precise:
- A small serrated pumpkin saw is perfect for clean cuts without much effort. Kids’ carving kits usually include one, which helps with tricky shapes.
- Detail carving tools or linoleum cutters let you etch fine lines and shadows without cutting all the way through the pumpkin.
- A sturdy scooper or large spoon for cleaning out the pumpkin inside with less strain. Getting all the pulp and seeds out makes carving easier and cleaner.
- Craft knives or X-Acto knives can help you with small, delicate details if you’re comfortable using them carefully.
Having the right pumpkin and tools means your design will be easier to carve and look sharper. I always tell my boys, “A good pumpkin and tools are half the victory!”
Preserving Your Carved Pumpkins Longer
Nobody likes to finish a perfect, creepy pumpkin only to have it turn to mush in a couple of days! Keeping your scary pumpkin fresh through Halloween is a challenge, but these tips really help:
- Clean your pumpkin well before carving. Rinse the outside and inside with a diluted bleach solution (about 1 tablespoon bleach to 1 quart water). This kills molds and bacteria that cause rot.
- Keep your pumpkin dry when you’re not displaying it. Moisture speeds up decay, so avoid leaving wet pumpkins outside overnight or in the rain.
- Use petroleum jelly or vegetable oil to coat all the freshly carved edges and inside surfaces. I smooth it on with my fingers or a paper towel; this seals in moisture and slows drying out.
- Refrigerate or bring your pumpkin indoors at night if you can, especially in warm or humid climates. Cooler temperatures slow rot dramatically.
- Spray your pumpkin with water and a little bleach every couple of days to keep molds from showing up. Just don’t soak it!
- Avoid candles in your pumpkin during the day if you want it to last longer. Heat from the flame speeds up spoilage, so switch to LED lights or glow sticks for indoor or early evening glow.
Following these steps turned our pumpkins from sad, shriveled faces into fresh, spooky smiles that lasted all through Halloween week.
Avoiding Common Carving Mistakes
Pumpkin carving fun can get ruined fast by a few common mistakes. Over the years, these are the ones I watch out for, and they’ve saved me from a lot of “oops!” moments:
- Don’t cut too deeply or remove too much pumpkin flesh at once. Thin walls are fragile and likely to collapse. Take off small amounts gradually, especially if you’re making layers or etching details.
- Avoid carving too close to the stem or bottom. The stem area is tough, and the bottom supports the pumpkin. Carving near these weak spots can cause cracks or instability.
- Keep your pumpkin clean and dry while working. Wet hands or tools make cuts slippery and hard to control. Plus, wet surfaces increase the chance of slipping and accidents.
- Plan your design before you start cutting. Drawing the pattern with a washable marker or pencil helps avoid mistakes and keeps carving on track.
- Work slowly and patiently, especially around tight details. Rushing leads to uneven cuts or broken pieces. I always remind myself that patience gets the best results and keeps little hands safe.
- Don’t forget about pumpkin thickness. Thin spots glow better but break easier; thick walls last longer but can be harder to carve. Finding the right balance depends on your design.
By watching out for these simple but easy-to-miss points, your pumpkin carving will go smoother and look more polished. Plus, carving will feel like less of a battle and more of a fun creative time with your kids!
These tips have helped me enjoy the pumpkin carving season without the stress. When you combine the right pumpkin, tools, preservation tricks, and smart carving habits, your unique scary pumpkin carving ideas will really have their moment to shine!

Conclusion
Trying out unique scary pumpkin carving ideas brings so much fun and creativity to our Halloween traditions. It’s amazing how a simple pumpkin can become a little work of art when you mix classic spookiness with new twists, creative techniques, and a bit of family teamwork. These ideas encourage the whole family to join in, from the littlest helpers to the adults wanting a fresh challenge.
I can’t wait for you to try some of these ideas and see how your pumpkins turn out! If you give them a go, I’d love to hear your stories, favorite tips, or even photos of your creations. Sharing those moments keeps the Halloween spirit alive and makes pumpkin carving even more special for all of us. Let’s make this season unforgettable, one scary pumpkin at a time!
This post may contain affiliate links. Read the full disclosure here.