There’s something magical about stepping outside on a crisp autumn morning and seeing your front porch dressed up in all its fall glory! As a mom of three energetic boys, I know how important it is to create a welcoming space that says “home” the moment anyone walks up to our door. Fall urns for front porch decorating have become my absolute favorite way to add that seasonal charm without spending hours on complicated projects!
The best part about decorating with fall urns is that they’re surprisingly forgiving and flexible! Whether you’re a seasoned gardener or someone who can barely keep a succulent alive (no judgment here!), you can create stunning arrangements that’ll last throughout the entire season. Let me share everything I’ve learned about creating gorgeous fall urns that’ll make your porch the star of the neighborhood!
Choosing the Perfect Urns for Your Fall Display
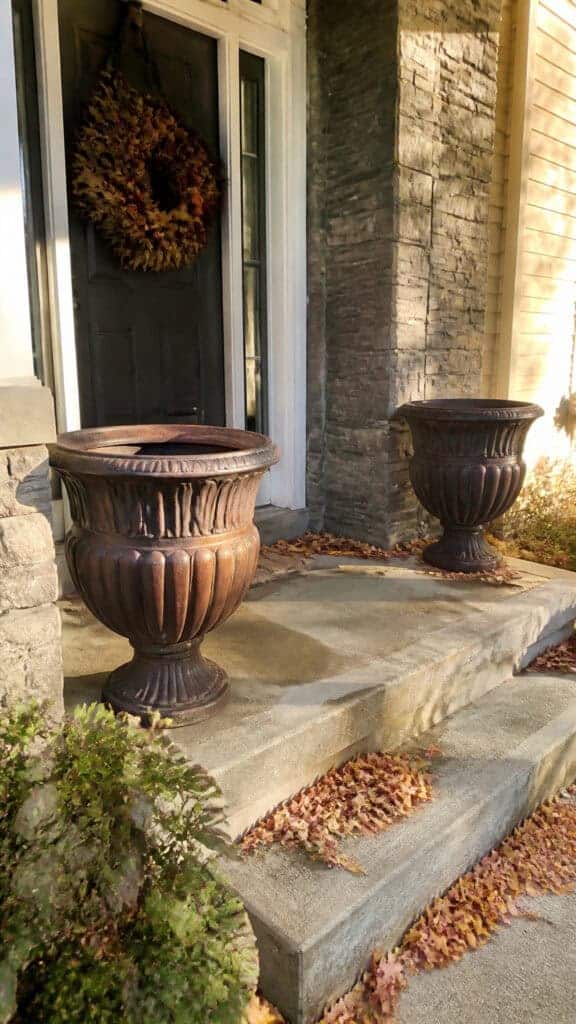
The foundation of any great fall porch display starts with selecting the right containers! I’ve learned through trial and error that not all urns are created equal, and picking the right ones can make your decorating journey so much easier.
Size really does matter when it comes to urns! For a standard front porch, I recommend going with urns that are at least 16-20 inches in diameter. Anything smaller tends to look a bit lost, especially if you have a larger porch or entryway. I personally love using a matching pair of urns flanking our front door – it creates such a beautiful, symmetrical look that feels both classic and welcoming!
Material-wise, you have tons of options! Ceramic and glazed pottery urns are absolutely gorgeous and come in beautiful autumn colors like deep burgundy, burnt orange, and rich chocolate brown. However, if you live in an area with unpredictable fall weather (hello, surprise cold snaps!), consider resin or fiberglass urns that can withstand temperature changes without cracking. I learned this lesson the hard way after my favorite ceramic urn cracked during an early freeze!
Don’t forget about color coordination! While traditional terracotta is always a winner, I’ve fallen in love with urns in unexpected colors. Navy blue urns look incredible with orange and yellow fall flowers, and black urns create a sophisticated backdrop that makes your colorful plants really pop. The key is choosing colors that complement your home’s exterior and existing decor!
Best Plants and Flowers for Fall Urns
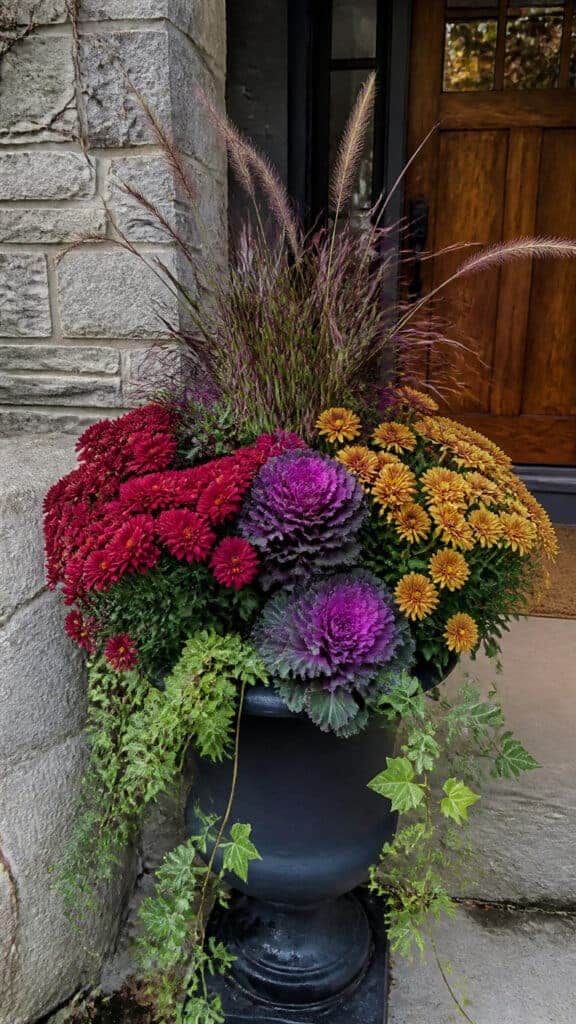
Now comes the fun part – filling those urns with gorgeous plants! The secret to creating fall urns for front porch displays that last all season is choosing hardy plants that can handle cooler temperatures and even a light frost.
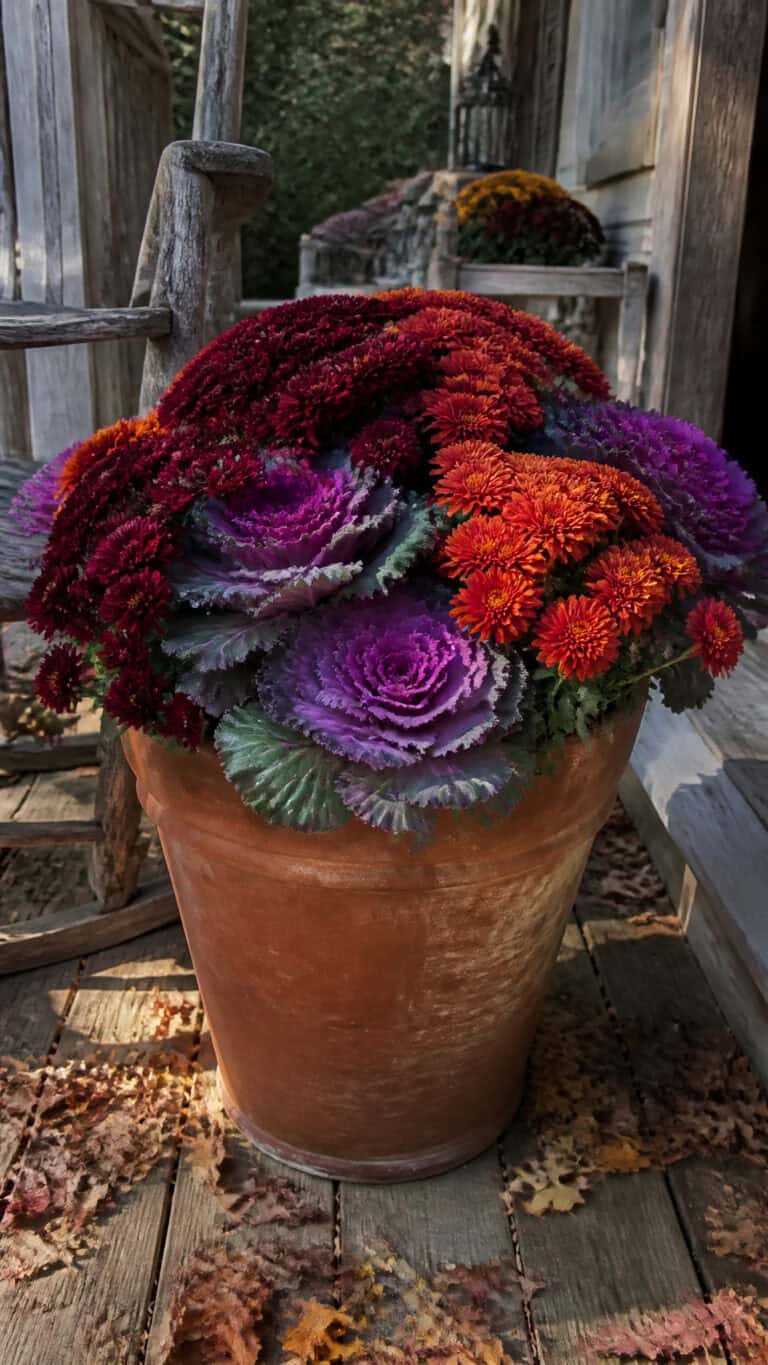
Mums are absolutely the superstars of fall container gardening! These beauties come in every autumn shade imaginable – burgundy, gold, orange, bronze, and even white. I always pick up several mums in different colors and use them as my main focal point. Pro tip: buy them when they’re still mostly in bud form, and they’ll bloom for weeks on your porch!
Ornamental kale and cabbage are my secret weapons for adding texture and lasting power! These plants actually get MORE beautiful as the weather cools down, and they can survive temperatures well below freezing. The purple and white varieties are stunning, and they add this gorgeous, almost rose-like texture to your arrangements. Plus, they keep looking great even after your mums have faded!
Don’t sleep on pansies and violas! These little charmers are surprisingly cold-hardy and add pops of color in places where you need them. I love tucking them around the edges of my urns to soften the look and add variety. They come in fall-appropriate colors like deep purple, golden yellow, and rich orange.
For height and drama, consider adding ornamental grasses or tall plants like Purple Fountain Grass or decorative millet. These add movement and visual interest, especially on windy fall days! I typically place one tall element in the back or center of each urn, then build around it with fuller plants like mums.
Incorporating Pumpkins and Gourds Into Your Urn Design
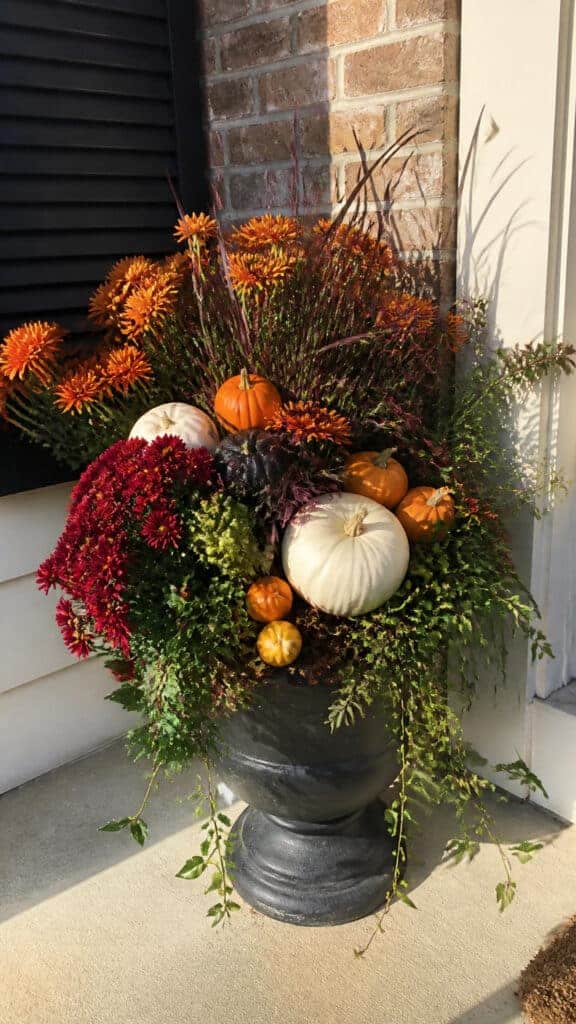
Let’s talk about the quintessential fall element – pumpkins and gourds! These aren’t just for sitting on your porch steps anymore. Incorporating them directly into your fall urns for front porch arrangements adds instant autumn charm and creates a cohesive, magazine-worthy look!
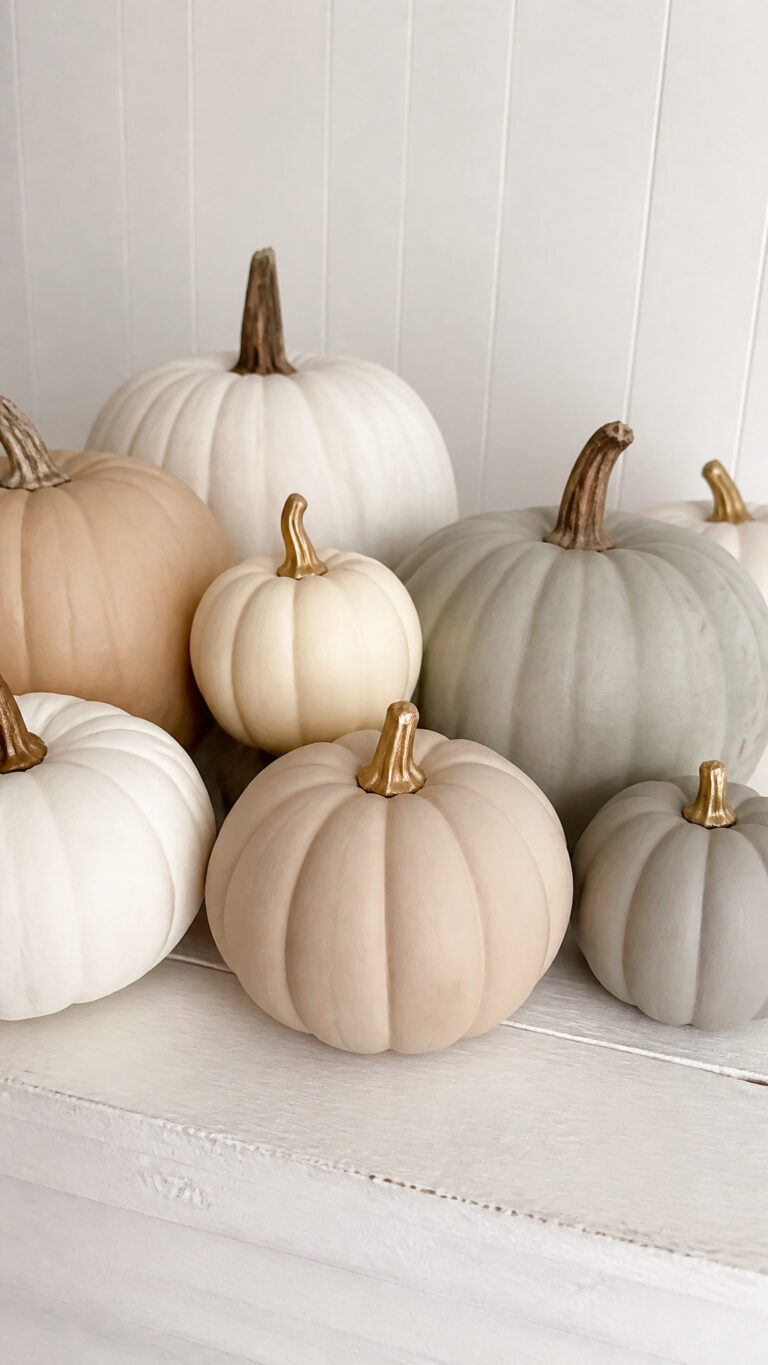
One of my favorite tricks is to use small to medium-sized pumpkins right in the soil of the urn arrangement! I nestle them between the plants, almost like they’re growing there naturally. White pumpkins look incredibly chic mixed with traditional orange mums, and those gorgeous blue-green heirloom varieties (like Jarrahdale pumpkins) create such a unique, unexpected color palette!
Gourds are perfect for adding whimsy and texture! The bumpy, warty varieties might not win any beauty contests, but they add so much character to an arrangement. I love using a mix of different gourd shapes and sizes – some smooth, some bumpy, some striped. Tuck them in at different heights throughout your urn for visual interest.
Here’s a genius tip I picked up: use floral picks or sturdy sticks to elevate smaller pumpkins and gourds within your arrangement! This creates different levels and prevents everything from looking flat. Just push a wooden skewer or floral pick into the bottom of a small pumpkin, then stick it into the soil wherever you want a pop of pumpkin perfection!
Don’t forget about mini pumpkins! These little cuties are perfect for filling in gaps and adding extra color. I buy bags of them at the grocery store and distribute them throughout my urns. As a bonus, when the boys want to play with pumpkins (which is constantly!), I can easily replace any that get “borrowed” for their games!
Adding Texture With Seasonal Fillers and Foliage
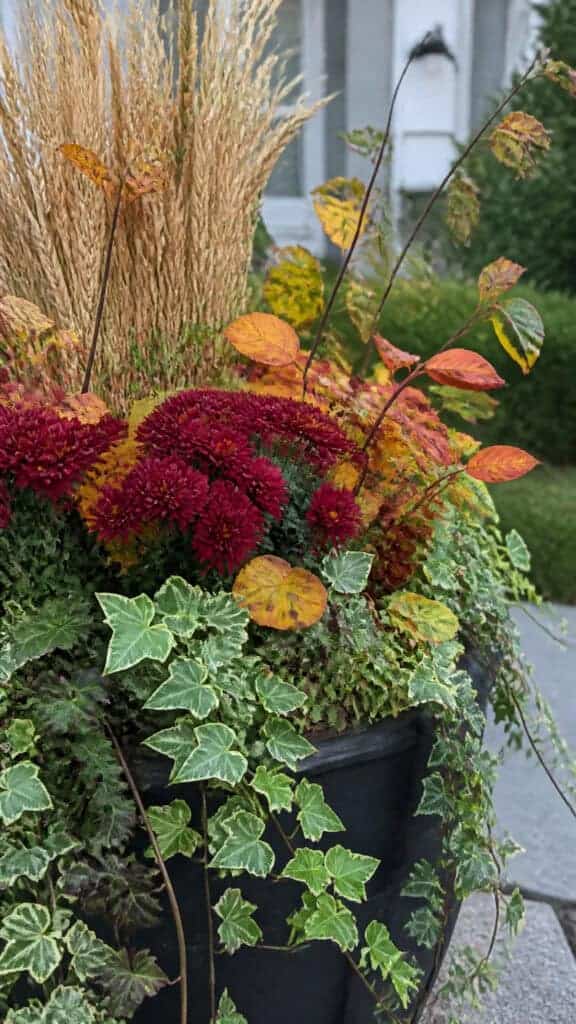
The difference between a good fall urn and an absolutely stunning one often comes down to the fillers and foliage you choose! These elements add depth, texture, and that professional designer touch that makes people stop and ask where you got your arrangements done!
Trailing plants are essential for softening the edges of your urns and creating that lush, overflowing look! My go-to choices include English ivy (which stays green even through frost), sweet potato vine in chartreuse or purple, and creeping Jenny. These cascade beautifully over the rim of the urn and add movement to the overall design. I always plant several trailing elements around the perimeter of each urn!
Dried and natural elements bring in that rustic, harvest-time feel! Wheat stalks, dried corn stalks, and bundles of dried grasses add height and a wonderful texture contrast to your softer flowers. I like to stick several stalks in the back of my urns to create a backdrop. You can usually find these at craft stores or farmers markets, and they’re super affordable!
Branches and twigs are seriously underrated! I send my boys on “stick collection missions” in our backyard (which they think is the best job ever!), and we use interesting branches to add architectural interest to our urns. Curly willow branches are particularly gorgeous, and birch branches add a beautiful white accent. In late fall, I love adding branches with berries still attached – they bring in natural color and attract pretty birds to our porch!
Don’t forget about colorful fall foliage! Branches with autumn leaves in reds, oranges, and yellows can be stuck right into your urn arrangement. They’re free if you have deciduous trees in your yard, and they add instant fall vibes! Just remember to replace them as they dry out and lose their color throughout the season.
Styling Tips for Maximum Curb Appeal
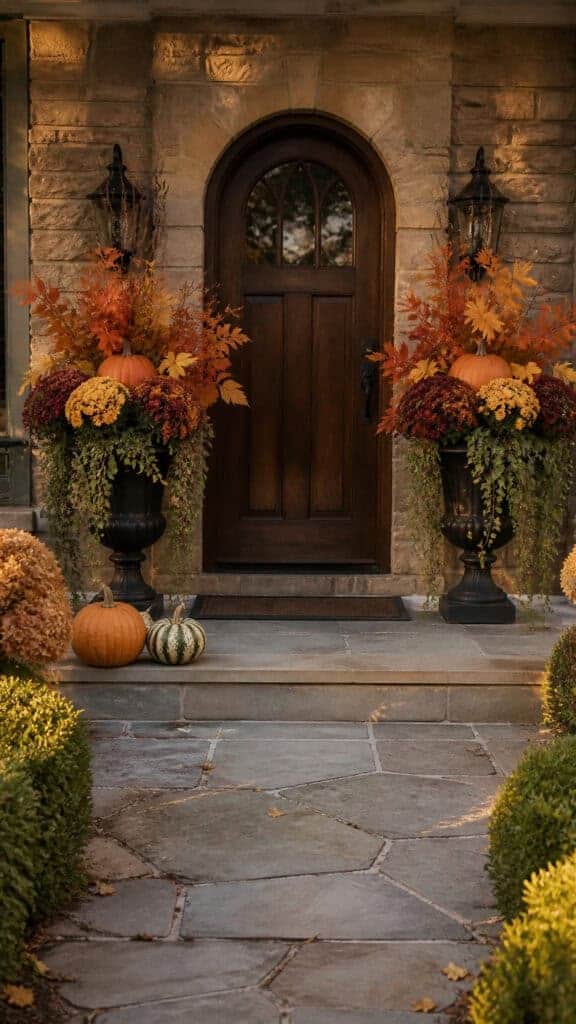
Creating beautiful fall urns for front porch displays is one thing, but styling them for maximum impact is where the magic really happens! Let me share the tricks I’ve learned that take arrangements from pretty to absolutely show-stopping!
The rule of threes is your best friend! When arranging plants in your urn, use odd numbers – three mums instead of two, five small pumpkins instead of four. There’s something about odd numbers that’s more visually pleasing to the eye. I also like to vary the heights, creating a “thriller, filler, spiller” effect with tall plants in back, full plants in the middle, and trailing plants around the edges!
Consider your viewing angle! Most people will see your urns from the front as they approach your door, so make sure that side is your best side! I arrange the prettiest blooms and most colorful elements facing forward, while the back can be a bit simpler. If your urns are visible from the street, though, you’ll want them to look good from all angles!
Symmetry creates a sense of calm and elegance! If you’re using two urns flanking your door, try to mirror the arrangements. They don’t have to be absolutely identical (and honestly, that’s nearly impossible with natural materials!), but they should be balanced in terms of height, color, and fullness. I take photos of my first urn from multiple angles to help me recreate it in the second one!
Layer your elements thoughtfully! Start with your largest plants and work your way to smaller accents. I begin by placing my tall grasses or stalks in the back, then add my mums and kale in the middle section, nestle in pumpkins and gourds, and finish by tucking trailing plants around the edges. This layering creates depth and makes your arrangement look full and lush!
Don’t forget the finishing touches! A beautiful ribbon bow in fall colors, a decorative pick with a scarecrow or fall saying, or even some battery-operated fairy lights can add that extra special something. Just keep it tasteful – you want to enhance your beautiful plants, not overshadow them!
Maintaining Your Fall Urns Throughout the Season
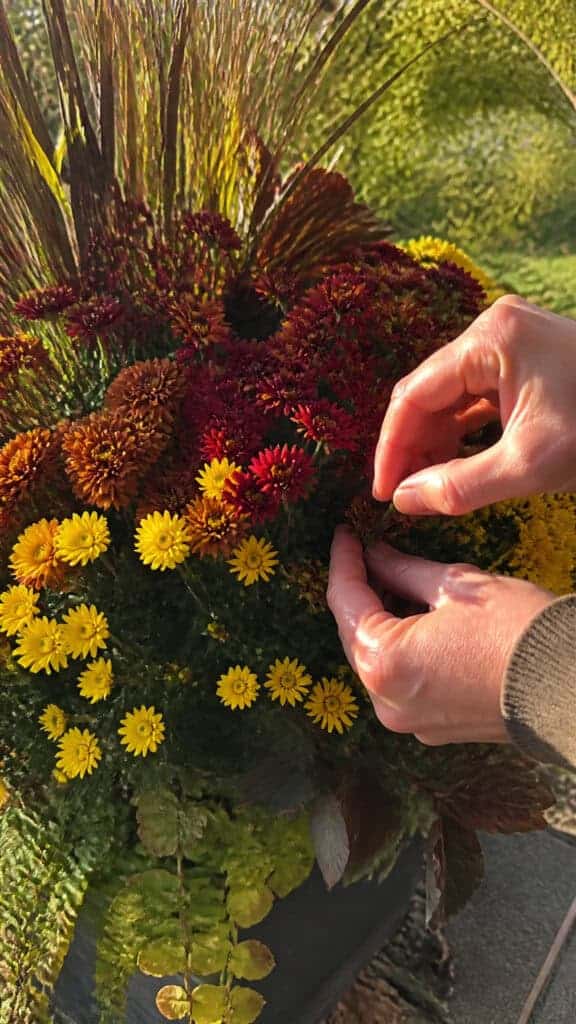
Okay, here’s the real talk – creating gorgeous fall urns for front porch decorating is wonderful, but keeping them looking fabulous all season long requires a little bit of maintenance! The good news is that it’s way easier than you might think, and totally doable even with three little ones running around!
Watering is crucial, especially early in the fall when temperatures can still be quite warm! I check my urns every couple of days by sticking my finger about an inch into the soil. If it feels dry, it’s time to water. Fall plants generally need less water than summer flowers, but they still need consistent moisture. I’ve found that early morning watering works best – it gives plants time to absorb what they need before cooler evening temperatures set in!
Deadheading makes such a difference in keeping your mums blooming! Every few days, I take a couple of minutes to pinch off spent blooms. This encourages the plant to produce more flowers instead of setting seed. It’s actually kind of therapeutic, and sometimes I recruit my oldest son to help (he thinks he’s a “flower doctor” when he does this!).
Refresh elements as needed throughout the season! Pumpkins and gourds can get soft or moldy, especially if we get a lot of rain. I keep extras on hand and swap them out when necessary. Similarly, if a plant looks tired or gets damaged by an unexpected freeze, don’t hesitate to replace it! A few fresh mums in late October can breathe new life into your arrangement.
Protect your urns during extreme weather! If a hard freeze is coming and you have tender plants, throw a light sheet or frost cloth over your urns overnight. For heavy rain or wind, I sometimes move smaller urns closer to the house or under an overhang. It’s a bit of extra work, but it helps your beautiful arrangements last much longer!
As the season progresses into late fall, embrace the natural changes! Some plants will fade, leaves will drop, and that’s okay! You can transition your urns into early winter displays by removing spent flowers and adding evergreen branches, pinecones, and winter berries. This way, your urns continue to look intentional and lovely even as autumn turns to winter!
Budget-Friendly Ideas for Stunning Fall Urns
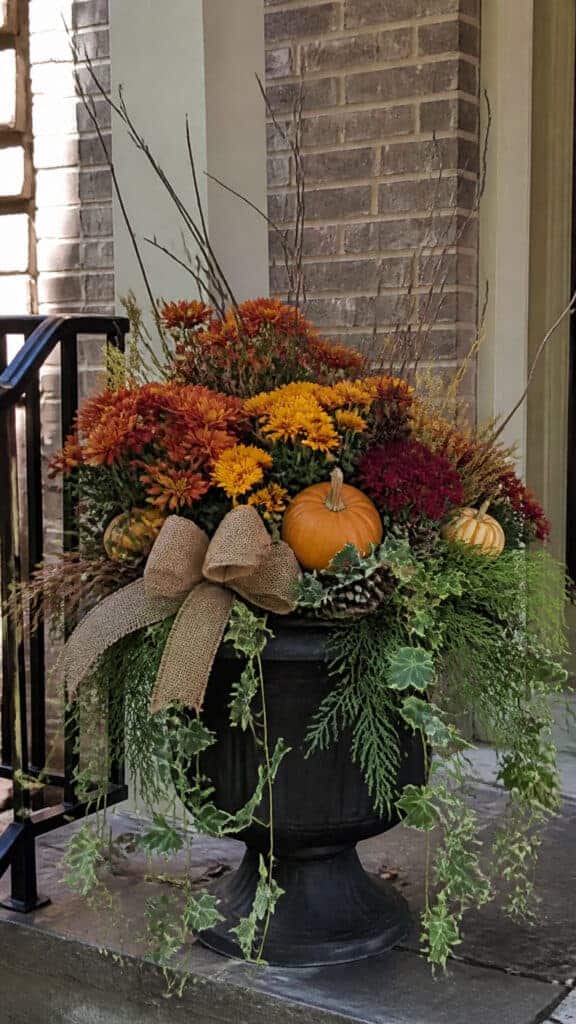
Let’s be real – with three boys to feed, clothe, and keep in shoes that fit for more than five minutes, I’m always looking for ways to create beautiful fall urns for front porch displays without breaking the bank! The good news is that you absolutely can create gorgeous arrangements on a budget!
Shop smart and shop early! I’ve learned that buying mums and fall plants in early September, before the peak demand, often means better prices and healthier plants. Many garden centers also have sales in mid-October when they’re trying to clear inventory. I stock up on plants marked down and use them to refresh my urns or create additional arrangements!
Use what you already have! Before buying anything new, I take inventory of what’s in my garage, basement, and yard. Old urns from previous years, containers that could work as urns, branches and foliage from our trees – all of these are free resources! I’ve even used large terracotta pots turned upside down as pedestals to elevate smaller urns and create more visual impact!
DIY your decorative elements! Instead of buying expensive floral picks and decorations, we make our own! The boys and I collect pinecones, interesting branches, and colorful leaves on our nature walks. We’ve even made our own scarecrow decorations from burlap and twine. These homemade touches add personality and cost next to nothing!
Focus on fewer, larger arrangements rather than many small ones! Two substantial urns flanking your door make a bigger impact than several small arrangements scattered around. I invest in making those two urns absolutely gorgeous, and they become the focal point of my entire fall porch decor!
Extend the life of your investment! The plants you use in your fall urns can often be transplanted into your garden after the season ends. Mums, ornamental kale, and many perennials will survive winter in the ground and come back next year! This means you’re not just decorating – you’re actually investing in your landscape!
Bringing It All Together
Creating beautiful fall urns for front porch decorating has become one of my favorite autumn traditions! There’s something so satisfying about stepping back and admiring those gorgeous arrangements, knowing that I created them with my own hands (and with a little “help” from my boys, who mostly just want to play with the pumpkins!). The welcoming atmosphere they create makes coming home feel extra special during this cozy season!
Remember, there’s no single right way to create fall urns – the best arrangement is the one that makes you smile every time you see it! Don’t be afraid to experiment with different colors, textures, and combinations until you find your signature style. Whether you go for classic autumn colors or try something unexpected, your front porch will radiate seasonal charm and welcome everyone who visits. Now grab those urns and let’s make this fall the most beautiful one yet!
This post may contain affiliate links. Read the full disclosure here.