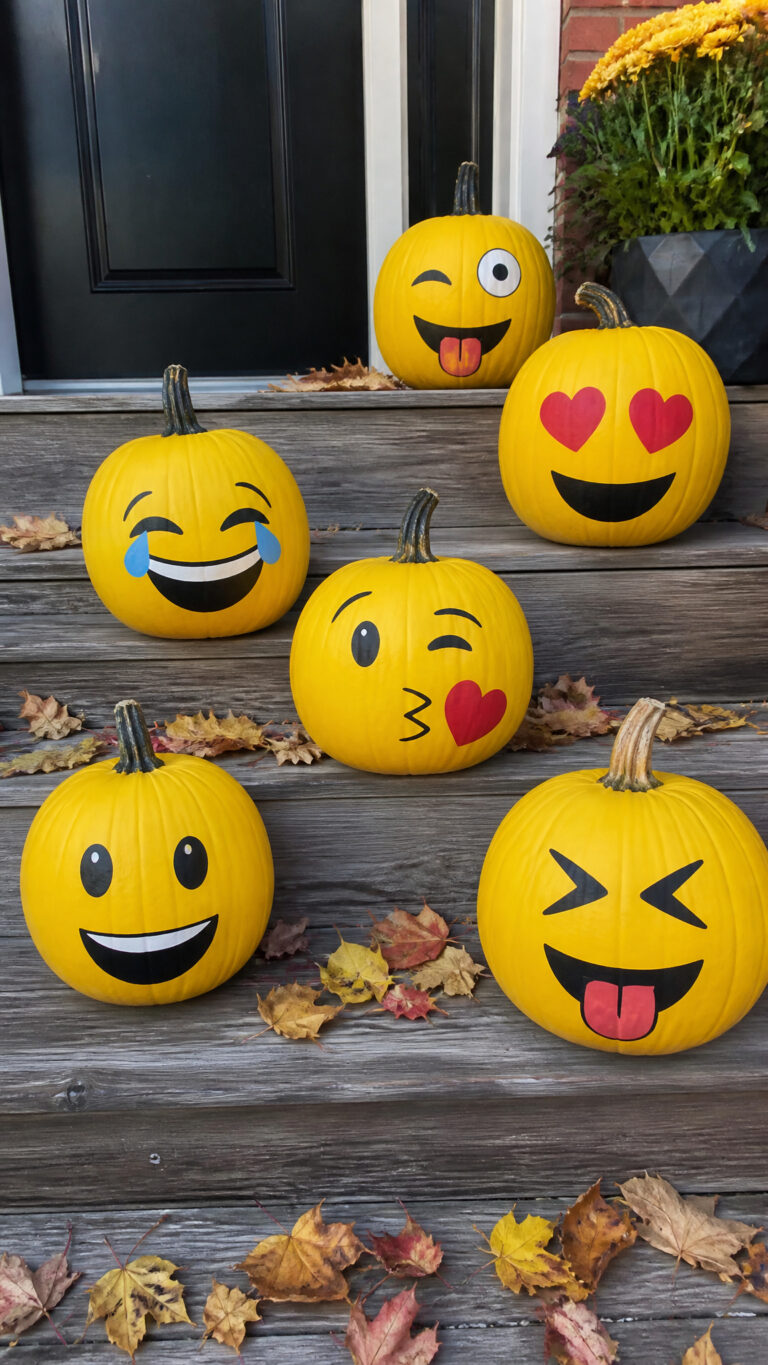
Fall is here and that means pumpkins are taking over every corner of my house! With three energetic boys constantly looking for something fun to do, I’ve discovered that painting pumpkins is an absolute game-changer. No sharp knives, no gooey mess to clean up, and the best part? These beauties last way longer than carved jack-o-lanterns!
Whether you’re looking for a rainy afternoon activity or want to create gorgeous
Classic Polka Dot Pumpkins
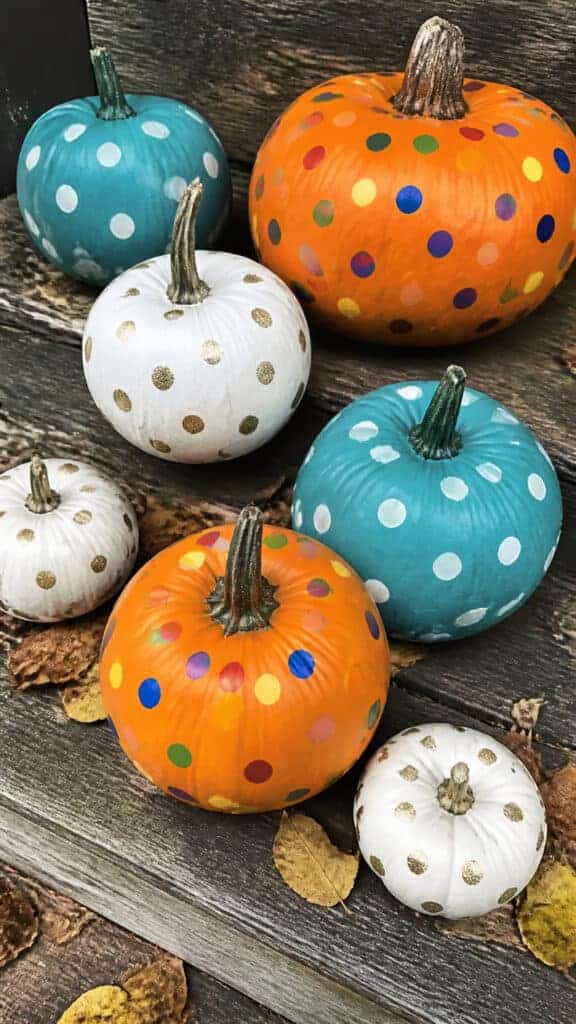
Let me tell you, polka dots are my absolute favorite go-to pattern because they’re practically impossible to mess up! I learned this trick when my middle son was going through his “I want to help with everything” phase, and it turned out to be the perfect solution for all skill levels.
All you need is a base coat of acrylic paint in whatever color makes your heart happy. I usually go with white, gold, or even a fun teal to mix things up from traditional orange. Once that dries (which takes about an hour if you’re impatient like me), grab a pencil eraser, the end of a paintbrush, or even a cotton swab to create your dots!
Here’s my mom hack: use a small paper plate as your paint palette and just dip your tool directly into the paint. The boys love this part because they can make random patterns or neat rows – there’s literally no wrong way to do it! For extra pizzazz, try using metallic paints or even adding dots in multiple colors. We’ve done rainbow dots, ombre effects going from light to dark, and even polka dots in different sizes for added visual interest.
The cleanup is minimal, and these pumpkins look absolutely adorable clustered together on your porch or as a centerpiece on your dining table. Plus, they photograph beautifully for those fall family photos we all try to get!
Drip Paint Pumpkins for a Modern Look
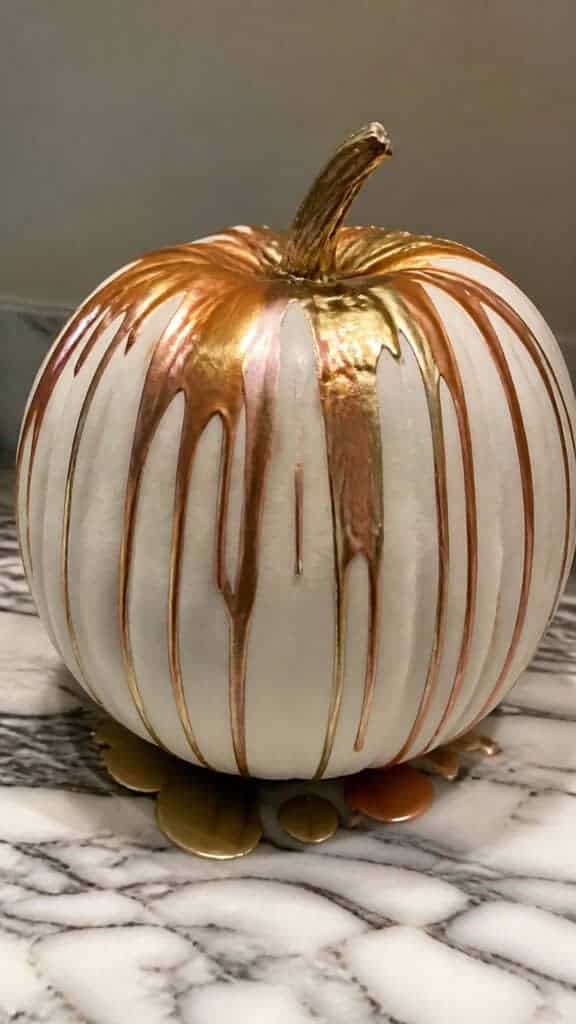
Okay, this one sounds fancy but I’m going to let you in on a secret – it’s actually one of the easiest pumpkin painting ideas ever! My boys think this technique is absolutely hilarious because it involves letting paint drip down the sides, which feels delightfully messy even though it’s totally controlled.
Start by placing your pumpkin on a protected surface (I use an old cardboard box because I’m all about easy cleanup). Then simply pour or squeeze acrylic paint right on top of the pumpkin and let gravity do the work! The paint will naturally drip down the sides creating these gorgeous, artistic streaks.
You can use one color for a dramatic monochromatic look, or go wild with multiple colors. We’ve done black and white for a chic look, fall colors like burgundy and gold for traditional vibes, and even neon colors when the boys wanted something “super cool” for their rooms. The trick is to not overthink it – the more random and organic, the better it looks!
For thicker paint that doesn’t drip as quickly, add a tiny bit of water to thin it out. If you want faster drips, use more water or choose naturally thinner paints. And here’s a bonus tip: you can use squeeze bottles (like old condiment bottles) for more control, which is perfect if you want specific drip patterns. This project is messy in the best way possible, and the end result looks like something from a trendy boutique!
Painted Animal Face Pumpkins
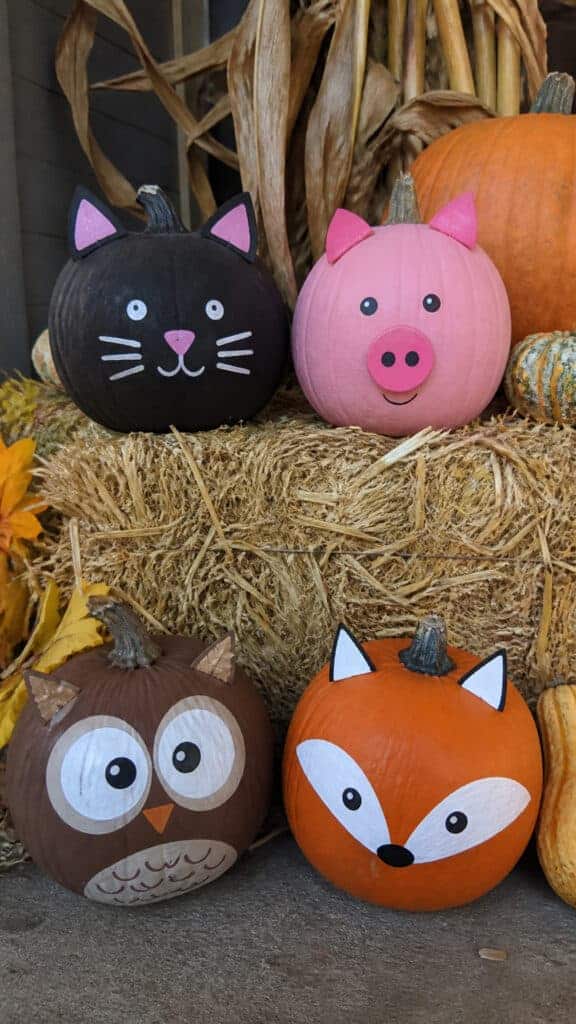
My youngest absolutely adores animals, so these painted critter pumpkins have been a huge hit in our house! The best part about this idea is that you don’t need to be an artist – simple shapes and basic features are all it takes to create adorable animal faces.
For a basic cat face, paint your pumpkin black and add white eyes, a pink triangle nose, and some whiskers with a thin brush or paint pen. For a pig, use pink paint all over and add a darker pink circle for the snout, two dots for nostrils, and pointy ears made from felt or construction paper. Owls are super popular too – use brown or white as your base, add large circular eyes with black centers, and create a simple beak with orange or yellow paint.
We’ve also made pandas (white base with black patches around the eyes and black ears), foxes (orange with white cheeks and black nose), and even unicorns with a painted horn and some sparkly accents. The boys love choosing which animals they want to create, and I love that we can make an entire pumpkin patch full of different creatures!
Here’s my trick for making this even easier: use a pencil to lightly sketch the features before painting, or print out a simple animal face template to use as a guide. Paint pens work wonderfully for details like whiskers, spots, or small features because they give you more control than a brush. These animal pumpkins are perfect for younger kids who might get frustrated with more complex designs!
Ombre and Color Block Designs
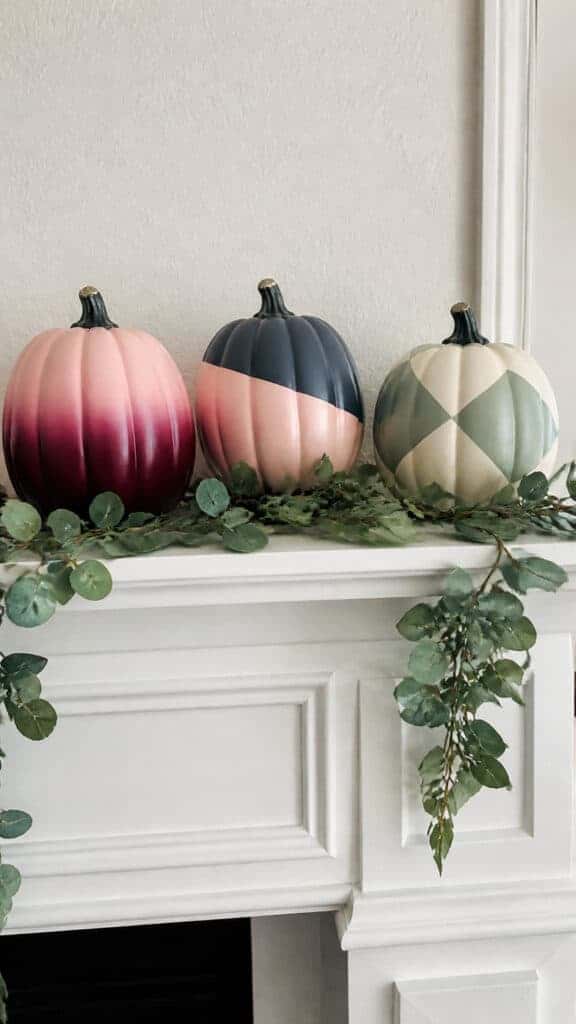
If you want something that looks super sophisticated but is actually ridiculously easy, ombre and color block pumpkins are where it’s at! I started doing these when I wanted
For an ombre effect, choose two or three colors in the same family – like light pink to hot pink to burgundy, or cream to peach to burnt orange. Paint the top section of your pumpkin with the lightest color, the bottom with the darkest, and the middle section with your medium shade. While the paint is still slightly wet, use a dry brush to blend where the colors meet, creating that gorgeous gradual transition.
Color blocking is even simpler and perfect if you’re short on time! Just divide your pumpkin into sections – halves, thirds, or quarters – and paint each section a different color. You can use painter’s tape to create super crisp lines (let each section dry completely before taping and painting the next one), or embrace a more casual look with freehand sections.
I love doing color blocked pumpkins in unexpected color combinations like navy and blush pink, sage green and cream, or even bold combinations like turquoise and coral. These easy pumpkin painting ideas are perfect for creating a cohesive look if you’re decorating for a party or want your porch decor to match your home’s color scheme. Plus, they’re modern enough that they don’t scream “Halloween” – you can keep them out through Thanksgiving!
Metallic and Glitter Pumpkins
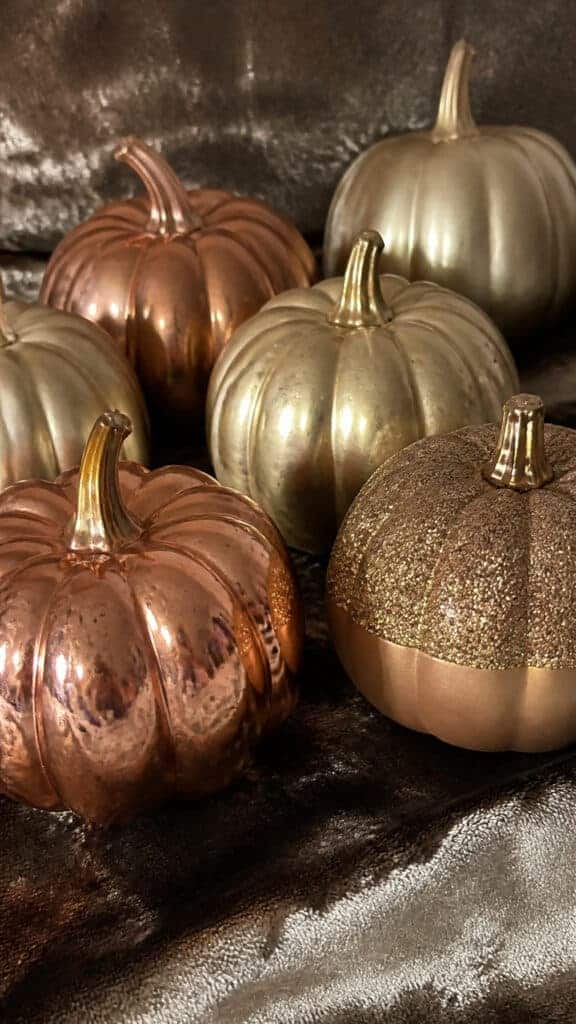
Can we talk about how glamorous metallic pumpkins are?! These are my go-to when I want something that feels fancy but requires minimal effort. The reflective quality of metallic paints just automatically makes everything look more expensive and put-together, which is exactly what this tired mama needs!
You can go full metallic by painting the entire pumpkin in gold, silver, copper, or rose gold. I usually do two coats for the best coverage, letting it dry completely between coats. The result is stunning and catches the light beautifully whether it’s on your porch or your dining table. For added dimension, try using different metallic shades on pumpkins of various sizes and grouping them together.
If you want to add glitter (and let’s be honest, who doesn’t?), there are a couple of approaches. The easiest is using glitter spray paint, which gives you sparkle without the mess of loose glitter. But if you want more glitz, paint your pumpkin with regular acrylic paint or Mod Podge, then sprinkle glitter all over while it’s still wet. Work over a large box or newspaper to catch the excess – trust me on this one!
My favorite combination is a white pumpkin with gold glitter just on the stem, or doing half the pumpkin in glitter and half in matte paint for a modern look. You can also create glitter stripes, dots, or even paint the ridges of the pumpkin with glitter for a subtle sparkle. Fair warning though: glitter gets everywhere, so maybe do this project outside or in the garage. But the end result is totally worth finding glitter in random places for the next three months!
Chalkboard Paint Pumpkins
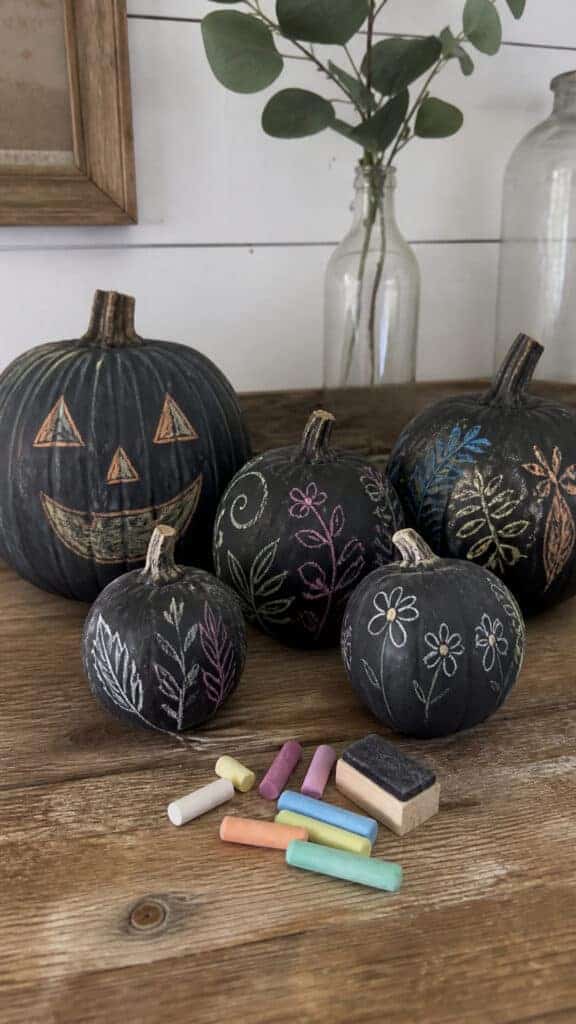
This might be my sneakiest mom win ever – pumpkins you can change whenever you want! Chalkboard paint pumpkins are fantastic because you paint them once, and then you can draw or write different things on them throughout the entire fall season. The boys love that they can keep updating their designs!
Simply paint your pumpkin with chalkboard paint (it comes in black, but also fun colors like green, blue, and even pink). Apply two or three coats, letting each one dry completely. Once the final coat is dry, you need to “season” the surface by rubbing the side of a piece of chalk all over it, then wiping it off with a dry cloth. This prevents your first real drawing from getting permanently etched into the paint.
Now comes the fun part – grab some chalk or chalk markers and go to town! Write fall quotes, draw simple designs, let the kids practice their letters, or create different faces. We’ve done countdown calendars to Halloween, gratitude lists for Thanksgiving, and the boys love drawing silly faces that they can erase and redo whenever they want.
Chalk markers give you brighter, more vibrant colors and are less messy than traditional chalk, but they’re slightly harder to erase. Regular chalk is perfect for kids because mistakes wipe away easily with a damp cloth. These pumpkins are also great for parties – use them as place cards by writing guests’ names, or as menu labels for your buffet table. The versatility of this idea makes it one of my absolute favorite easy pumpkin painting ideas!
Simple Stripe and Geometric Patterns
When I’m feeling like I want something clean and modern but don’t have a ton of time, stripes and geometric patterns are my best friends! These designs look incredibly professional but are actually some of the easiest pumpkin painting ideas to pull off, especially if you use painter’s tape.
For horizontal stripes, wrap painter’s tape around your pumpkin at whatever width you want your stripes to be. Press down the edges really well (this is important for crisp lines!), then paint the exposed sections. You can do alternating colors, rainbow stripes, or even varying widths for visual interest. Once the paint is completely dry, carefully peel off the tape to reveal perfect stripes!
Vertical stripes follow the same process but run from stem to bottom. These are great because they follow the natural ridges of the pumpkin. For a fun twist, try diagonal stripes or even a chevron pattern using tape to create the angles. The boys think it’s like magic when we peel off the tape and reveal the clean lines underneath!
Geometric patterns like triangles, hexagons, or abstract shapes are also super easy. You can either use tape to create the shapes, or freehand them with a pencil first and then paint inside the lines. Don’t worry about being perfectly precise – slightly imperfect geometric patterns actually look more artistic and handmade in the best way possible! Try mixing different shapes on one pumpkin, or keep it simple with just triangles scattered randomly across the surface. These modern designs are perfect if your home decor is more contemporary and you want pumpkins that fit your style!
Time to Get Painting!
See? I told you these easy pumpkin painting ideas were totally doable! The best part about painted pumpkins is that they last so much longer than carved ones, they’re safer for little hands, and honestly, the cleanup is way easier than dealing with pumpkin guts. Plus, you can start decorating earlier in the season and enjoy your creations for weeks!
Whether you try the simple polka dots, get fancy with metallics, or let the kids go wild with chalkboard paint, I guarantee you’ll end up with pumpkins you’re proud to display. So grab some paint, protect your surfaces, and have fun creating! And remember – there are no mistakes in pumpkin painting, only happy accidents that make your creations uniquely yours. Now if you’ll excuse me, I need to go stop my youngest from painting the dog. Happy fall, friends!
This post may contain affiliate links. Read the full disclosure here.