Pumpkin painting contests are one of my absolute favorite fall activities! There’s something so magical about transforming plain orange pumpkins into works of art, and with three energetic boys constantly bouncing around my house, I’ve learned that painting is way less messy than carving (and much safer for little fingers!).
If you’re planning to enter a pumpkin painting contest this season or just want to create something spectacular for your front porch, I’ve rounded up nine incredible pumpkin painting contest ideas that are guaranteed to turn heads! These designs range from simple enough for kids to tackle to more elaborate projects that’ll keep you happily painting during naptime. Let’s dive into these showstopping ideas!
Galaxy Pumpkin with Swirling Nebulas
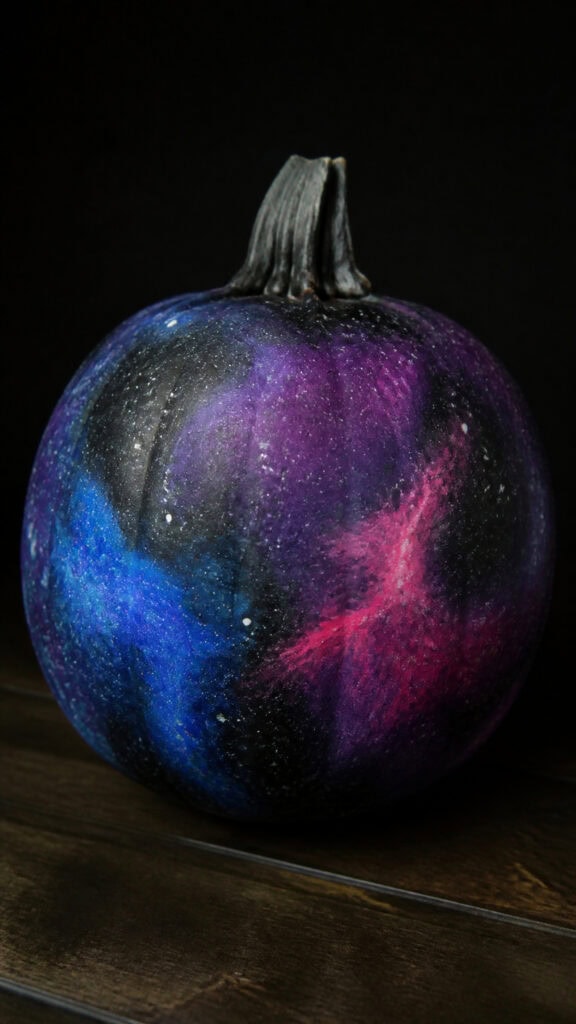
This stunning cosmic design never fails to impress judges and onlookers alike! The galaxy pumpkin features deep purples, blues, pinks, and blacks swirled together to create an otherworldly nebula effect that looks incredibly complex but is actually quite forgivable for beginners.
Start by painting your entire pumpkin black as a base coat and let it dry completely. Then, using a sponge, dab on layers of deep purple, navy blue, and magenta in random swirling patterns. The key is to blend the colors while they’re still wet, creating that dreamy, ethereal look. Once you’re happy with your nebula clouds, use a small brush or even a toothbrush to splatter white paint across the surface for stars!
My middle son absolutely loved helping with the splattering part (though we definitely had white paint specks everywhere afterward!). For extra pizzazz, add some larger stars with a fine-tipped brush and consider using glow-in-the-dark paint for the star splatters. When the lights go down at the contest, your pumpkin will literally shine! This is one of those pumpkin painting contest ideas that photographs beautifully and looks expensive and time-consuming, even though it’s surprisingly quick to create.
You can also add planets, shooting stars, or even a tiny rocket ship if you want to personalize it further. The best part about galaxy designs is that there’s no wrong way to do it – every nebula is unique!
Watermelon Slice Pumpkin
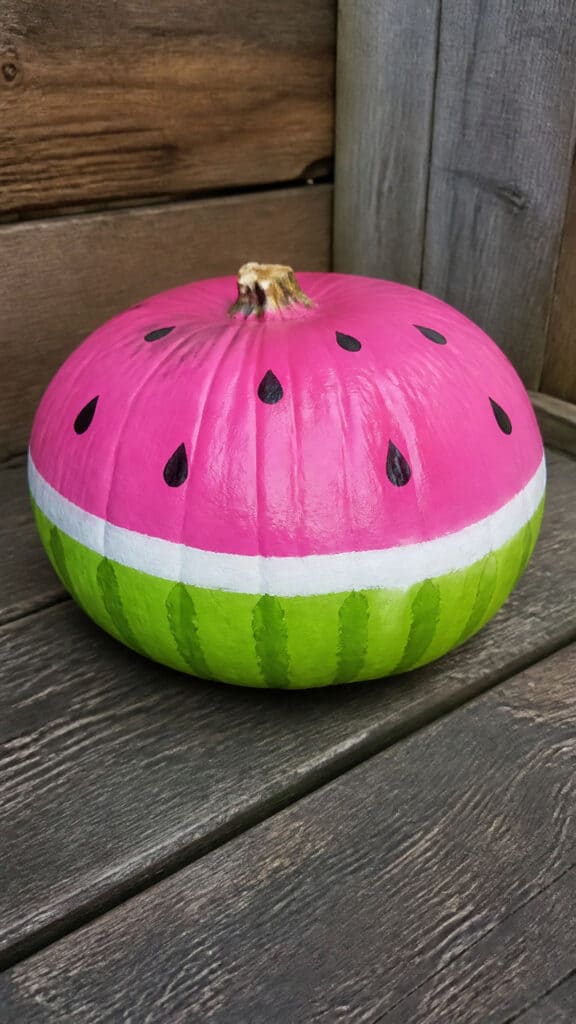
Talk about a fun twist on the traditional! This adorable watermelon pumpkin is always a crowd favorite and brings a smile to everyone’s face. It’s perfect for younger kids to help with since the design is straightforward and uses bold, bright colors.
Turn your pumpkin on its side and paint the bottom half (the part touching the ground) a vibrant lime green to represent the watermelon rind. The middle section gets painted white for that characteristic lighter green layer, and the top half becomes the juicy pink or red flesh of the watermelon. The proportions don’t have to be perfect – mine never are with three boys “helping” me!
Once your base colors are dry, use a small brush or even a black marker to add the classic black watermelon seeds scattered across the pink section. You can make them teardrop-shaped for authenticity or just do simple ovals. Some people like to add a bite mark on one side using a darker pink or red, which adds a cute, whimsical touch!
This design works especially well for round, squat pumpkins that already have that watermelon-like shape. I’ve seen people win contests with this idea because it’s so unexpected and cheerful! Plus, it’s one of those pumpkin painting contest ideas that stands out in a sea of traditional fall colors. Kids absolutely love it, and it’s become a summer-meets-fall favorite in our neighborhood.
Stacked Pumpkin Cairn Tower
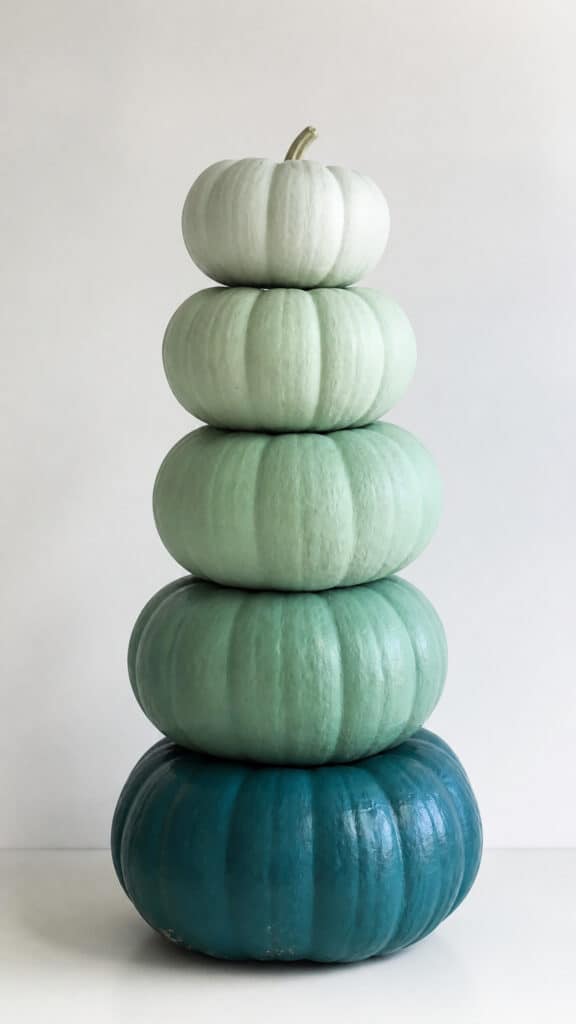
This creative concept uses multiple small pumpkins painted and stacked to create an eye-catching tower display! It’s one of those pumpkin painting contest ideas that really makes people stop and stare because it’s so different from the typical single-pumpkin entry.
Gather three to five small pumpkins of varying sizes – you want them to stack nicely from largest on the bottom to smallest on top. Paint each pumpkin in coordinating colors or patterns. I love doing an ombre effect with colors transitioning from dark to light as you go up, or you could do complementary patterns like stripes, polka dots, chevrons, and solid colors.
The key to making this work is ensuring each pumpkin has a flat bottom and flat top so they stack securely. You might need to use a bit of hot glue or museum putty between layers to keep everything stable during transport and display. My boys thought this was like building the world’s fanciest pumpkin tower, and they were so proud when it didn’t topple over!
Consider adding a theme to your tower – like painting them to look like a totem pole, a lighthouse with stripes and a yellow “light” on top, or even stacking different painted animals. The vertical design really stands out on a display table full of individual pumpkins. Just make sure to check your contest rules to see if multi-pumpkin entries are allowed! This approach definitely maximizes your creative real estate and gives you more surface area to showcase your painting skills.
Woodland Creature Face
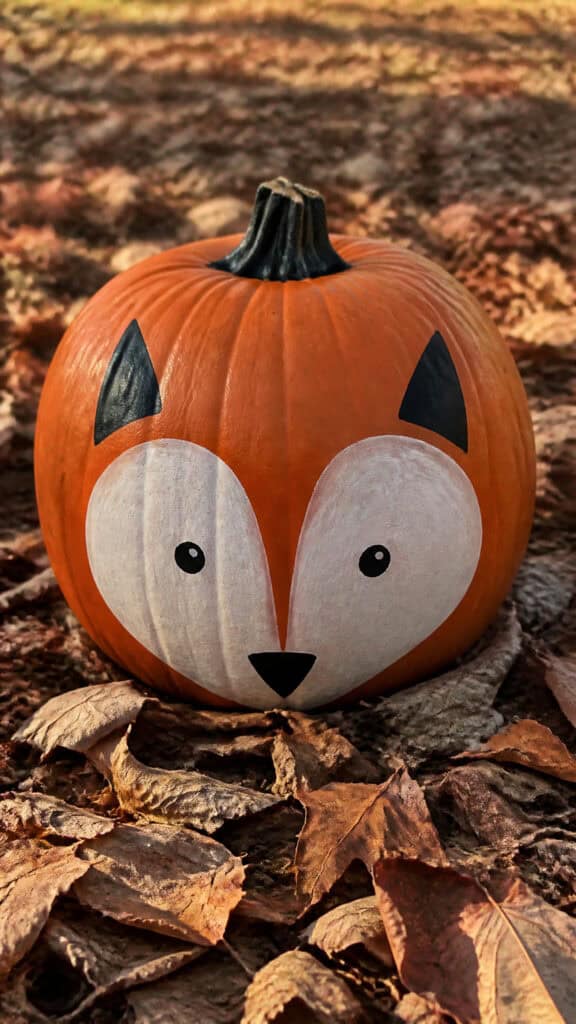
Animal faces are absolutely precious on pumpkins, and woodland creatures are especially perfect for fall! Think foxes, owls, hedgehogs, raccoons, or deer – these designs are adorable and surprisingly simple to execute, even if you don’t consider yourself particularly artistic.
For a fox design, paint the entire pumpkin orange (or leave it natural!), then add a white heart-shaped face area. Paint black nose, eyes, and ear details, and you’ve got an adorable fox face! For an owl, use browns and tans with large circular eyes and a small beak. The key is to use the natural round shape of the pumpkin to your advantage.
My youngest is obsessed with raccoons right now, so we created a raccoon pumpkin with gray paint, a white face, and that characteristic black mask around the eyes. We used the stem as a little nose, which was such a cute touch! You can also add dimensional elements like felt ears, googly eyes, or pipe cleaner whiskers if your contest allows embellishments.
These woodland creature designs work beautifully because they’re recognizable from a distance and appeal to both kids and adults. They’re also forgiving – if your lines aren’t perfect, it just adds to the handmade charm! This is definitely one of those pumpkin painting contest ideas that brings personality to your entry. Consider adding some painted leaves or acorns around the base for extra woodland vibes, or paint a little scene on the back of the pumpkin showing the creature’s forest home.
Dripping Paint Pumpkin
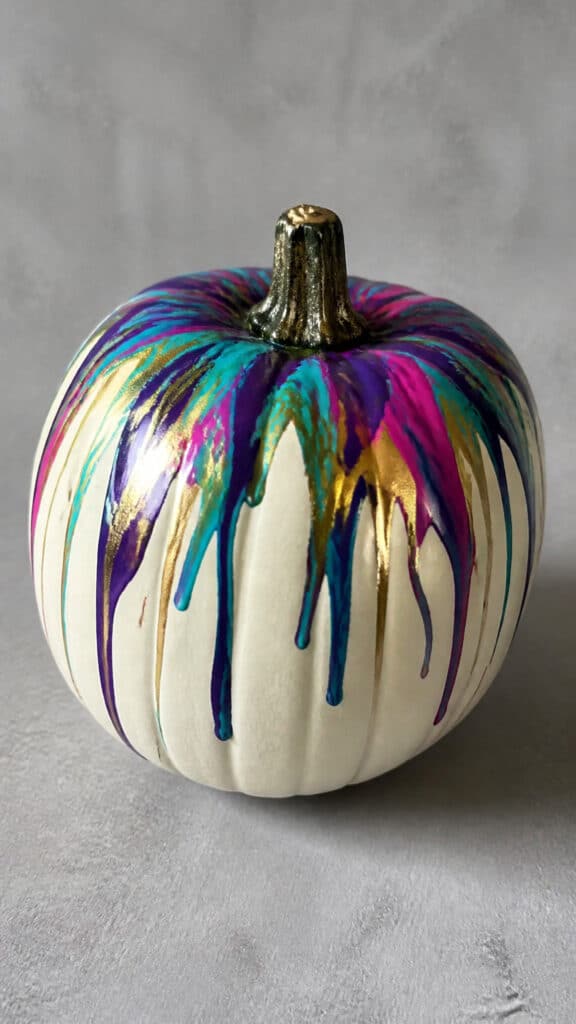
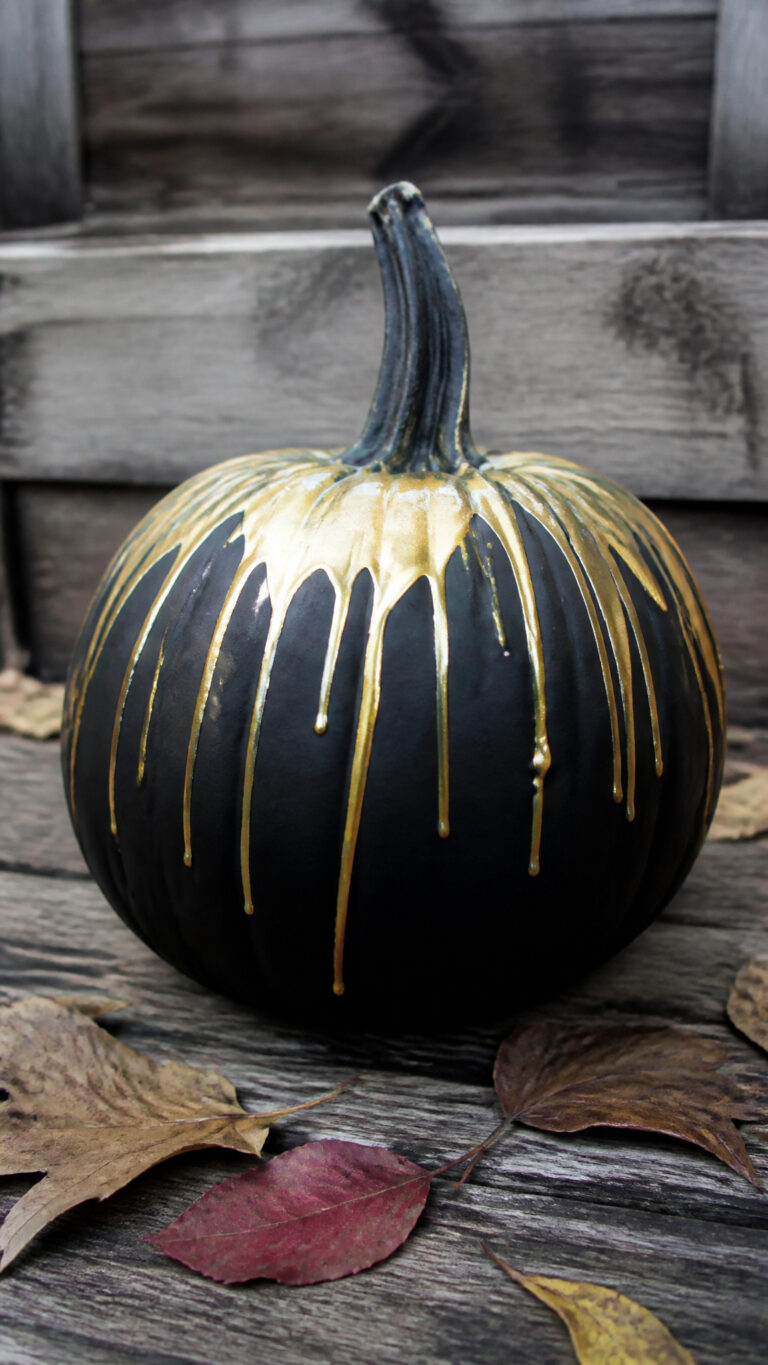
This modern, artistic design looks like you literally poured paint over your pumpkin and let it drip down the sides – because that’s exactly what you do! It’s messy, fun, and creates a unique result every single time, which my boys absolutely loved (though I definitely recommend doing this project outside!).
Start with a white or light-colored base coat on your pumpkin and let it dry completely. Then comes the fun part – choose three to five colors that coordinate well together. Jewel tones like teal, purple, and gold look amazing, or you could go with a rainbow effect. Pour small amounts of paint on the very top of the pumpkin around the stem and let gravity do the work!
The paint will naturally drip down the sides in organic, unpredictable patterns. You can rotate the pumpkin as you add different colors to ensure coverage all around, or concentrate the drips on just one side for a different effect. Some paints drip faster than others, so acrylic craft paint works well because it’s thick enough to create nice drip lines without running too quickly.
For extra visual interest, use metallic paints mixed with regular colors, or add glitter to the wet paint. You can also do multiple layers of drips – let the first layer dry, then add another round of drips in contrasting colors. This technique is super forgiving because there’s literally no way to mess it up! Every drip pattern is beautiful and unique. It’s one of those pumpkin painting contest ideas that looks professionally artistic but is actually really simple. Plus, cleanup is part of the fun when you’ve got kids who love getting messy!
Elegant Mandala Design
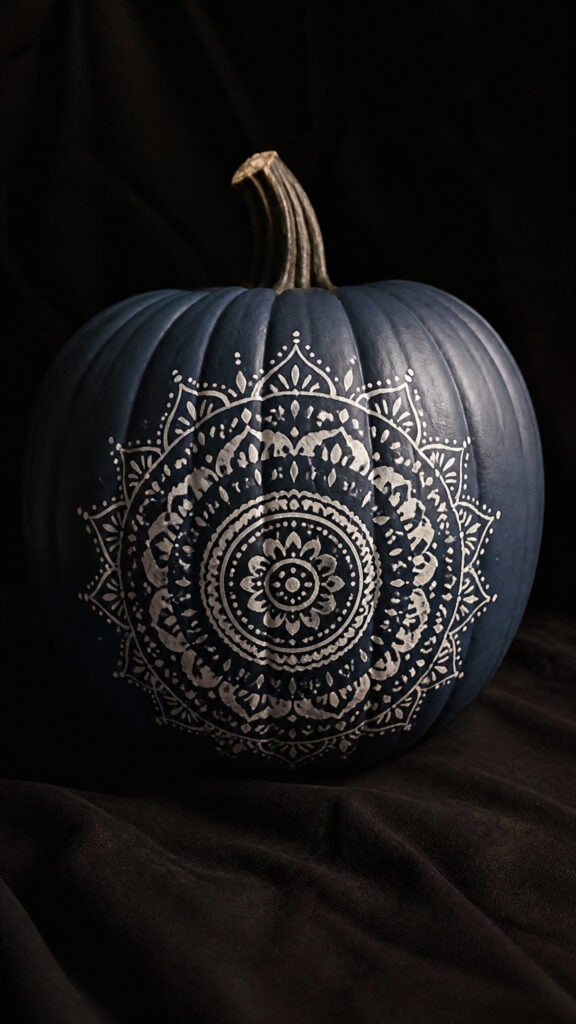
If you’re looking for something sophisticated and intricate, a mandala-painted pumpkin is absolutely stunning! These geometric, symmetrical designs look incredibly detailed and impressive, making them perfect for adult contest categories or for anyone who enjoys meditative, detailed painting.
Start by painting your pumpkin a solid base color – white, black, navy, or even metallic gold all work beautifully. Once dry, find the center point on the front of your pumpkin and use it as your anchor. You’ll build your mandala outward from this center point in concentric circles and repeating patterns. Using paint pens or fine-tipped brushes makes this much easier than regular brushes!
The beauty of mandalas is that they’re made up of repeating elements – dots, petals, leaves, lines, and geometric shapes. You don’t need to freehand everything perfectly; you can use stencils or even trace around circular objects to create your base circles. Then fill in the sections with detailed patterns. I like to sketch my design lightly with chalk or pencil first so I can adjust before committing with paint.
Popular mandala color schemes include white on black for dramatic contrast, gold on navy for elegance, or rainbow colors for a boho vibe. You can keep it simple with just a few rings of patterns or go all out with incredibly detailed designs that cover the entire front surface. This is definitely a project for when the kids are occupied elsewhere – I save this one for my peaceful evening painting sessions! Among pumpkin painting contest ideas, this one really showcases artistic skill and patience. The finished result looks like something you’d buy at a high-end boutique!
Emoji Pumpkin Collection
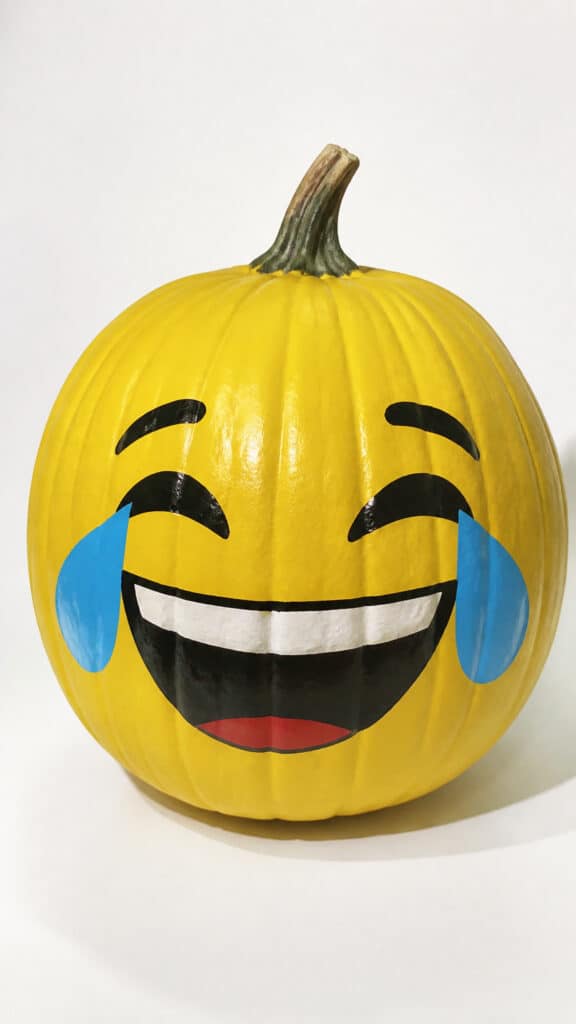
Kids go absolutely crazy for emoji pumpkins, and they’re perfect for family-friendly contests! These cheerful faces are instantly recognizable and bring so much personality to your pumpkin display. Plus, they’re simple enough that kids can really take the lead on painting them!
Paint your pumpkin a bright yellow base coat – you might need two coats for good coverage. Once dry, choose your favorite emoji expression to recreate. The laughing-crying emoji is always popular, or you could do the heart-eyes emoji, the sunglasses cool-guy emoji, or even the poop emoji if you’re feeling cheeky (my boys think that one is absolutely hilarious!).
Use black paint for the facial features, keeping the shapes simple and bold so they’re recognizable from a distance. For the heart-eyes emoji, paint the hearts in red or pink. For the sunglasses emoji, add white highlights on the lenses to make them look shiny and dimensional. You can even create a whole family of emoji pumpkins with different expressions if you’re entering a group category!
The key to making these work is keeping the features large and simple – don’t get too detailed or the emoji won’t be as immediately recognizable. These are definitely among the most fun pumpkin painting contest ideas for kids’ categories, and they always get lots of smiles and laughs from judges and viewers. You could even set up your emoji pumpkins in a row to tell a story or show a progression of emotions. So cute and so much fun to create together!
Mermaid Scale Pattern
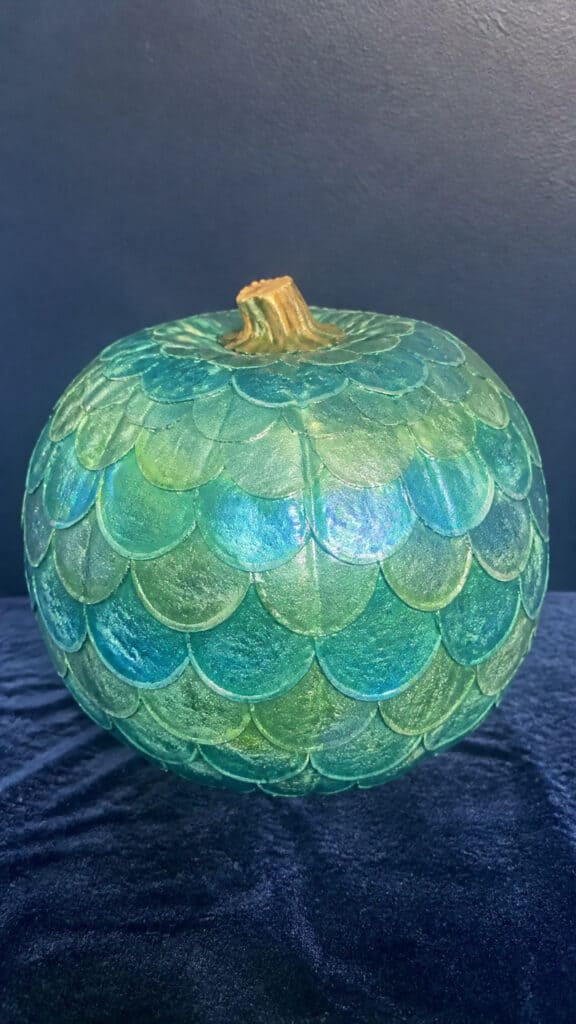
This gorgeous design has been trending everywhere, and for good reason – it’s absolutely magical! The mermaid scale pattern creates a beautiful, textured look that catches the light beautifully and looks way more complicated than it actually is to create.
Start by painting your pumpkin a base color in the lightest shade of your chosen color family – perhaps a pale aqua or soft lavender. Once dry, you’ll create the scale pattern using a scalloped edge. The easiest way to do this is to use a circular object like a bottle cap or small cup as a template. Starting at the bottom of the pumpkin, trace overlapping scallops all the way around in a row.
Move up and create another row of scallops, offsetting them so they nestle into the spaces of the row below, like shingles on a roof. Continue this pattern all the way up the pumpkin. Then comes the fun part – painting each scale! Use two or three coordinating colors (like teal, turquoise, and seafoam green) and paint the scales in a gradient or random pattern. Add a dot of metallic paint or glitter at the top of each scale for extra shimmer.
For an even more impressive effect, paint each scale with a gradient – darker at the bottom, lighter at the top. This creates amazing dimension! I won’t lie, this one takes some time and patience, but the result is so worth it. My oldest helped me paint scales while we watched a movie together, and it was such a nice bonding activity. This is one of those pumpkin painting contest ideas that photographs beautifully and looks incredibly professional. Add some pearls, shells, or starfish around the base for the complete underwater theme!
Storybook Character Portrait
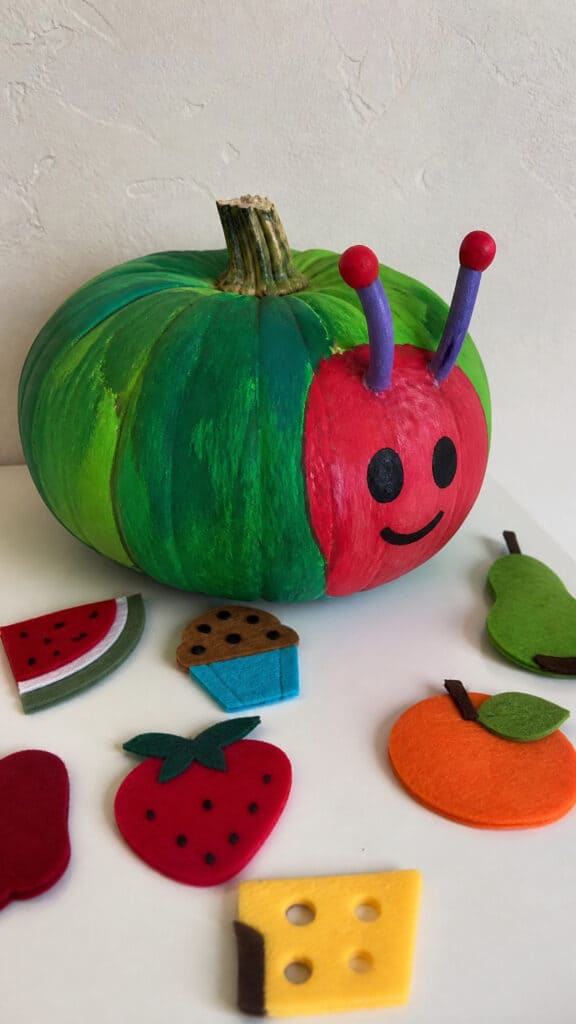
Bringing beloved storybook characters to life on pumpkins is such a sweet idea, especially if you’re entering a family or children’s contest category! Whether it’s a classic character or a current favorite, these portraits always capture hearts and bring nostalgic smiles.
Choose a character with distinctive features that will translate well to a pumpkin canvas – think characters like the Very Hungry Caterpillar, the Cat in the Hat, the Gruffalo, or even classic characters like Winnie the Pooh. The key is selecting characters with simple, bold features rather than highly detailed faces. You can paint the entire pumpkin to become the character, or create a portrait-style painting on the front.
For a Very Hungry Caterpillar pumpkin, paint the pumpkin bright green and add the characteristic red face with antennae at the top. Use the natural segments of the pumpkin to emphasize the caterpillar’s body sections! For a Cat in the Hat pumpkin, paint it white with red stripes and add the cat’s mischievous face. The vertical shape of pumpkins works perfectly for this iconic character.
My boys and I created a Gruffalo pumpkin last year with orange eyes, purple prickles (using paint, not actual prickles!), and his characteristic features. We read the book together first for inspiration, which made the painting process even more special. You could also do characters from popular series like Pete the Cat, Llama Llama, or whatever your kids are currently obsessed with! These character pumpkins are wonderful conversation starters and really showcase creativity. Among all the pumpkin painting contest ideas out there, this one lets you combine art with literacy and beloved stories, which I absolutely love as a mom!
Time to Get Painting!
There you have it – nine amazing pumpkin painting contest ideas that are sure to impress judges and make your pumpkin the star of the show! Whether you go for the cosmic beauty of a galaxy pumpkin, the whimsical charm of a woodland creature, or the intricate elegance of a mandala design, the most important thing is to have fun with the process and let your creativity shine!
I hope these ideas have inspired you to grab some paintbrushes and get creative this fall season! Remember, even if you don’t win the contest, you’ll have created something special and made wonderful memories in the process. My boys and I have painted dozens of pumpkins over the years, and honestly, the giggles and quality time together matter way more than any ribbon ever could. Now go make some pumpkin masterpieces – I can’t wait to see what you create!
This post may contain affiliate links. Read the full disclosure here.