There’s something absolutely magical about transforming your front porch into a cozy autumn wonderland, and mums are seriously the MVP of fall decorating! As a mom of three energetic boys who track leaves (and mud!) across the porch daily, I’ve learned that creating beautiful mums front porch fall displays doesn’t have to be complicated or time-consuming. These hardy, gorgeous flowers can handle whatever chaos comes their way while making your home look like it belongs on a magazine cover!
Whether you’re working with a sprawling wraparound porch or a tiny stoop like we had at our first house, mums offer endless possibilities for creating that perfect autumn welcome. I’ve spent years experimenting with different arrangements—some successes, some hilarious failures—and I’m excited to share all my favorite tricks for making your front entry absolutely stunning this fall season!
Choosing the Perfect Mums for Your Front Porch Display
Selecting the right mums is honestly the foundation of creating those gorgeous mums front porch fall displays that’ll make your neighbors do a double-take! I’ve learned through trial and error (mostly error, let’s be honest) that not all mums are created equal, and picking the right ones makes all the difference in how long your display stays beautiful.
When I’m at the garden center, I always look for mums that are still mostly in bud form rather than fully bloomed. I know it’s tempting to grab the ones that look gorgeous right now, but trust me on this! Mums with tight buds will give you weeks more of beautiful blooms. I made the mistake my first year of buying fully bloomed mums in early September, and by mid-October they looked pretty sad!
Size matters too, especially when you’re planning your overall design! I typically mix different sizes—large mums for anchor points, medium ones for filling in, and smaller ones for adding texture. The standard sizes you’ll find are:
- 8-inch pots: Perfect for smaller spaces or adding to existing arrangements
- 10-inch pots: My go-to size for most displays—substantial but manageable
- 12-inch pots: These are showstoppers! Great for flanking doorways or making a statement
- Decorative planters: Pre-arranged options that save time (lifesaver when the kids have three different activities in one evening!)
Health check is crucial! Look for mums with deep green foliage all the way to the soil line, firm stems, and no yellowing leaves. I gently squeeze the pot to make sure the root system is established but not completely root-bound. And here’s a pro tip I wish someone had told me earlier: buy your mums a week or two before you plan to display them and keep them watered in a sunny spot. This helps them acclimate and ensures they’re healthy before becoming part of your showcase!
Color Combinations That Make Your Display Pop
Okay, can we talk about color for a minute? This is where mums front porch fall displays go from nice to absolutely WOW! I used to just grab whatever mums looked pretty, throw them together, and wonder why my porch didn’t have that cohesive, designer look. Then I learned about color theory—nothing fancy, just some basic combinations that work every single time!
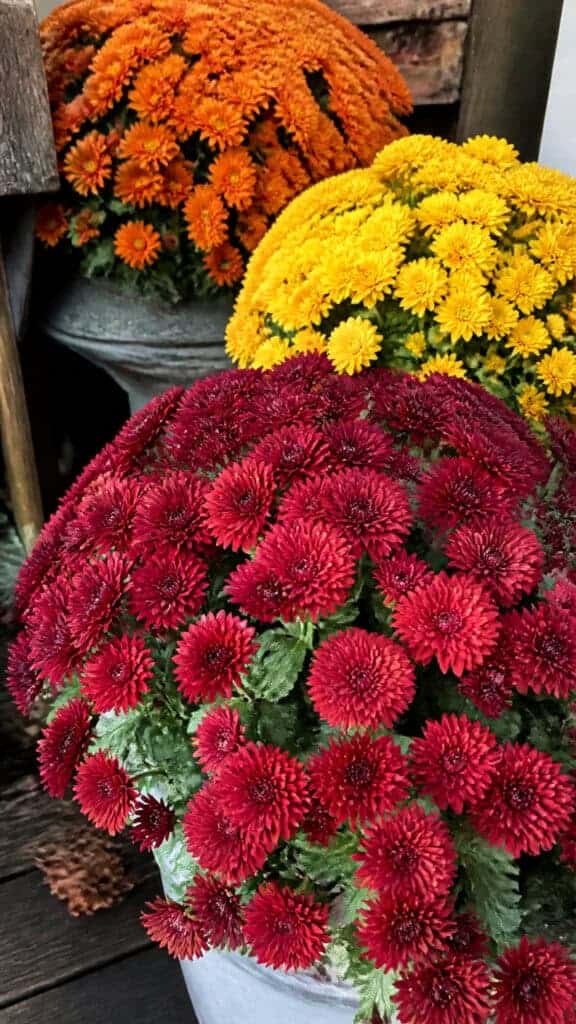
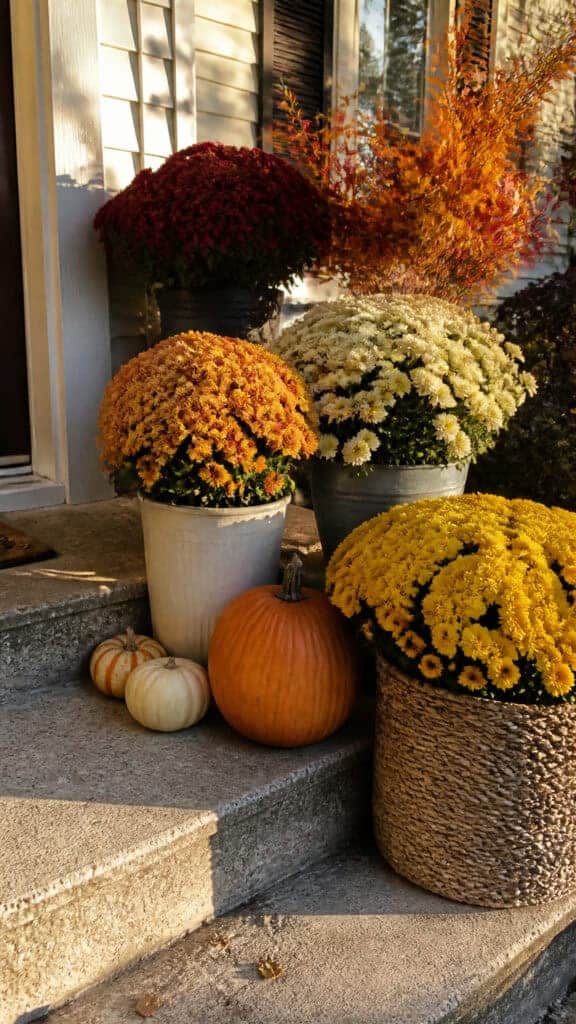
My absolute favorite approach is the classic autumn palette: deep burgundy, burnt orange, golden yellow, and maybe a pop of white or cream. This combination screams fall without being too matchy-matchy, and it works with pretty much any house color. Our house has gray siding, and these warm tones create such a beautiful contrast that even my husband (who notices approximately nothing about decor) commented on how nice it looked!
If you want to try something different, here are some stunning combinations I’ve tested:
- The Warm Sunset: Combine coral, peach, golden yellow, and cream mums for a softer, lighter take on fall that’s absolutely gorgeous in the afternoon light
- The Rich Jewel Tone: Deep purple, burgundy, and wine-colored mums with pops of bronze create a sophisticated, elegant look
- The Modern Farmhouse: Stick with white and cream mums exclusively, then add texture with pumpkins and natural elements—so chic!
- The Bold Statement: Go monochromatic with all orange or all burgundy mums in varying shades for serious visual impact
- The Unexpected Twist: Mix in some pink or lavender mums with traditional fall colors for a unique, feminine touch
Here’s my secret weapon: I always include at least one lighter color (yellow, cream, or white) in my displays because it brightens everything up and helps the darker colors really stand out. It’s like adding highlights to your hair—it just makes everything look more dimensional and interesting! And don’t be afraid to repeat colors in different areas of your porch. I usually use the same color combination in multiple spots to create that pulled-together look that makes people think you hired a professional decorator!
Creative Container Ideas Beyond Basic Pots
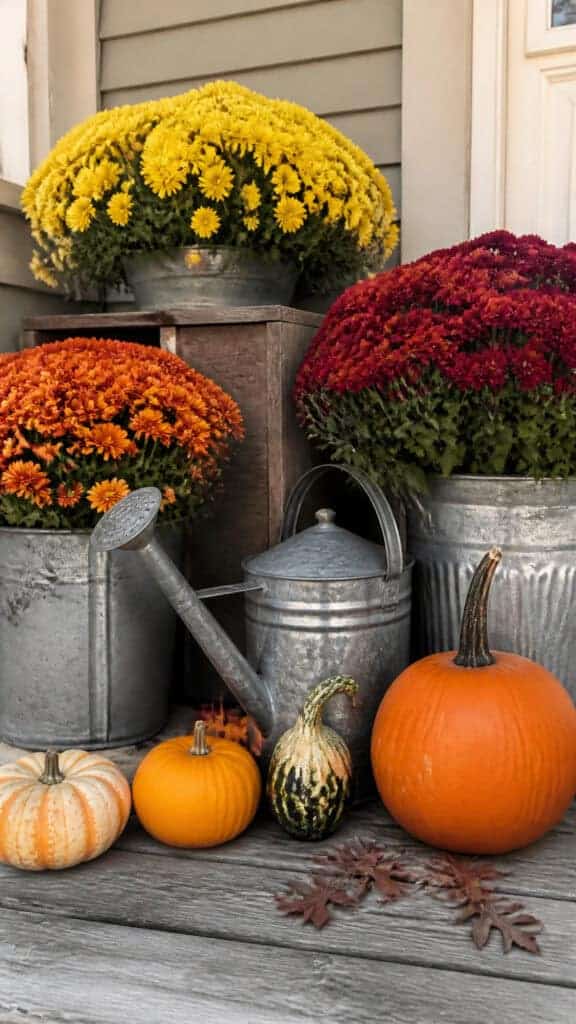
Listen, I love a classic terracotta pot as much as the next person, but using creative containers is what takes mums front porch fall displays from basic to absolutely Instagram-worthy! And the best part? You probably have tons of container options already hiding in your garage, basement, or that shed where everything mysteriously accumulates!
My biggest revelation came when I stopped thinking of containers as just pots and started seeing them as part of the overall design. Now I’m constantly on the lookout for unique vessels that add character and personality to my displays. Thrift stores and yard sales are absolute goldmines for this—I’ve scored vintage milk cans, old wooden crates, and antique buckets for just a few dollars each!
Some of my favorite container ideas that have worked beautifully:
- Galvanized buckets and washtubs: These give such a charming farmhouse vibe and they’re super durable (important when you have boys playing football on the porch!)
- Wooden crates and boxes: Stack them, line them with plastic, and fill with mums for instant rustic charm
- Vintage wheelbarrows: If you have space, these make incredible statement pieces filled with multiple mums
- Wicker baskets: Line with plastic and they create such a cozy, cottage feel
- Ceramic urns: Perfect for a more formal, elegant look—I found mine on clearance at a home goods store!
- Repurposed items: Old boots, toolboxes, watering cans, or even that cute wagon the kids outgrew
Pro tip from someone who learned this the hard way: if your container doesn’t have drainage holes, either drill some or use it as a cachepot (fancy word for putting your mum in its plastic pot inside the decorative container). My first year, I planted directly into a sealed container and the poor mum basically drowned! Also, group containers in odd numbers—three or five looks way better than two or four. I don’t know why, it’s just one of those design rules that actually works!
Layering and Arranging for Maximum Visual Impact
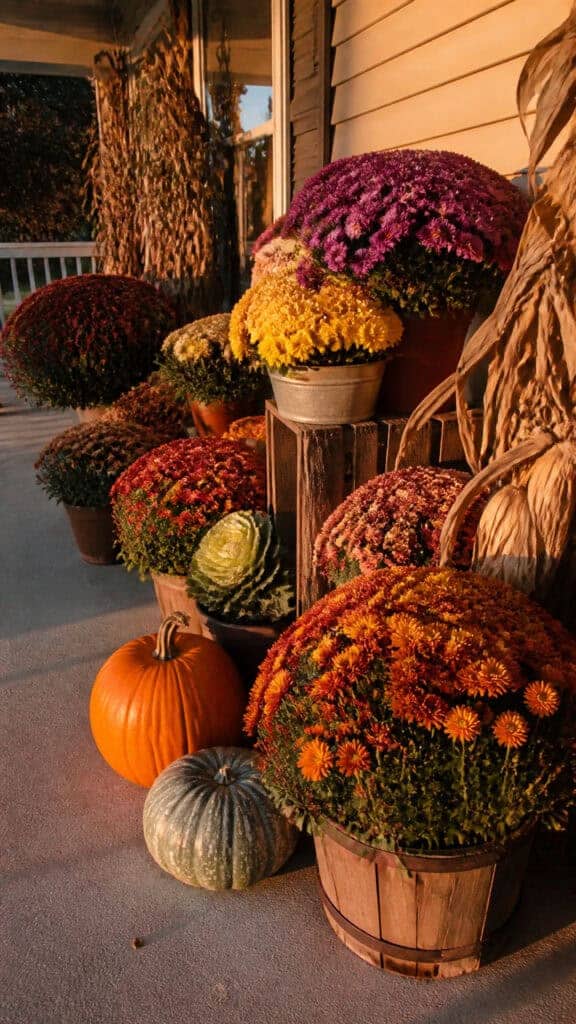
Creating those stunning mums front porch fall displays that look professionally designed is really all about layering and arrangement! I used to just line up my mums in a row like little soldiers, and while it was fine, it definitely didn’t have that wow factor I was going for. Once I learned to think in layers and levels, everything changed!
The key is creating depth and visual interest by varying heights and using the space in three dimensions instead of just across the floor. I start with my largest elements first—usually my biggest mums or containers—and place them where I want to anchor the display. For most porches, this means flanking the door or creating a focal point on one side. Then I build around these anchor points, adding medium and smaller elements to fill in and create that lush, abundant look!
Here’s my foolproof layering strategy that works every single time:
- Back layer: Place taller elements against the wall or railing—think tall mums, corn stalks, or decorative branches
- Middle layer: This is where most of your mums will live, at varying heights using plant stands, overturned crates, or different sized containers
- Front layer: Add low elements like pumpkins, gourds, or smaller mums that spill forward toward the steps
- Vertical interest: Don’t forget to go UP! Use hanging baskets with mums, wreaths on the door, or garland on railings
I’m obsessed with using different heights because it makes such a huge difference! I keep a collection of sturdy plant stands, overturned crates, and even concrete blocks (covered with burlap or tucked behind larger items) to elevate some mums while keeping others at ground level. This creates that cascading, overflowing look that’s so appealing to the eye!
Another trick I love is the triangle principle—arrange your mums so they form triangular shapes from different viewing angles. This naturally draws the eye through the display and creates balance. And always step back frequently while you’re arranging! I walk to the street and look at my porch from where visitors will first see it. Sometimes what looks great up close needs adjusting from a distance. My middle son thinks it’s hilarious how many times I walk back and forth, but it really helps get the arrangement just right!
Adding Complementary Fall Elements to Your Mum Display
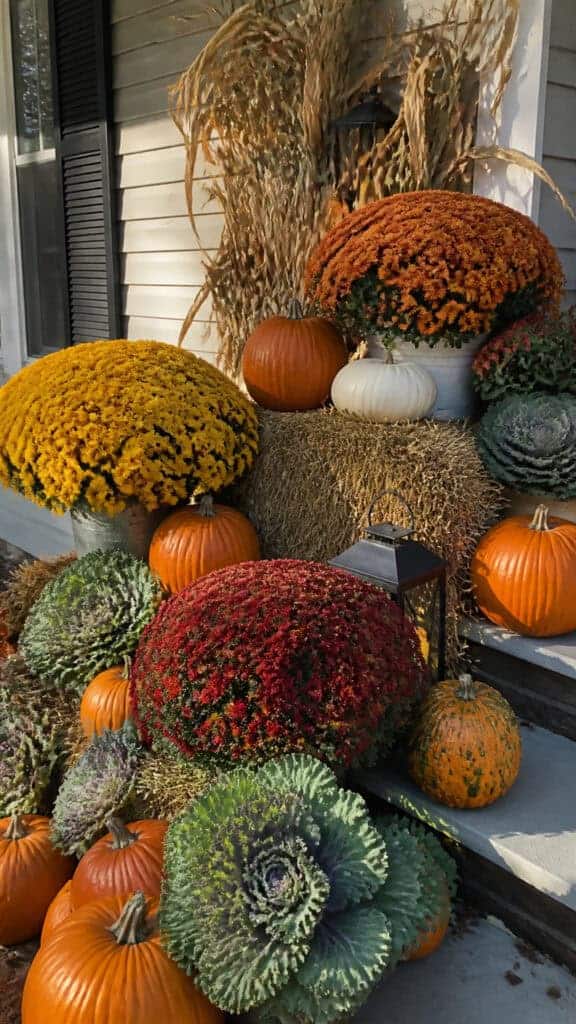
While mums are definitely the stars of the show in mums front porch fall displays, adding complementary elements is what creates that full, magazine-worthy look! Think of mums as your main dish and all these extras as the delicious side dishes that make the whole meal amazing. Plus, adding other elements helps stretch your mum budget because you need fewer flowers when you’re incorporating other fall favorites!
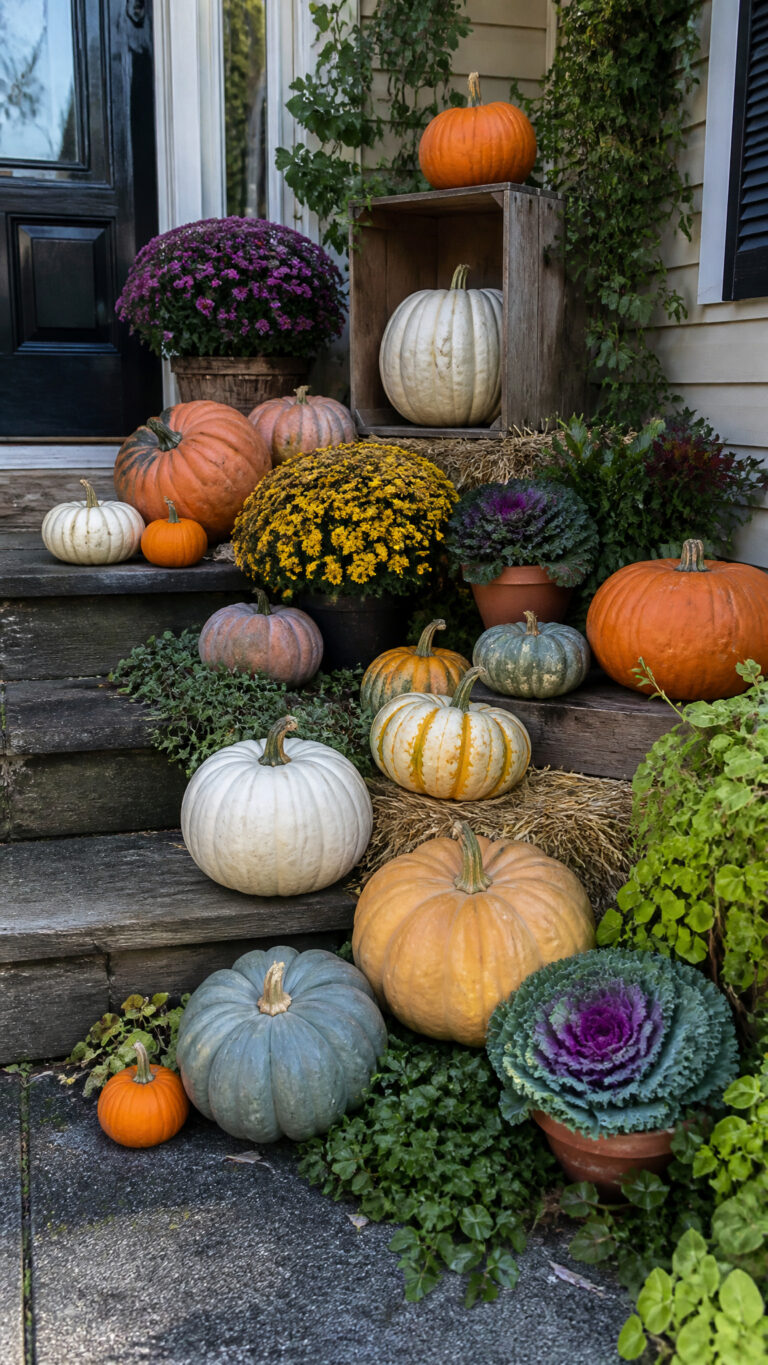
Pumpkins are obviously the most classic pairing with mums, and I’m here for it! I use a mix of real and faux pumpkins (the fake ones last year after year, which my budget loves), and I’ve learned that variety is key. Different sizes, different colors, different textures—white pumpkins, traditional orange ones, those gorgeous blue-green heirloom varieties, warty gourds that my boys think are hilarious, and tiny decorative pumpkins scattered throughout. I probably use 15-20 pumpkins of various sizes in my full porch display!
Here are my favorite elements to mix with mums for that complete fall look:
- Natural corn stalks: These add incredible height and that authentic harvest feel—I bundle them with twine and tuck them behind larger arrangements
- Hay bales or straw: Perfect for creating different levels and adding rustic texture (warning: real hay can get messy with wind and rain!)
- Decorative cabbage and kale: These add amazing texture and come in gorgeous purple and green tones that complement mums beautifully
- Branches and twigs: I collect interesting branches from our yard—curly willow, birch, or even branches with colorful leaves still attached
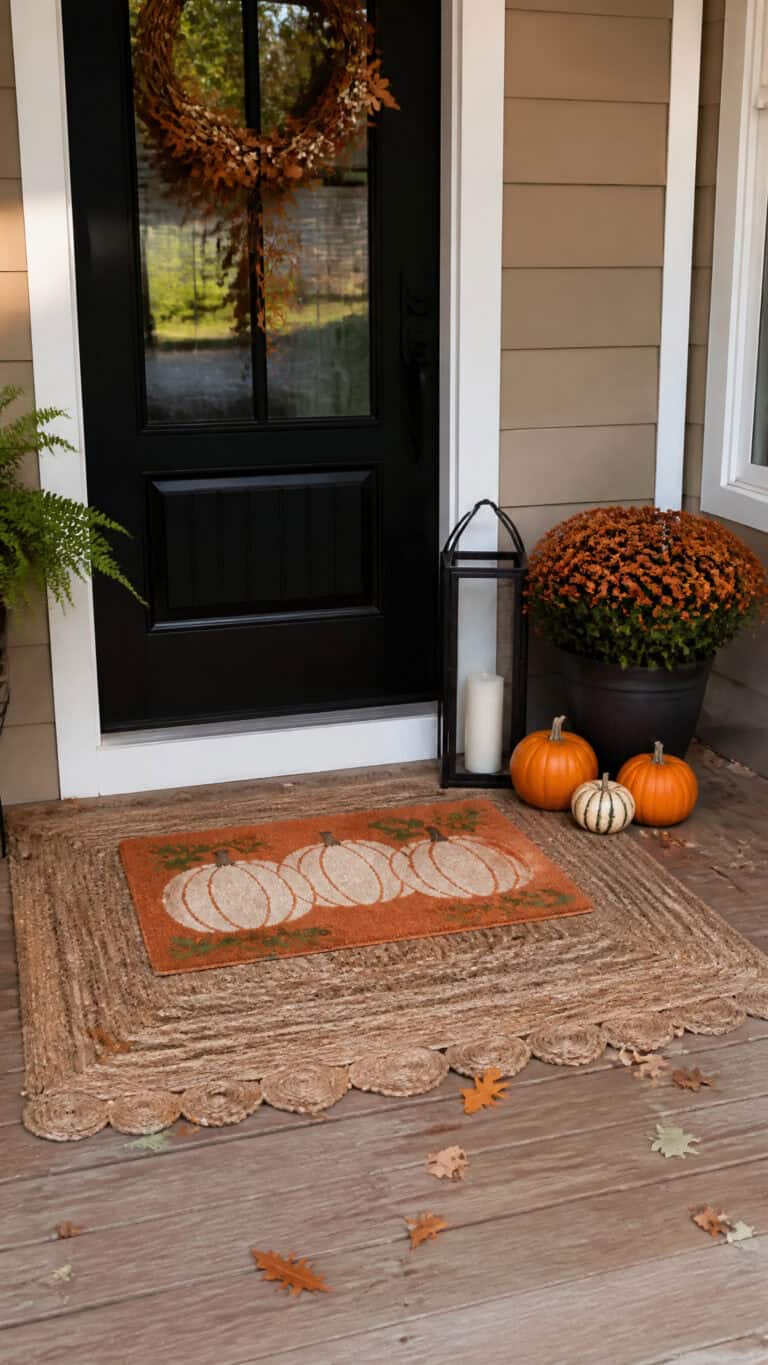
- Lanterns with candles: These add warmth and work for both day and evening appeal
- Seasonal signs: A cute “Welcome” or “Hello Fall” sign adds personality without overwhelming the natural beauty
- Dried flowers: Wheat stalks, dried hydrangeas, or pampas grass add lovely texture and neutral tones
Don’t forget about textiles! I drape a plaid blanket over my porch bench, add some fall-themed pillows, and sometimes include a doormat that coordinates with my color scheme. These softer elements make the space feel cozy and inviting, not just decorated. And here’s something I started doing last year that I absolutely love: I tuck in some fairy lights or small battery-operated lanterns that automatically come on at dusk. When we pull into the driveway after soccer practice in the evening, our porch looks absolutely magical!
Caring for Your Mums to Keep Them Looking Fresh
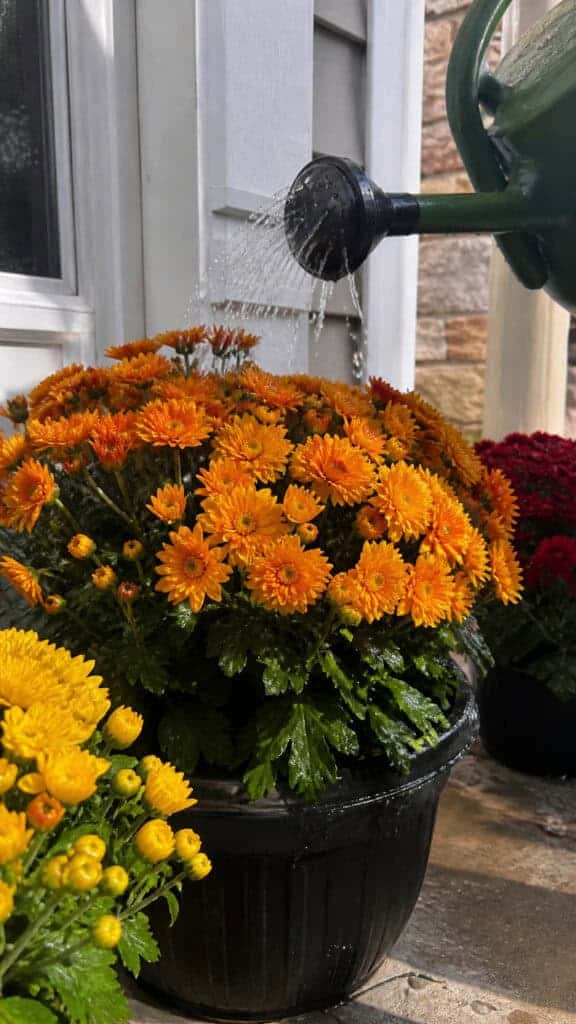
Okay, real talk—what’s the point of creating gorgeous mums front porch fall displays if they’re going to look sad and wilted in a week? I learned this lesson the hard way my first year when I spent a small fortune on beautiful mums and then basically ignored them. Spoiler alert: they did not appreciate being ignored! The good news is that keeping mums looking fabulous isn’t difficult at all, even with a crazy busy schedule!
The number one most important thing—and I cannot stress this enough—is consistent watering! Mums are thirsty plants, especially when they’re blooming like crazy. During warm fall days, I water my mums every single morning, and sometimes in the evening too if it’s been particularly hot. I stick my finger about an inch into the soil, and if it feels dry, they get watered. The boys think I’m obsessed, but this simple habit has made such a difference in how long my displays stay beautiful!
Here are my essential care tips that keep mums looking gorgeous all season:
- Water deeply: Don’t just sprinkle the surface—water until you see it draining out the bottom to ensure the entire root system gets moisture
- Deadhead spent blooms: I pinch off faded flowers every few days, which encourages more blooms and keeps everything looking fresh (I do this while waiting for the school bus!)
- Protect from extreme weather: If we’re expecting a hard frost or heavy rain, I move potted mums closer to the house or under the porch overhang
- Feed occasionally: I use a water-soluble fertilizer every two weeks to keep the blooms coming strong
- Watch for pests: Check under leaves for aphids or spider mites—I’ve caught problems early just by paying attention during watering
One mistake I see people make constantly is overwatering once temperatures drop. As fall progresses and we get cooler weather, mums need less water. I adjust my watering schedule based on temperature and rainfall—this isn’t a set-it-and-forget-it situation! Also, if your mums are in containers without drainage (even with the plastic pot inside), make sure water isn’t pooling at the bottom. I learned this when I couldn’t figure out why one of my mums was struggling—turned out it was basically sitting in a swamp!
Here’s a bonus tip that extends the life of your mums: if you live in a climate where mums can be perennial (zones 5-9), you can actually plant them in your garden after your porch display is done! I do this every year now. Once the first hard frost hits and my display is finished, I plant the healthiest mums in my garden beds. They come back the following year, and I get to enjoy them all over again! It’s like getting free plants, which makes my frugal heart so happy!
Budget-Friendly Tips for Stunning Displays
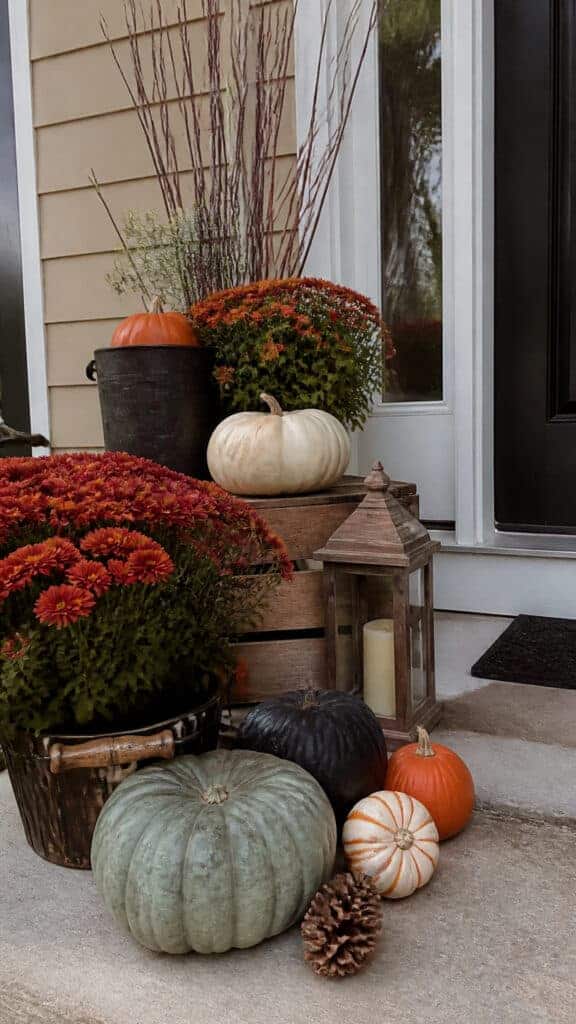
Can we be honest for a second? Creating beautiful mums front porch fall displays can get expensive fast if you’re not careful! Between the mums themselves, containers, pumpkins, and all the extras, you could easily spend hundreds of dollars. But here’s the thing—you absolutely don’t have to break the bank to create a stunning fall porch! I’ve developed so many money-saving strategies over the years, especially important when you’re raising three boys who constantly need new shoes because their feet won’t stop growing!
My biggest money-saving secret is shopping strategically and reusing elements year after year. I invest in quality containers and decorative items that I can use season after season, and I’m very selective about what I buy new each year. Typically, I only purchase fresh mums and real pumpkins annually—everything else I already own or can forage from nature!
Here are my tried-and-true budget-friendly strategies:
- Shop sales and clearance: I buy containers, lanterns, and decorative items on clearance after each season for next year—sometimes 70-80% off!
- Start with fewer mums: You’d be amazed how far 4-6 well-placed mums can go when you bulk up the display with pumpkins and natural elements
- Use what you have: Shop your own home first! Baskets, buckets, crates, and containers you already own work perfectly
- Go natural: Collect branches, pinecones, acorns, and colorful leaves from your yard or neighborhood walks (free!)
- DIY your decor: Make your own signs, paint your own pumpkins, or create wreaths from materials you collect
- Split costs with friends: Buy hay bales or corn stalks with neighbors and divide them up—everyone saves money!
- Choose perennial mums: Plant them in your garden after the season and they’ll come back next year
I also watch for mum sales at local garden centers and big box stores. Early September often has promotions to get people excited about fall decorating, and then late September/early October there are usually sales to move inventory. I’ve gotten gorgeous mums for half price just by timing my shopping right! And here’s something I started doing: I keep a dedicated “fall decor” box in my basement where everything gets stored carefully each year. Taking good care of my reusable items means they last for years, making my per-season cost super low!
Another budget hack I love is focusing on one really stunning focal point rather than trying to fill every inch of the porch. Maybe that’s an amazing arrangement flanking your front door, or a gorgeous display on a porch table. When you concentrate your efforts and budget on one showstopping area, it has more impact than spreading everything thin across the whole space. Plus, it’s way less overwhelming to put together, which matters when you’re trying to decorate between soccer practice and dinner!
Bringing It All Together for Your Perfect Fall Entry
Creating beautiful mums front porch fall displays really doesn’t have to be complicated or stressful—I promise! With the right mums, a thoughtful color scheme, creative containers, and some complementary fall elements, you can transform your front entry into a warm, welcoming space that celebrates everything we love about autumn. And honestly, there’s something so satisfying about pulling into your driveway and seeing your porch looking absolutely gorgeous, especially when neighbors and delivery drivers compliment your handiwork!
Remember, the most important thing is creating something that makes YOU happy and reflects your personal style! Don’t get too caught up in making everything perfect or Pinterest-worthy. Some of my favorite porch moments have been when my boys helped arrange pumpkins (in totally chaotic ways that somehow worked!) or when I just threw things together quickly and it turned out beautifully. Fall decorating should be fun, not stressful! So grab some mums, gather your pumpkins, and create a fall display that welcomes everyone to your home with warmth and seasonal charm. Happy decorating, mama!
This post may contain affiliate links. Read the full disclosure here.