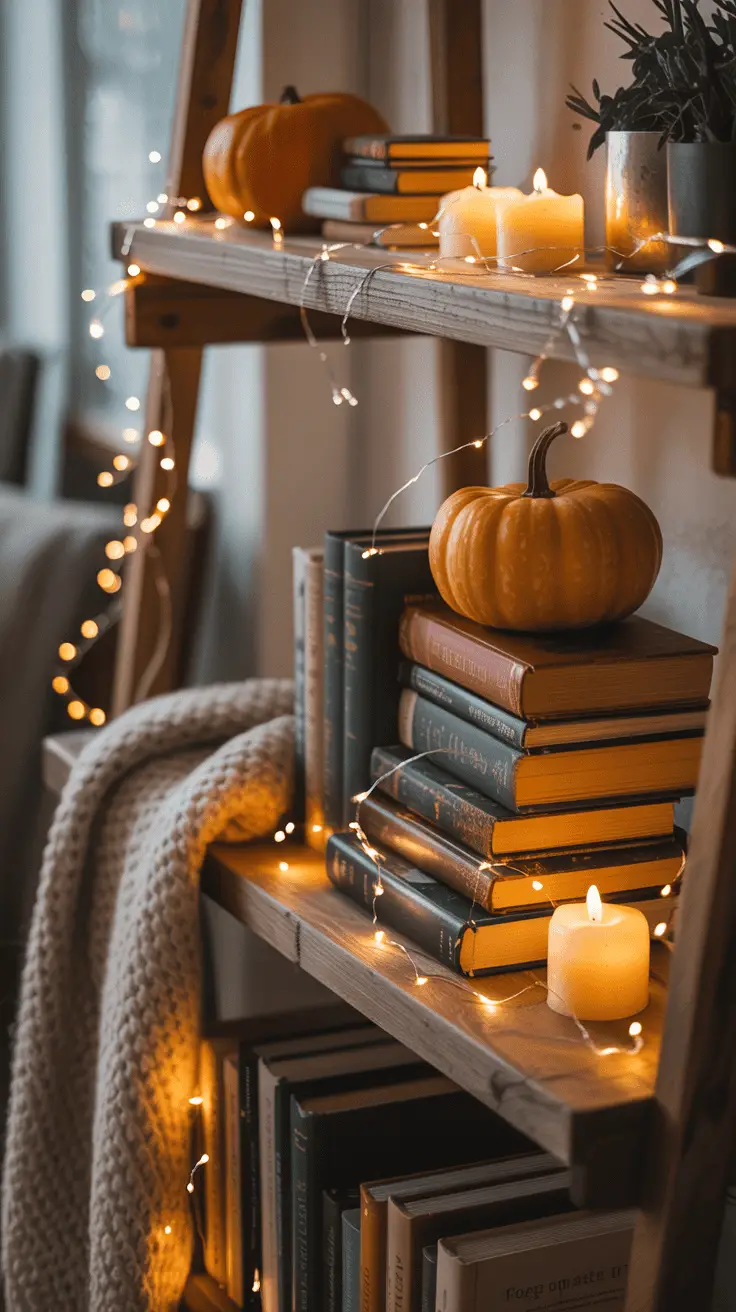
Fall decorating with three energetic boys means I need projects that are fun, relatively mess-contained, and won’t result in anyone needing stitches! That’s exactly why I’ve fallen head-over-heels in love with painted pumpkins instead of carved ones. No sharp knives, no slimy pumpkin guts, and the best part? These beauties last so much longer on the porch!
I’ve spent the last few seasons experimenting with unique pumpkin painting ideas that go way beyond the basic orange-with-a-face routine. Whether you’re looking for something whimsical for the kids, elegant for your front porch, or just plain fun, these creative approaches will have your neighbors stopping to take a closer look. Trust me, once you try painting instead of carving, you’ll never go back!
Galaxy and Celestial Pumpkins
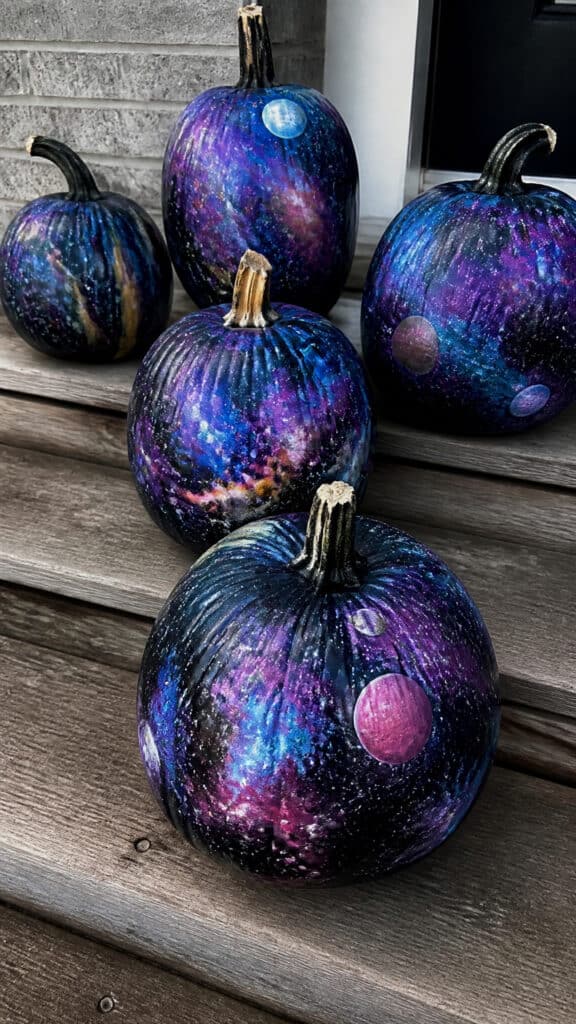
My middle son is absolutely obsessed with space right now, so these galaxy pumpkins were a huge hit in our house! The technique is surprisingly simple and creates such a dramatic, eye-catching effect that looks like you spent hours on it.
Start with a pumpkin painted in deep black or navy blue as your base coat. Once that’s completely dry, the magic happens! Use a sponge to dab on layers of purple, blue, pink, and magenta acrylic paint, blending them together in swirling patterns. The key is to work in circular motions and not overthink it – galaxies are naturally chaotic and beautiful!
For the finishing touches, I let my boys take over with the star-making. We used an old toothbrush dipped in white paint, then ran our fingers across the bristles to create a splatter effect. You can also add larger stars with a small brush or even use metallic gold and silver paint for planets and moons. These unique pumpkin painting ideas work especially well on pumpkins of different sizes grouped together to create an entire solar system display!
Pro tip from a mom who learned the hard way: do this project outside or put down about seventeen layers of newspaper. That toothbrush splatter technique is SO fun but also gets paint absolutely everywhere!
Drip Paint Pumpkins for Modern Flair
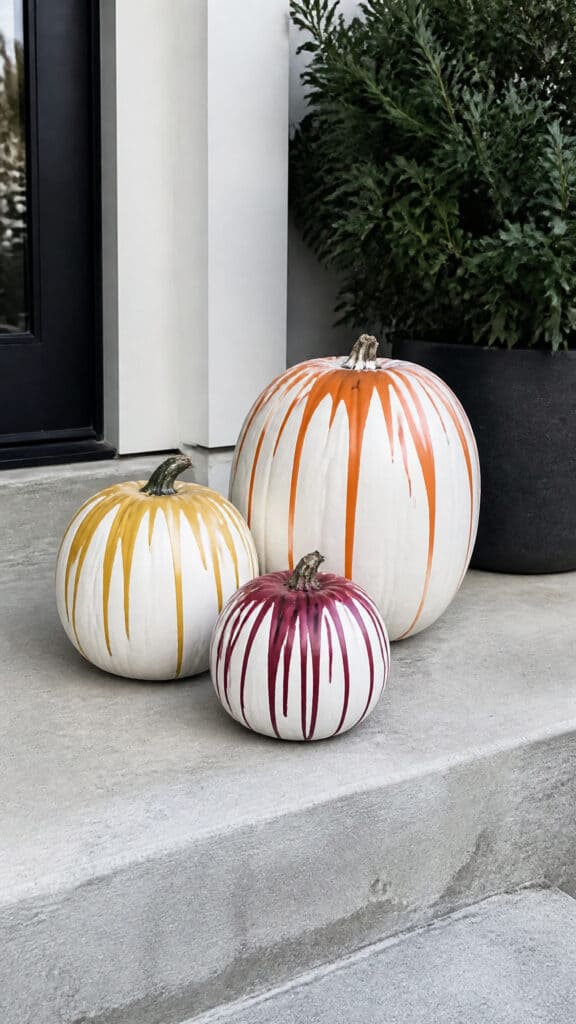
If you want something that looks super artistic but is actually incredibly easy (my favorite combination!), drip paint pumpkins are where it’s here at. My boys think this technique is hilarious because it involves intentionally making a mess, which is basically their love language!
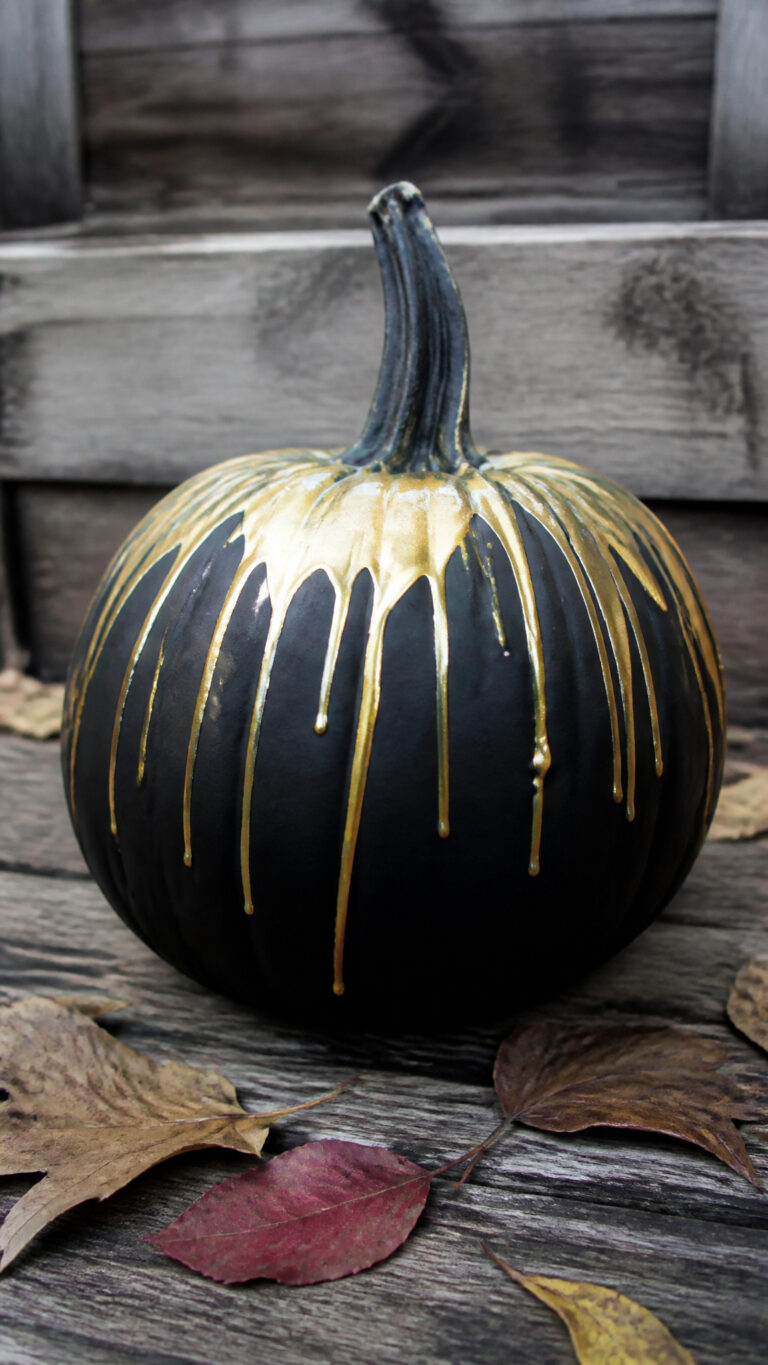
Choose a base color for your pumpkin – white, black, or even a metallic gold spray paint works beautifully. Once your base is dry, position your pumpkin stem-side up. Now comes the fun part! Pour small amounts of acrylic paint in contrasting colors directly onto the top of the pumpkin and let gravity do the work. The paint will naturally drip down the sides creating these gorgeous, organic lines.
You can use one color for a minimalist look, or go wild with multiple colors like we did. I set up a painting station in our driveway with pumpkins elevated on cups or cans so the paint could drip freely without the pumpkins sitting in a puddle. We used fall colors like burnt orange, mustard yellow, and deep burgundy on white pumpkins, and the effect was stunning!
For extra drama, try using metallic paints or adding glitter to the wet paint as it drips. You can also control the drip pattern by tilting the pumpkin slightly or using a stick to guide the paint in certain directions. These unique pumpkin painting ideas photograph beautifully and make your porch look like an art gallery!
Storybook Character Pumpkins
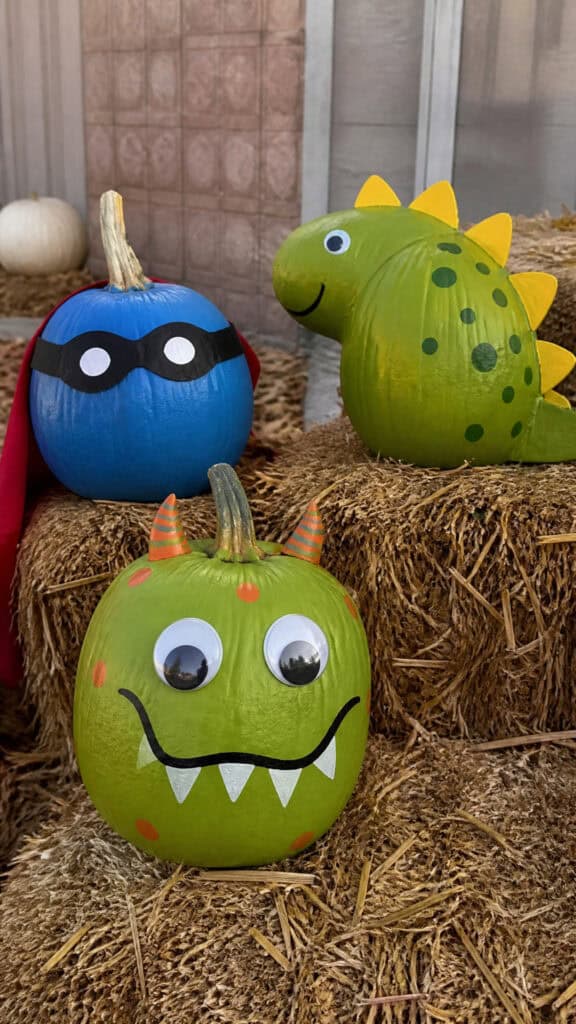
With three little boys who have very strong opinions about their favorite characters, we’ve turned pumpkin painting into a way to celebrate their current obsessions! This year we’ve got everything from dinosaurs to superheroes sitting on our front steps, and honestly, it makes me smile every time I see them.
The beauty of character pumpkins is that they can be as simple or detailed as your patience level allows. For my youngest, we did a simple monster face with googly eyes (hot glued on after painting) and a big toothy grin. For my oldest who’s really into art, we tackled a more detailed superhero mask design that he sketched out first on paper.
Start by painting your base color – this might be the character’s main color or just a solid background. Once dry, use pencil to lightly sketch your design before committing to paint. Acrylic paint markers are absolute lifesavers for details like eyes, mouths, and small features because they give you so much more control than a brush!
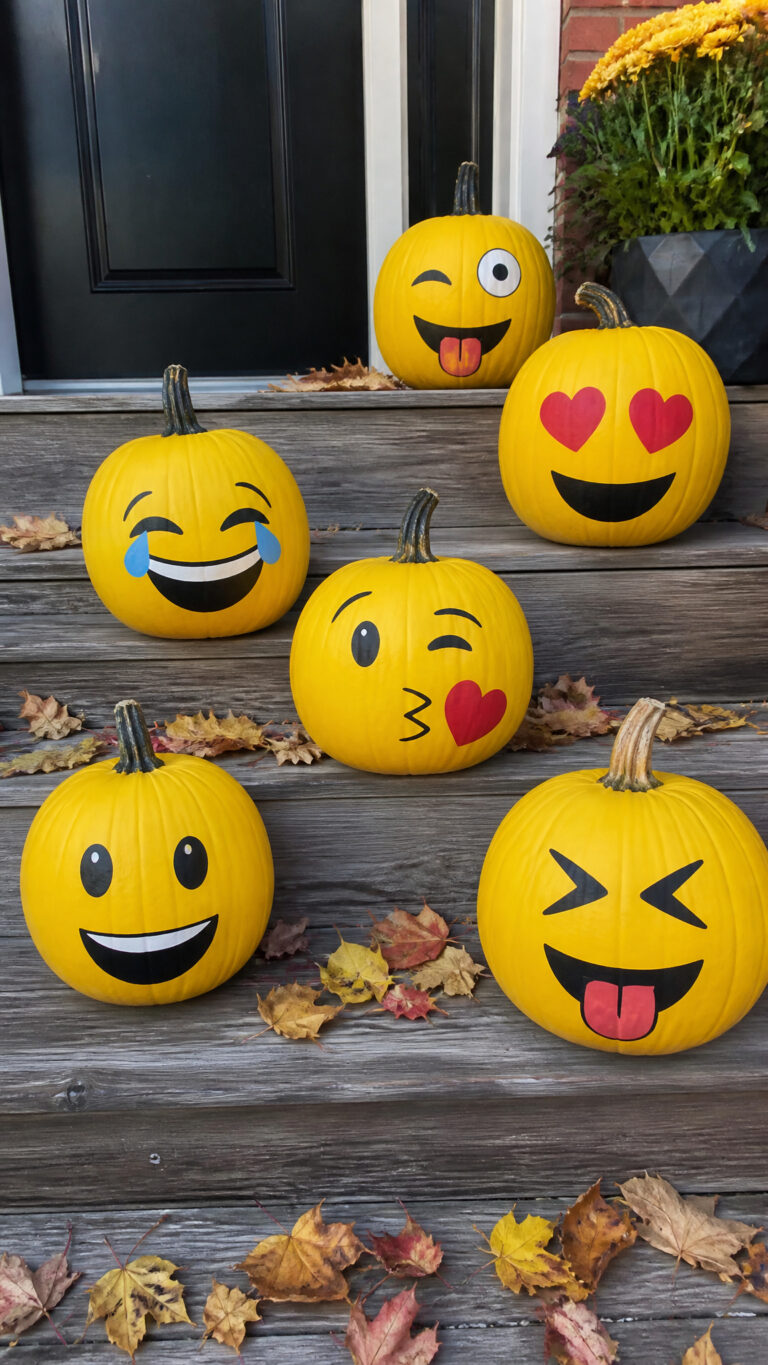
Some of our favorite character ideas include: friendly monsters with wild hair made from yarn, animals with painted features and felt ears, favorite book characters, or even emoji faces. The key to making these unique pumpkin painting ideas work is choosing characters with simple, recognizable features. You don’t need to be a professional artist – sometimes the slightly wonky, handmade look is what makes them so charming!
Ombre and Watercolor Effect Pumpkins
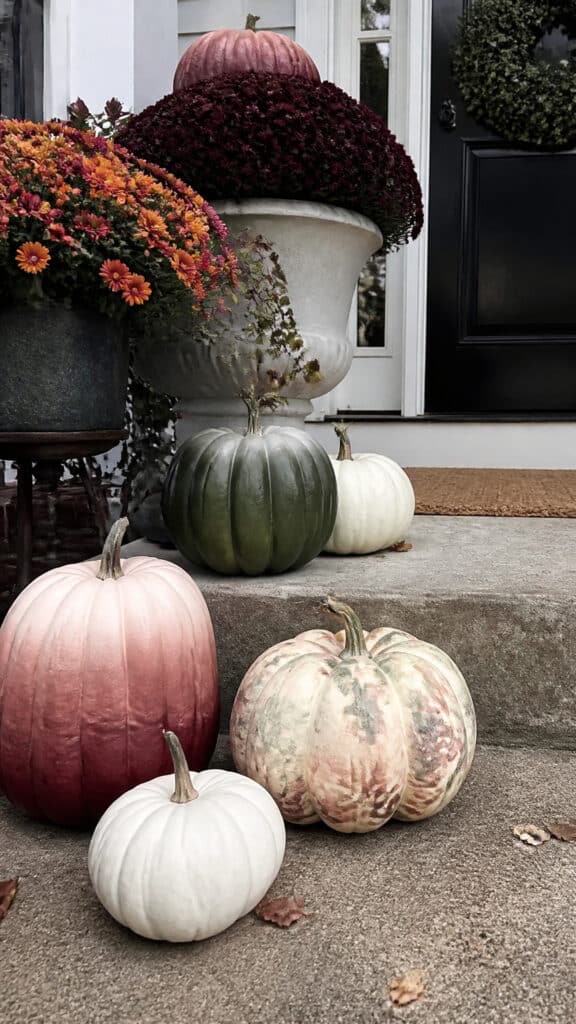
If you’re going for an elegant, sophisticated fall look (yes, even with kids running around!), ombre and watercolor technique pumpkins are absolutely gorgeous. These look complicated but I promise they’re totally doable, even during naptime when you only have twenty minutes of peace!
For the ombre effect, choose two or three colors that blend well together – think blush pink fading to burgundy, or sage green fading to deep forest green. Paint the bottom third of your pumpkin in your darkest color, the top third in your lightest color, and leave the middle section bare for now. Here’s the trick: while the paint is still wet, use a damp sponge or brush to blend where the colors meet, creating that seamless gradient effect.
The watercolor technique is even more forgiving! Paint your entire pumpkin white first and let it dry completely. Then, thin down your acrylic paints with water until they’re almost translucent. Apply these watered-down paints in soft, overlapping layers, letting some areas be darker and others lighter. It creates this beautiful, dreamy effect that looks like watercolor paper!
I love grouping several ombre pumpkins in different color families together – some in warm tones, some in cool tones – for a really cohesive, designer look. Add in some painted white pumpkins and maybe a few with gold stems, and suddenly your porch looks like it belongs in a magazine! These unique pumpkin painting ideas are perfect if you’re going for a more grown-up aesthetic while still being fun to create.
Geometric and Pattern Pumpkins
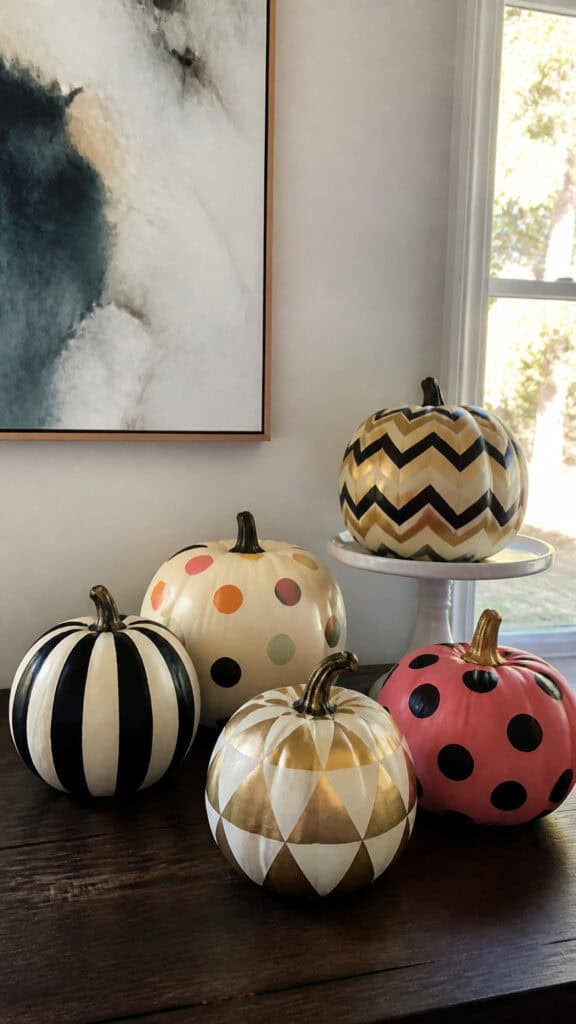
My oldest son loves anything with patterns and symmetry, so geometric pumpkins have become his specialty! These look incredibly professional and modern, but the secret is that they’re mostly just patience and painter’s tape – no artistic talent required!
The easiest approach is using painter’s tape or washi tape to create patterns before you paint. Paint your pumpkin a solid base color first (white, black, or metallics work great). Once completely dry, apply strips of tape in your desired pattern – stripes, chevrons, triangles, or a geometric grid. Paint over the entire thing in your second color, let it dry, and carefully peel off the tape to reveal your pattern underneath. It’s like magic every single time!
For polka dots, I’ve found that the round foam daubers from the craft store are perfect – just dip and stamp! You can create patterns with different sized dots, or keep them uniform for a more modern look. We’ve done everything from simple polka dots to more complex patterns with dots of varying sizes and colors.
If you’re feeling ambitious, hand-painted geometric designs are stunning too. Use a pencil to lightly sketch triangles, diamonds, or hexagons, then fill them in with different colors. Metallic paint pens are fantastic for adding thin lines and details that make your design really pop. These unique pumpkin painting ideas work especially well if you’re going for a modern farmhouse or contemporary fall aesthetic!
Glow-in-the-Dark Pumpkins
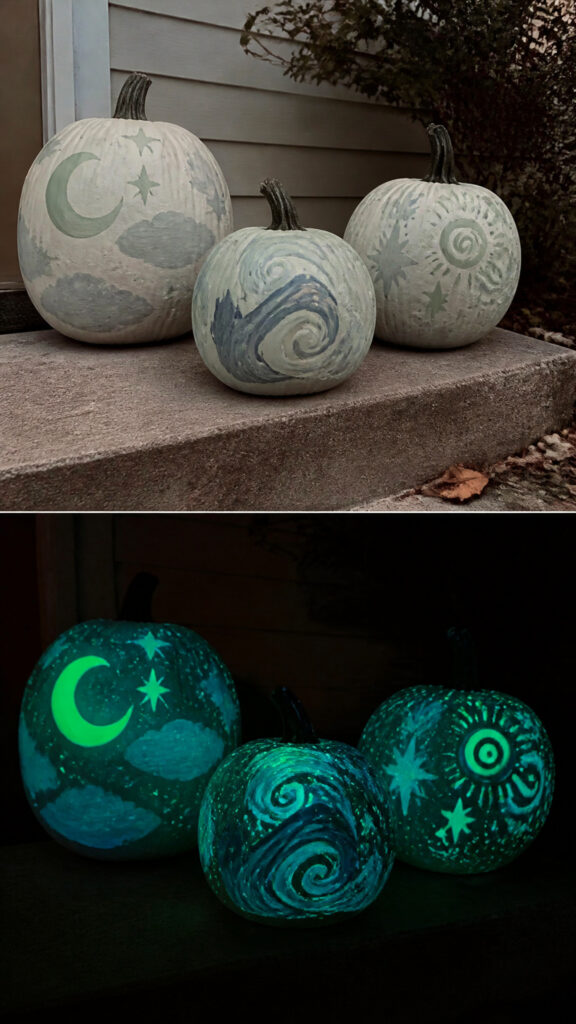
Okay, this is hands-down the most exciting pumpkin project we’ve done, and my boys still ask to go outside after dark just to see them glow! Glow-in-the-dark pumpkins are such a fun twist on traditional fall decorating, and they’re surprisingly easy to pull off.
You’ll need glow-in-the-dark paint, which you can find at any craft store in the specialty paint section. I recommend painting your pumpkin white first as a base coat because it helps the glow paint show up more vibrantly. Once your base is dry, you can paint designs with the glow paint – we’ve done everything from spooky faces to stars and moons to abstract patterns.
The coolest effect we discovered was combining regular paint with glow paint. During the day, the pumpkin looks like a normal painted pumpkin with your design in a soft green or blue color. But when the sun goes down and the paint has been “charged” by daylight, boom – it glows! We painted constellation patterns, ghost shapes, and even just simple dots that light up at night.
For maximum glow effect, place your pumpkins where they’ll get good sunlight during the day to charge up the paint. You can also use a flashlight to “charge” them right before you want to show them off. These unique pumpkin painting ideas are perfect for Halloween night when trick-or-treaters come by – the kids absolutely love them! Just be prepared for every kid in the neighborhood to want to touch them!
Nature-Inspired Botanical Pumpkins
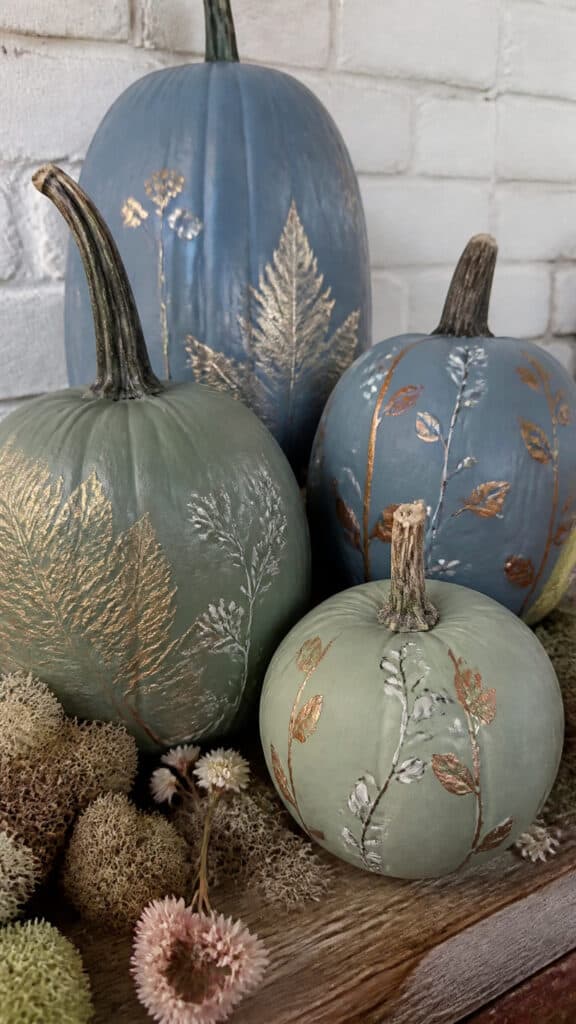
Sometimes the most beautiful designs come from the simplest inspiration – like the gorgeous leaves falling in our backyard! Botanical pumpkins have this elegant, organic feel that works for fall decorating from September all the way through Thanksgiving.
My favorite technique is actually using real leaves as stamps! Collect some pretty leaves from your yard (we love maple, oak, and fern shapes), paint one side with acrylic paint, and press it firmly onto your pumpkin. Peel it away carefully and you’ve got a perfect leaf print! We did an entire pumpkin covered in overlapping gold and copper leaf prints and it turned out absolutely stunning.
You can also hand-paint botanical designs if you’re feeling artistic. Simple stems with leaves, delicate flowers, or even just scattered leaves in fall colors create such a beautiful, natural look. Paint pens make this so much easier – I can draw a leaf shape way better with a paint pen than I ever could with a brush!
For a really unique twist, try painting your pumpkins in non-traditional colors like sage green, dusty blue, or soft gray, then add botanical elements in white or gold. It creates this beautiful, muted palette that feels very current and sophisticated. You can also add real elements like gluing on some preserved moss around the stem or tucking small dried flowers into the ridges of the pumpkin. These unique pumpkin painting ideas are perfect for creating a natural, organic fall display that feels fresh and modern!
Time to Get Painting!
The best part about these unique pumpkin painting ideas is that there’s truly no wrong way to do them! Some of our pumpkins turn out exactly as planned, and others end up being happy accidents that we love even more. The memories we make painting together – even with the inevitable paint spills and arguments over who gets which color – are what make fall decorating so special in our house.
Whether you try one technique or mix and match several, painted pumpkins are such a fun way to express creativity without the mess and hassle of carving. Plus, they last so much longer, which means you get to enjoy your hard work for weeks instead of days! So grab some pumpkins, raid your craft supplies, and get ready to create the most unique fall porch on your block. Trust me, your neighbors will be asking for your secrets!
This post may contain affiliate links. Read the full disclosure here.