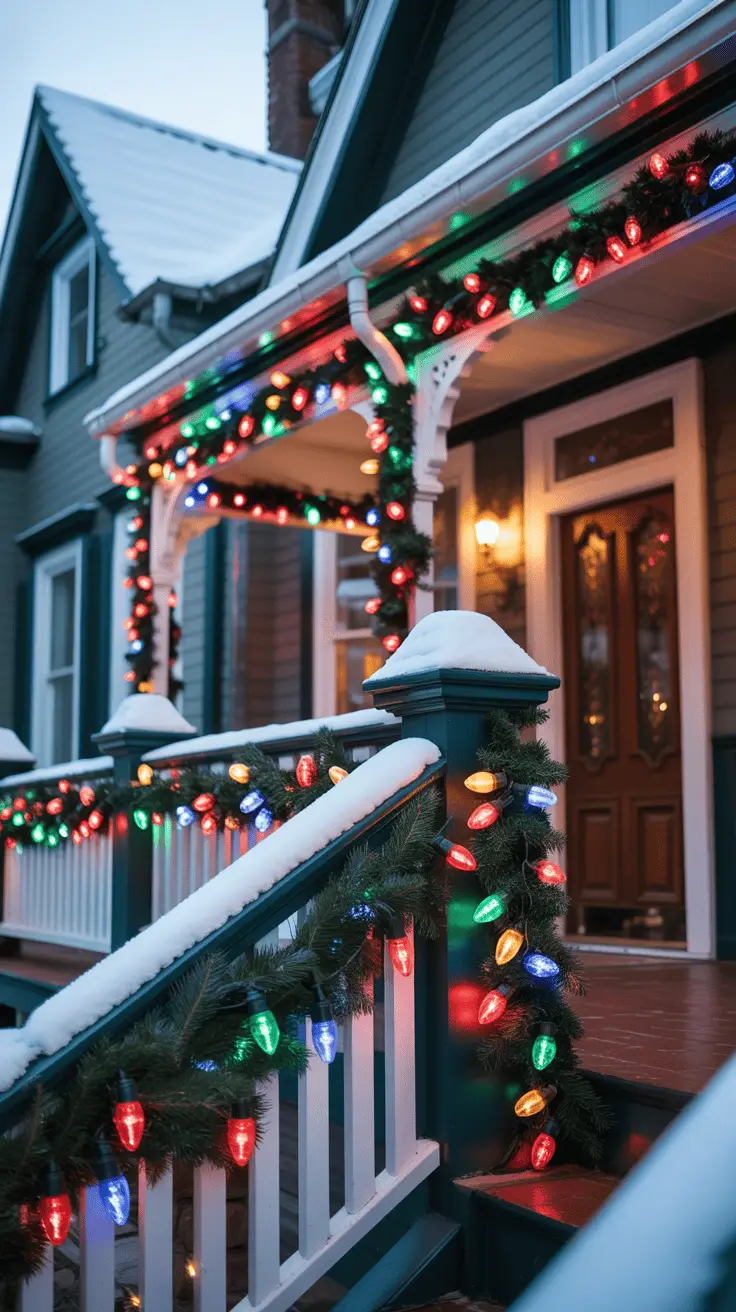
Every year, decorating gingerbread houses with my three boys turns into a lively, colorful mess of creativity and laughter. Finding fresh gingerbread house decorating ideas keeps our tradition exciting and totally fun to share!
It’s amazing how a few simple tricks and playful touches can transform a plain cookie structure into a charming holiday centerpiece that everyone will want to copy! Whether you’re looking for easy tweaks or bold designs, I’ve got ideas that make decorating with kids a joyful, stress-free adventure.

Picking the Perfect Gingerbread House Kit or Baking Your Own

When it comes to gingerbread house decorating ideas, deciding between a ready-made kit or baking your own gingerbread is a big step. I’ve found that both have their perks, especially with three little hands eager to help. Whether you’re short on time or want the full baking experience, there’s an option that fits your holiday mood and schedule. Let’s break down some favorites and essentials to get you started without the stress.
Top Gingerbread House Kits for Busy Moms

For moms who want fun but don’t have hours to bake and cut shapes, gingerbread house kits are a lifesaver. They come with pre-baked pieces and simple instructions, so you can jump right into decorating with the kids. I always look for kits that include kid-friendly designs—nothing too complicated but still super charming and festive. Here are some that have been a big hit in our house:
- Wilton Gingerbread House Kit: Classic shapes, sturdy pieces, and icing that holds everything well. Plus, it includes candy decorations, so you can get straight to the fun part.
- Melissa & Doug Wooden Gingerbread House Kit: Not edible but perfect if you want a mess-free option that still lets the kids get creative with decorations again and again.
- Georges Gingerbread House Kit: Easy to assemble with clear steps, and it tastes really fresh if you want to nibble on leftover gingerbread.
What I love about these kits is how they simplify the process but don’t skimp on the magic of holiday creativity. The kids can see a real house taking shape in minutes, and that feeling is always a highlight.
Simple Homemade Gingerbread House Recipe

If you’re up for rolling up your sleeves, making your own gingerbread house kit is just as fun and surprisingly simple. Baking together turns the whole thing into a full-day activity—the kind that sticks with you. Here’s my go-to recipe that’s easy enough for little hands to help with and results in sturdy pieces perfect for building:
Ingredients:
- 3 cups all-purpose flour
- 1 tsp baking soda
- 2 tsp ground ginger
- 1 tsp ground cinnamon
- 1/2 tsp ground cloves
- 1/4 tsp salt
- 3/4 cup unsalted butter, softened
- 3/4 cup brown sugar
- 1 large egg
- 1/2 cup molasses
Instructions:
- Preheat your oven to 350°F.
- In a bowl, whisk flour, baking soda, spices, and salt.
- In another large bowl, beat butter and sugar until creamy. Add egg and molasses, mix well.
- Gradually stir in dry ingredients until dough forms.
- Chill dough for at least one hour — this makes it easier to roll.
- Roll out dough on a floured surface to about 1/4 inch thick.
- Cut out house pieces using templates or freehand shapes.
- Place pieces on parchment-lined baking sheets and bake for 10-12 minutes.
- Let cool completely before assembling.
This recipe gives you that rich gingerbread flavor and firm structure that holds up well when the kids add their candy decorations. Plus, the smell filling the kitchen is worth every minute!
Tools and Supplies to Have on Hand

Whether you’re working with a kit or homemade pieces, having the right tools and edible goodies makes decorating smoother and way more fun. I always keep a stash ready during the holidays. Here’s what I never start without:
- Piping bags with small round tips: For neat icing application and sturdy “glue.”
- Spatulas or small spoons: To spread icing evenly and help hold pieces in place.
- Assorted candies: Gumdrops, candy canes, mini M&Ms, licorice strings, sprinkles, and peppermint disks. The variety keeps things playful.
- Edible glitter or colored sugar: For a little sparkle that catches the eye.
- A turntable or lazy Susan: Helpful when adding decorations all around without dropping the house.
- Wax paper or silicone mat: To protect your workspace from sticky messes.
- Toothpicks or skewers: For fine detail work or gently fixing small pieces that need support.
Having these on hand will keep the decorating flowing without the need to run around hunting for supplies mid-project. Plus, kids love sorting through candies and choosing their favorites—it adds to the excitement and feels like a tiny candy shop right at the table!
Choosing the right kit or baking your own gingerbread house, along with the right tools, makes decorating an adventure everyone will want to copy. With a little prep, it’s so easy for moms to create wonderful memories without the stress. Next up, I’ll share some ways to bring your gingerbread houses to life with color and personality!
Creative and Fun Gingerbread House Decorating Ideas

When it comes to gingerbread house decorating ideas, getting creative with what you have on hand is half the fun. Over the years of decorating with my boys, I’ve learned that simple candies and frosting tricks can turn a basic gingerbread house into a whimsical, eye-catching work of art. These ideas make it easy for kids to jump in and have a blast, and the results always make us smile. Let’s jump into some practical tips and playful approaches that will get your holiday project looking fresh and fun.
Candy Galore: Using Different Candies for Unique Designs
Candies are the heart of any gingerbread house, but there’s so much more than just chocolate and sprinkles! Mixing different types of candies adds texture, color, and a playful touch that everyone notices. Here are some favorites I always keep around and how we use them:
- Gumdrops: I love using gumdrops on the roof as little tiles or lining the edges as colorful, rounded accents. Try cutting some in half to make them fit into smaller spaces.
- Peppermint Disks and Candy Canes: These give an instant holiday vibe. Peppermint disks work great as wreaths (just add a bit of green icing) or windows, while mini candy canes frame doors or windows like tiny fences.
- Licorice Strings: These are perfect for outlining the house or creating windowpanes. We twist them to make tiny garlands or use red and black licorice for a fun contrast.
- Mini M&Ms and Colored Chocolate Drops: Great for adding spots of bright color anywhere you want a pop—think flower beds or the edge of the roof.
You can get playful by mixing shapes and sizes; try stacking small candies or arranging sugar pearls in patterns. The best part is there’s no wrong way, and kids especially love feeling like they’re in charge of nicking candies and placing them exactly how they want.
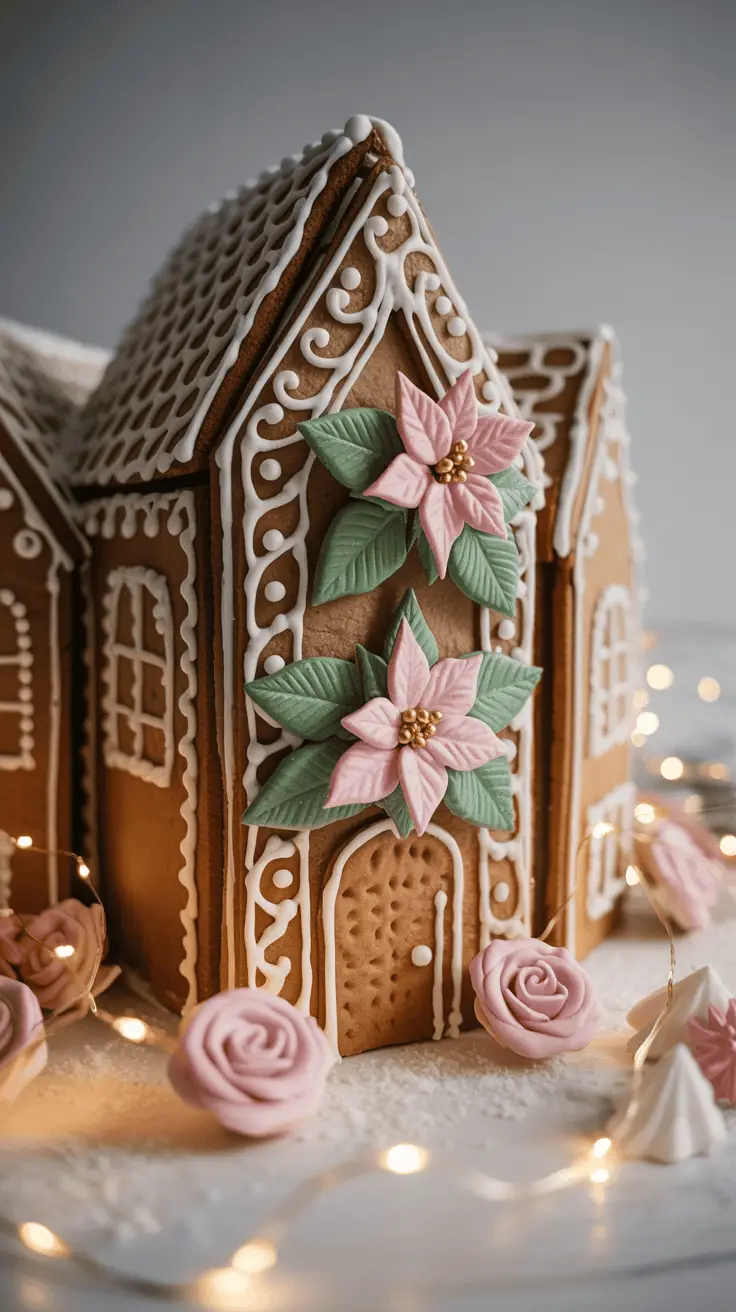
Icing Techniques for Beautiful Details

Icing is like the glue holding everything together but also a chance to add real personality with some simple decorating styles. I always encourage my boys to try a few techniques, and it’s amazing how much difference they make!
- Piping: Using a piping bag with a small round tip lets you draw fine lines, dots, or swirls. This works great for creating window frames, door hinges, or little snowy branches. It’s simple enough for kids to try and adds detail that really stands out.
- Flood Icing: This is when you thin your icing a bit so it spreads smoothly like a glaze. We use it to fill whole panels of the house in white or pastel colors. It dries with a shiny finish that looks so neat. Kids feel like they’re painting a cookie.
- Snow Effects: To make your gingerbread house look like it’s nestled in fresh snow, sprinkle powdered sugar over the roof or walls right after icing them. You can also add tiny mounds of fluffy icing at corners and edges to imitate snow piles.
Practicing these techniques together gives kids ways to improve their skills while making each part of the house look polished. Plus, frosting warmth from little hands adds a cozy feeling to the whole project!
Adding Personal Touches: Themes and Characters
I love when decorating goes beyond candy and icing to include favorite stories, movie characters, or holiday themes that make the gingerbread house truly ours. This is the moment when creativity shines and kids feel proud to show off their ideas.
- Pick a theme like a winter wonderland, a fairy tale cottage, or even a spooky gingerbread house for a twist.
- Use figurines or cupcake toppers featuring characters your kids love—Santa, elves, snowmen, or even superheroes can find a way onto the scene.
- Add small props like tiny candy trees, mini wreaths made from icing, or edible stars and bells to amp up the holiday cheer.
This is also the time when stories about the characters your children pick come alive as they decorate. I love to see how my boys’ eyes light up telling their own gingerbread house tales, making the whole experience more than just decorating—it becomes a tradition with meaning.
Putting your family’s favorite characters or themes into the project makes the whole process feel personal, memorable, and definitely something everyone will want to copy. It’s like creating your own little holiday world right on the kitchen table!
Tips for Decorating with Kids: Making It a Fun Family Activity

Decorating gingerbread houses is already a favorite tradition in our family, and adding kids into the mix makes it even better. When it comes to gingerbread house decorating ideas, turning the process into a team effort keeps everyone excited and involved. With a few simple steps, you can set up a kid-friendly space, give little ones tasks they’ll enjoy, and celebrate their creativity so they feel proud of what they make. Here’s how I keep the activity fun and stress-free when my boys and I are all gathered around the kitchen table.
Setting Up a Kid-Friendly Decorating Station

The key to a smooth decorating session is having a workspace that’s easy for kids to use and keeps everything organized. I always clear a big table or countertop, cover it with wax paper or a silicone mat, and make sure all supplies are within reach.
Here’s how I set up:
- Group supplies by type: I put candies in small bowls or containers, separate different icing colors in piping bags, and keep extra napkins nearby for quick clean-ups.
- Keep the workspace clear: I leave enough room around the gingerbread house so the kids don’t feel cramped. Sometimes I set up individual “stations” for each child.
- Use kid-friendly tools: Small spoons, plastic knives, and squeeze bottles are easier for little hands than complicated tools.
- Have a tray or cookie sheet underneath: This catches any spills or dropped candy, so mess stays contained.
- Make it safe: If candy pieces are small, I keep an eye on younger children and remind them not to eat too fast (choking hazard alert!).
Setting it up this way makes the kids feel independent and gives them space to explore while keeping the mess and chaos manageable.
Engaging Young Children with Simple Tasks
When my boys were toddlers, they loved to help but would lose focus quickly if the tasks were too tricky. That’s why I break down decorating into simple, manageable jobs that match their ages. Even the youngest can join in and enjoy the process!
Here are some easy tasks to keep kids busy and happy:
- Sorting candies by color or shape: This gets their hands moving and lets them explore different options.
- Placing big candies: Gumdrops or large chocolate pieces are perfect to put on the roof or walls.
- Dab icing dots: Using a small spoon, kids can add little icing spots where candy goes.
- Sprinkling toppings: Kids love sprinkling colored sugar or edible glitter; it’s like tiny snow falling on the house.
- Spreading icing on flat surfaces: Older kids can use spatulas or butter knives for this, which helps with fine motor skills.
When the task matches their skills, kids stay focused longer and feel like real helpers. I make sure to keep things relaxed and not expect perfect results. That way, we all have fun together.
Encouraging Creativity and Celebrating Efforts
One of the best parts about decorating gingerbread houses with my boys is seeing their creativity shine through. I praise their ideas and efforts all the time, and it makes a huge difference in how excited they feel about the process.
Here’s how I boost their confidence and keep the fun going:
- Offer plenty of encouragement: I say things like, “Wow, I love how you chose those colors!” or “Great job placing those candies so carefully!”
- Celebrate all styles: Whether their designs are neat or messy, I show that creativity doesn’t have to be perfect to be wonderful.
- Let kids make their own decisions: Giving them the freedom to pick candy placement or colors helps them feel proud and independent.
- Display their finished houses: We put our decorated gingerbread houses somewhere everyone can see, which makes the kids beam with pride.
- Turn decorating into a story: Sometimes we create little tales around their houses or candy characters, which adds meaning and imagination to the activity.
Focusing on fun and creativity keeps kids excited and makes decorating a memory worth copying every year. Watching my boys glow with pride when they finish their piece is why I love this tradition so much!
This approach to decorating with kids turns what could be a stressful activity into a joyful family moment filled with laughter, learning, and tasty results. It’s the kind of experience that turns holiday prep into cherished memories.
Displaying and Preserving Your Gingerbread Masterpiece
Once the last candy finds its perfect spot and your icing looks like fresh snow, it’s time to think about showing off your gingerbread house decorating ideas and keeping your creation looking fantastic. After all the fun and effort, you want your gingerbread masterpiece to be admired for days or even weeks! I’ve learned a few tips over the years that help your gingerbread house stay fresh, stable, and shareable without stress.
Creative Display Ideas for Your Home
Displaying your gingerbread house isn’t just about setting it on the kitchen counter and hoping for the best (been there!). With a bit of thought, your creation can be a dazzling part of your holiday décor that everyone notices.
Try these easy, festive ideas:
- Use a decorative tray or platter. A bright red or green tray adds a pop of color, while a silver or gold platter gives a classy, festive touch. It also keeps crumbs or candy fallout contained.
- Place it under a glass dome or cloche. This not only looks charming but also protects your house from curious hands (and hungry pets). You can find glass domes in many sizes at home stores, or repurpose a large glass jar with a lid.
- Integrate your house into a holiday scene. Surround it with pine boughs, miniature LED lights, small ornaments, or fake snow for a mini winter wonderland on your mantel or buffet table. It feels like the centerpiece of your holiday story.
- Use a cake stand. Elevate your gingerbread house with a cake stand wrapped in holiday ribbon or garland. It makes the house the star of the table during family gatherings.
- Add a little sign or nameplate. Give your creation a whimsical name or the year so it’s part of your Christmas tradition and easy to talk about with guests.
These ideas keep your gingerbread house front and center and make it clear that it’s a holiday treasure that deserves a special spot.
How to Preserve Your Gingerbread House
Keeping your gingerbread house intact after hours of decorating (and some fierce toddler enthusiasm) is a top priority! Here’s what works for me to keep the house firm and fresh-looking for as long as possible:
- Choose a cool, dry spot for display. Heat and humidity soften the gingerbread and melt the icing. Avoid placing your house near radiators, heaters, or sunny windows.
- Spray with a light coating of clear food-safe glaze. This can help seal in moisture and protect candies from shrinking or sweating. Some craft stores sell edible spray sealants made for cookies and pastries.
- Keep it covered when not on display. You can tent a lightweight plastic container or wrap lightly with plastic wrap to reduce air exposure. Just be sure the plastic doesn’t touch the icing directly, or it might cause colors to run.
- Use hardened royal icing on seams and edges. Royal icing dries rock hard and acts like glue. Don’t be shy with it—thicker lines around the base and roof make a sturdy structure that lasts longer.
- Avoid eating or moving it too much. Every touch risks loosening parts. If you need to move the house, do it very carefully and support the base firm and even.
- Store leftover pieces separately. If you baked your own and want to save extra gingerbread, keep it in an airtight container at room temperature. It stays fresh and ready if you want to build more next year!
By following these tips, you can enjoy looking at your gingerbread house even after the holiday rush and keep the magic alive longer than you’d expect.
Sharing Your Creations with Friends and Family
There’s nothing sweeter than feeling proud of the gingerbread houses my boys and I build together. Sharing that joy multiplies the fun, whether through gifts or photos.
Here are some friendly ideas to spread the cheer:
- Gift mini gingerbread houses to neighbors, teachers, or friends. I like making smaller, simpler versions that are easier to transport but still charming and colorful. Wrap them in a clear box or cellophane tied with a festive ribbon.
- Host a gingerbread house photo contest. Snap pictures of each child’s creation or the whole family project, then share them with relatives via text, email, or social media. The smiles and comments will brighten everyone’s day!
- Create a gingerbread postcard or holiday card using your best photo. It’s a fun way to share your decorating ideas and give loved ones a peek into your holiday traditions.
- Invite friends over for a decorating party where everyone can build and exchange their houses afterward. This turns the project into a community event and creates lasting memories for kids and adults alike.
- Document the process with pictures or short videos. These make great keepsakes and can inspire your kids in future holiday baking seasons.
Sharing your gingerbread houses encourages connection and joy beyond just your own kitchen. It’s a simple way to spread holiday magic and keep those decorating ideas going strong year after year.
Displaying and preserving your gingerbread house is the last step to turn your festive project into a lasting holiday delight. With these tips, you get plenty of smiles and “wow” moments from friends and family alike!

Conclusion
These gingerbread house decorating ideas bring the magic of the season right into your home in a way that’s simple and fun for everyone. Whether you choose a kit or make your own pieces, adding colorful candies, icing details, and personal touches turns this holiday tradition into a wonderful family event. It’s about more than a pretty house; it’s about the laughs, the creativity, and those moments with your kids that become holiday memories.
I encourage you to gather your little helpers, try these ideas, and enjoy the festive fun that comes with decorating together. You’ll look back on these times and smile knowing you created something special as a family. Thanks so much for sharing in these tips—I can’t wait to see what you all create!
This post may contain affiliate links. Read the full disclosure here.