Pumpkin carving with three energetic boys sounds like a recipe for chaos, doesn’t it? Between the sharp knives, slippery pumpkin guts, and the inevitable “Mom, I need help!” every thirty seconds, I’ve learned that painting pumpkins is such a lifesaver during Halloween season! It’s mess-free (well, mostly!), safe for little hands, and honestly just as festive as traditional carving.
These halloween pumpkin painting ideas have saved my sanity year after year, and they’re perfect whether you’ve got toddlers who want to help or older kids ready to create masterpieces! Plus, painted pumpkins last so much longer than carved ones, which means your front porch stays decorated all season long without those sad, saggy jack-o’-lanterns by October 31st. Let’s dive into some super fun and creative ways to paint pumpkins that’ll have your whole family excited for Halloween!
Classic Black Cat Silhouettes
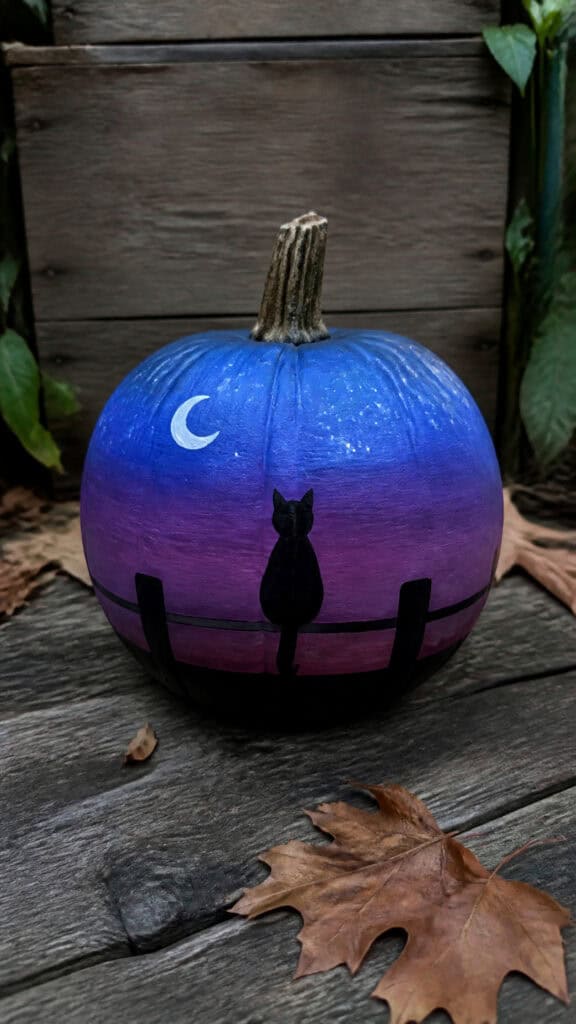
Nothing says Halloween quite like a mysterious black cat, and this is honestly one of the easiest halloween pumpkin painting ideas to pull off! I love this design because even my youngest can participate by painting the base coat while I handle the details. Start by painting your pumpkin a beautiful twilight blue or soft purple color – think dusk sky vibes! Once that dries completely (and yes, waiting is the hardest part with impatient kiddos!), you’ll paint a simple black cat silhouette on the front.
The beauty of this design is that it doesn’t have to be perfect at all! A slightly wonky cat actually adds to the spooky charm. You can paint your cat arching its back, sitting primly with its tail curled around, or even mid-pounce if you’re feeling ambitious. Add a simple fence line at the bottom and maybe a crescent moon in the background, and you’ve got yourself an Instagram-worthy pumpkin that took maybe twenty minutes of actual work time!
For extra pizzazz, try adding some white dots for stars or even some glow-in-the-dark paint for the cat’s eyes! My middle son went absolutely wild when he saw his cat pumpkin “light up” in the dark last year. Pro tip: use painter’s tape to create a straight horizon line if you want that professional touch, but honestly, a freehand wavy line looks just as charming and saves you a step!
Friendly Monster Faces
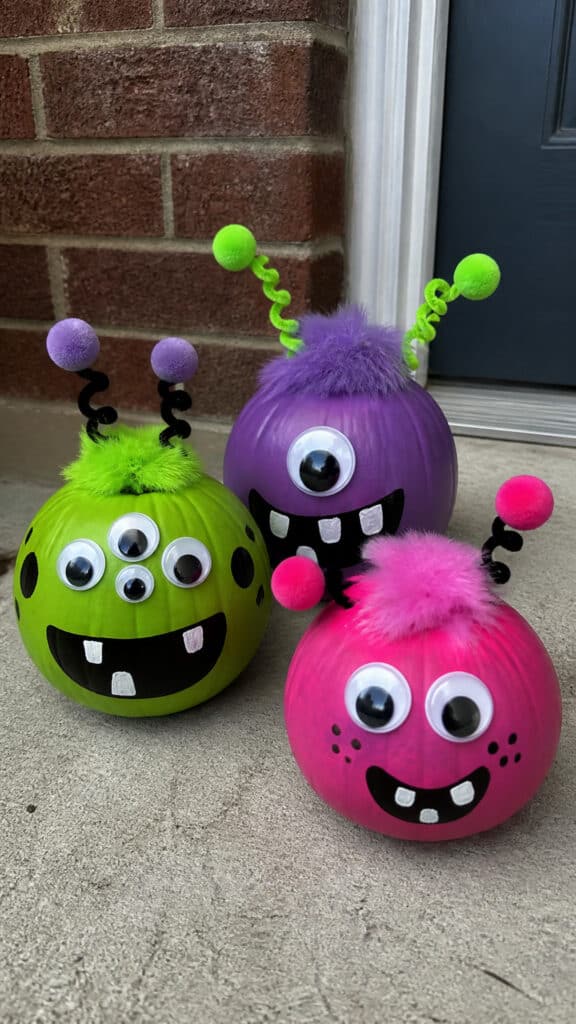
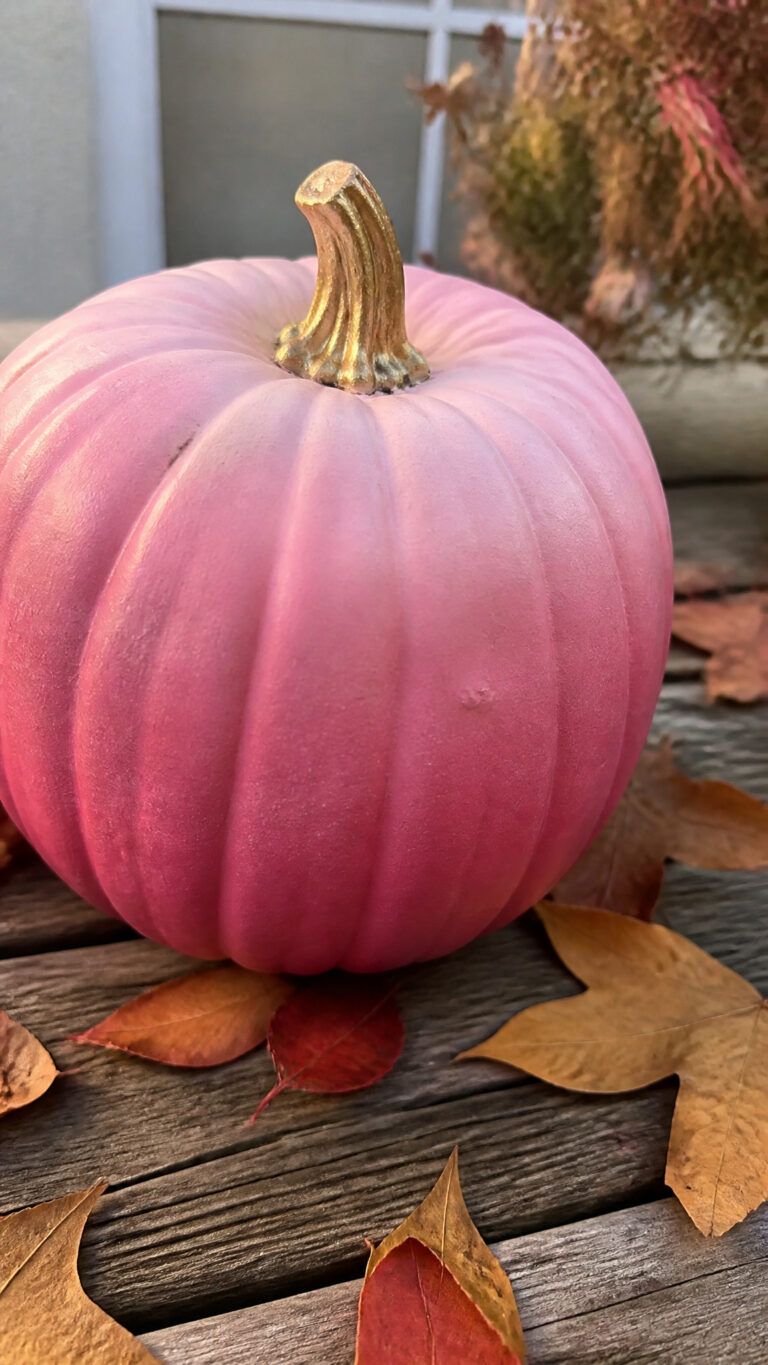
If you want halloween pumpkin painting ideas that are more cute than creepy, monster faces are absolutely the way to go! This is my go-to project when all three boys want to paint their own pumpkins because there are literally no rules. Every monster can look completely different, and they’re all perfect! Paint your pumpkin base in bright, fun colors like lime green, electric purple, hot pink, or even neon orange.
Once your base coat is dry, it’s time for the fun part – creating those googly-eyed monster faces! Big white circles for eyes (the bigger and goofier, the better!), colorful pupils looking in silly directions, maybe some fangs or a goofy smile with missing teeth. My boys love adding crazy details like multiple eyes, horns made from construction paper, or even fuzzy pom-poms glued on top for hair! One year, we used pipe cleaners for antennae, and it was such a hit that we’ve done it every year since.
The best part about monster pumpkins is that there’s absolutely zero pressure for them to look “right” because monsters can look like anything! Your five-year-old’s creation with seventeen eyes and a zigzag mouth? Perfect! Your toddler’s abstract paint smears with googly eyes stuck randomly? Also perfect! These pumpkins always make visitors smile, and they’re so much friendlier for little trick-or-treaters who might be scared of traditional spooky decorations.
Elegant Drip Design
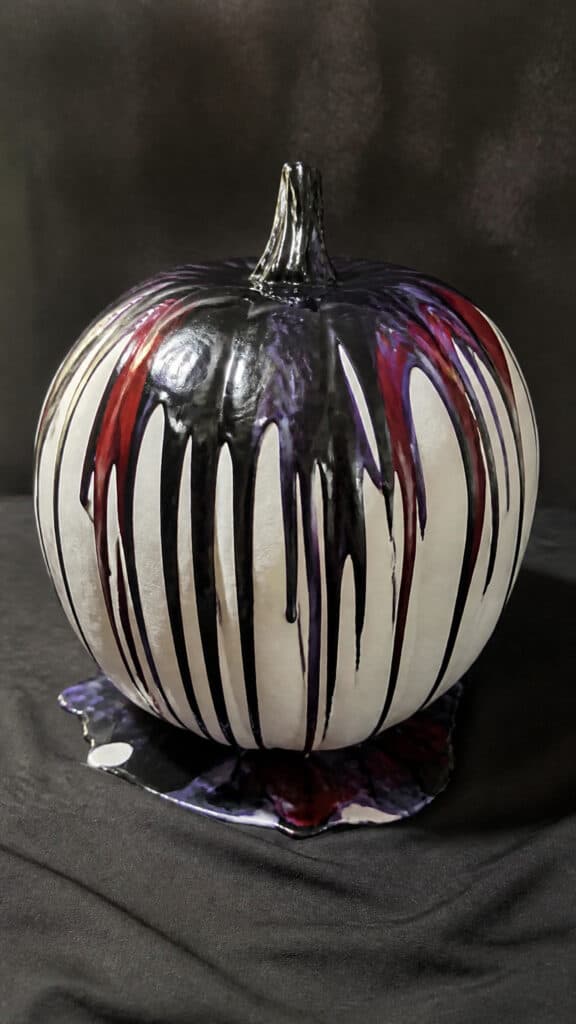
Okay, this one might sound fancy, but trust me – it’s actually one of the simplest halloween pumpkin painting ideas that looks incredibly impressive! The drip technique is so forgiving that even if things get messy (which they will with kids!), it still looks intentional and artistic. Start by painting your entire pumpkin white, black, or even metallic gold or silver for a really striking base.
Here’s where it gets fun and a little messy! Choose a contrasting color – like black drips on a white pumpkin or white drips on a black one – and literally just drizzle paint from the top of your pumpkin, letting gravity do all the work! My boys think this is absolutely magical to watch. You can use slightly thinned acrylic paint or even just squeeze it straight from the bottle if you want thicker drips. The paint will naturally run down the sides, creating those cool drippy streaks that look so spooky and modern.
For extra drama, try using multiple colors! Imagine a white pumpkin with drips in black, deep purple, and blood red all mixing together as they run down. Or go for a rainbow drip effect on a black pumpkin for something totally unexpected! The key is to not overthink it – just drizzle and let it do its thing. Set your pumpkin on a protected surface (trust me on this one – I learned the hard way about paint drips on the deck!), and let it dry completely before moving it to your display spot.
Starry Night Sky
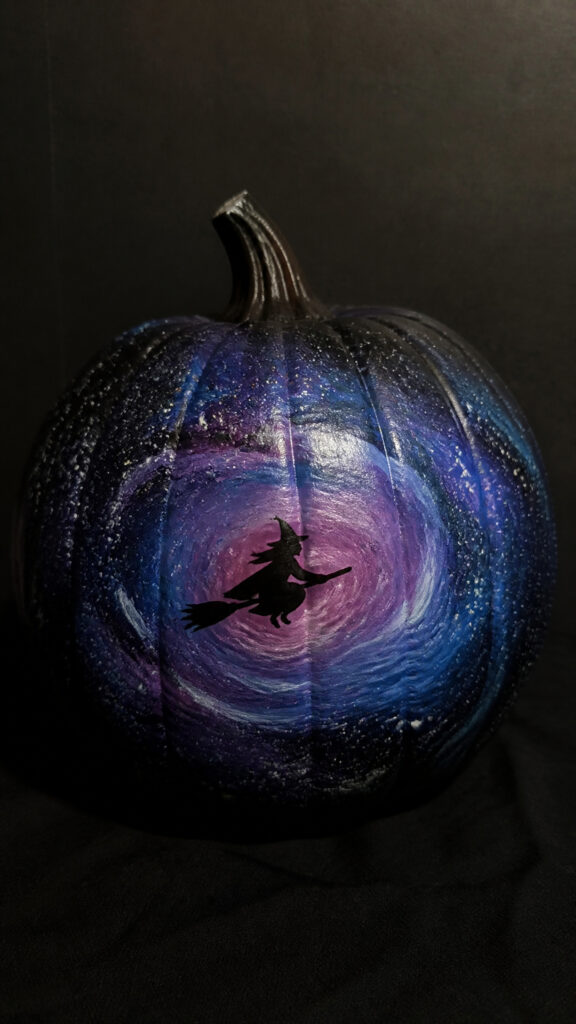
If you’re looking for halloween pumpkin painting ideas that are a bit more artistic and less traditionally spooky, this galaxy-inspired design is absolutely stunning! I discovered this technique when my oldest wanted something “cooler” than typical Halloween designs, and now it’s become a family favorite. You’ll create a beautiful night sky effect that’s perfect for Halloween but also sophisticated enough that you could honestly keep it out through Thanksgiving!
Start by painting your pumpkin a deep navy blue or black base coat – this is your night sky canvas! Once that’s dry, the magic begins. Using a sponge (those cheap foam brushes work perfectly!), dab on layers of deep purple, lighter blue, and even some dark pink or magenta to create that galaxy effect. Don’t worry about being neat – you want the colors to blend and swirl together! The messier it looks, the more realistic your galaxy appears.
Now comes my favorite part that the kids absolutely love – the stars! Dip an old toothbrush in white paint, hold it over your pumpkin, and run your finger along the bristles to create a splatter effect. It’s like making your own constellation! You can also add some larger stars by dabbing white paint with your fingertip or the eraser end of a pencil. For extra Halloween vibes, paint a simple witch silhouette flying across your starry sky, or add a haunted house on the horizon. This pumpkin always gets compliments from neighbors, and it photographs beautifully for those Halloween memory books we’re all trying to keep up with!
Candy Corn Cutie
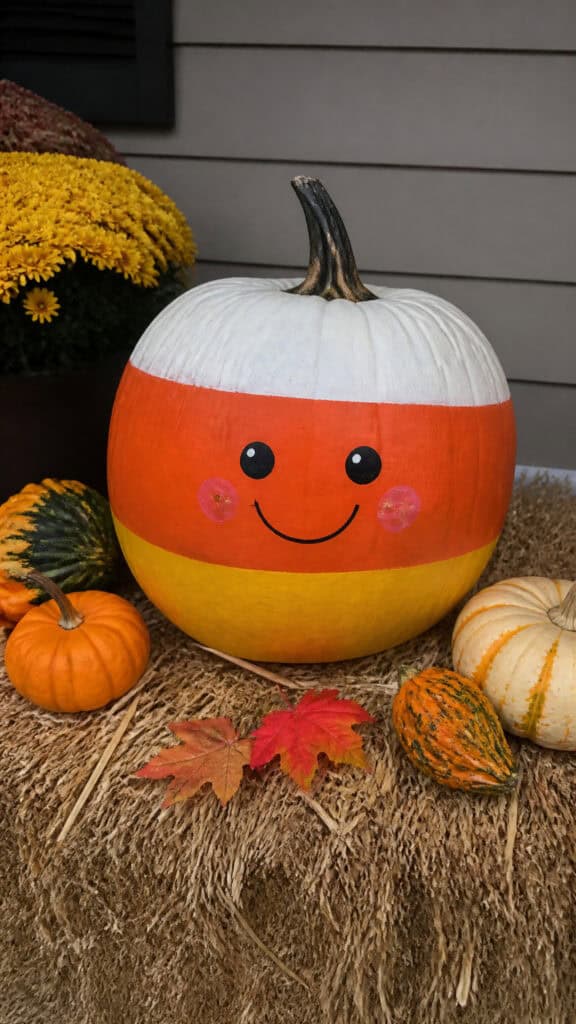
You either love candy corn or you don’t, but either way, this design is adorable and super simple – making it one of my favorite halloween pumpkin painting ideas for when we’re short on time! The color blocking technique is perfect for younger kids who are still developing their painting skills, and the result is always cheerful and festive. Plus, you only need three colors, which means less mess to clean up afterward (always a win in my book!).
Divide your pumpkin into three horizontal sections – you can eyeball it or use painter’s tape for crisp lines if you’re feeling particular that day! Paint the bottom section yellow, the middle section orange, and the top section white, just like a classic piece of candy corn. The great thing about this design is that it works on pumpkins of any size or shape! We’ve done tall skinny ones, short fat ones, and even those weird lumpy pumpkins that nobody else wanted at the pumpkin patch.
Once your sections are painted and dried, you can absolutely leave it as is for a clean, simple look, or jazz it up a bit! Add a cute face with a smile and rosy cheeks for a kawaii vibe, or paint on some stripes or polka dots for extra flair. Last year, my youngest insisted on adding googly eyes to his candy corn pumpkin, and honestly? It was adorable! You could also create a whole candy corn family by painting several pumpkins in different sizes and arranging them together on your porch.
Spooky Spider Web
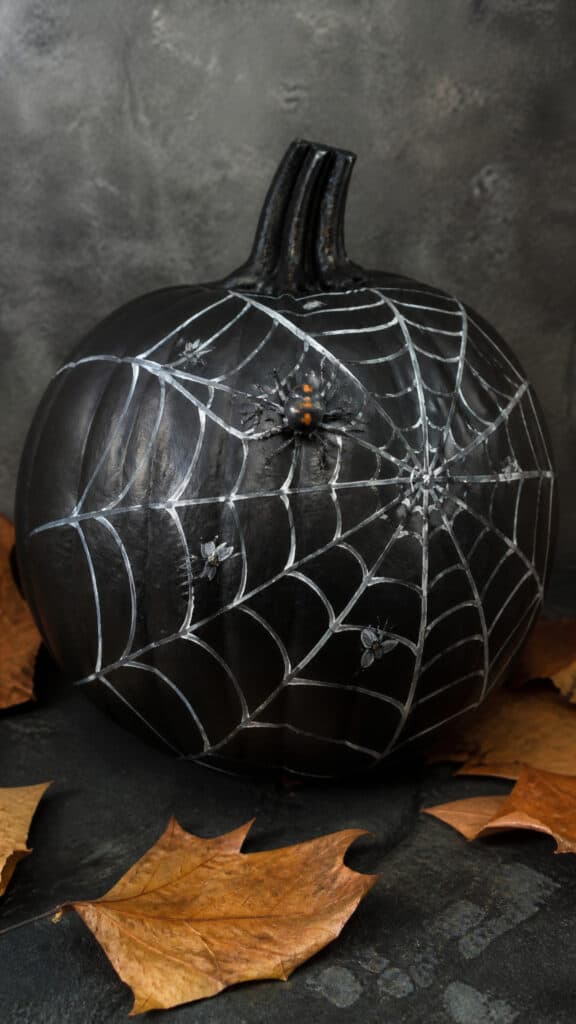
Spider webs are classic Halloween imagery, and creating them as one of your halloween pumpkin painting ideas is way easier than you might think! This design looks intricate and detailed, but I promise it’s totally doable even if you’re not artistically inclined. I’ve watched my seven-year-old nail this design with just a little guidance, so you’ve definitely got this!
Paint your pumpkin a solid base color first – black, deep purple, or even dark green works beautifully for that spooky vibe! Once it’s completely dry, use white paint (or silver for something a bit different!) to create your web. Start by painting a small circle or dot where you want the center of your web to be – this is usually off to one side rather than dead center for a more natural look. From that center point, paint straight lines radiating outward like sun rays, spacing them evenly around your pumpkin.
Now connect those straight lines with curved lines, working your way from the center outward! The curved lines should get progressively larger as you move away from the center, creating that classic web pattern. Don’t stress if your lines aren’t perfectly curved or evenly spaced – real spider webs aren’t perfect either! For the finishing touch, add a cute or creepy spider (depending on your preference!) sitting on the web. You can paint one, use a plastic spider from the dollar store, or even make one from black pom-poms and pipe cleaners. My middle son likes to add a few small flies “caught” in the web using black paint dots with tiny white wings!
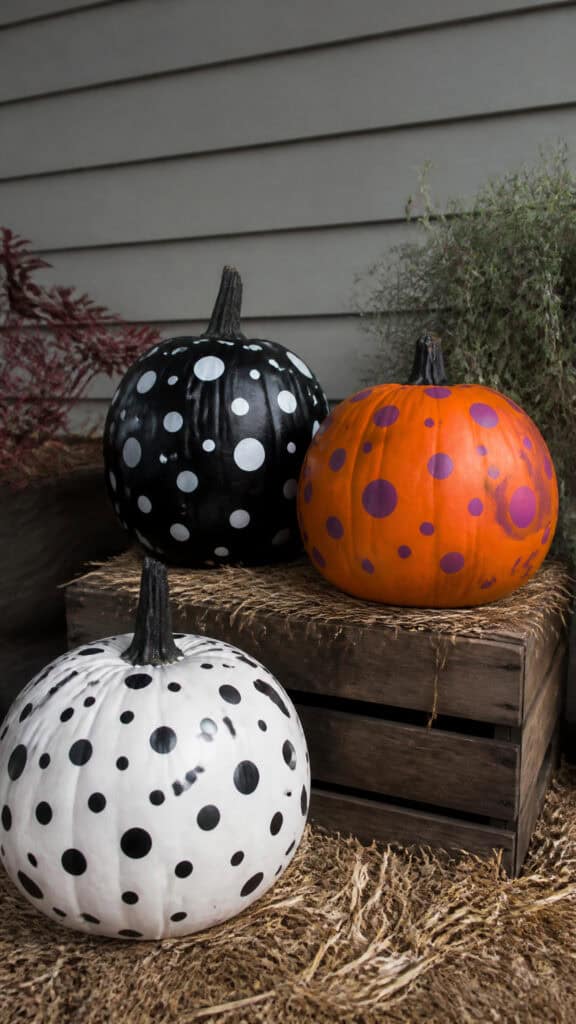
Sometimes the simplest halloween pumpkin painting ideas are the most charming, and polka dots definitely fall into that category! This is my absolute favorite project for when I need something that looks put-together but doesn’t require a ton of time or artistic skill. It’s also perfect for those days when the boys just want to paint without following complicated instructions – they can just dot away to their hearts’ content!
Choose a base color for your pumpkin and paint the whole thing – classic Halloween colors like orange, black, purple, or white work great, but don’t be afraid to go bold with unexpected colors like teal or hot pink! Once your base is dry, it’s time for dots. You can use the eraser end of a pencil, a cotton swab, or even your fingertip to create perfectly round dots all over your pumpkin. For a more varied look, use different sized circular objects – bottle caps, the end of a marker, or various sizes of dowels all work great!
The beauty of polka dots is that you can go in so many different directions! Create a gradient effect by using dots in several shades of the same color family. Make it Halloween-themed by using orange dots on black or white dots on purple. Or go totally wild with rainbow dots on a white pumpkin for something cheerful and fun! You can cover the entire pumpkin in dots or just do a cluster on one side. Last year, we did a whole collection of polka dot pumpkins in different color combinations, and they looked so cute grouped together on our front steps. Plus, this is one of those rare crafts where you can’t really mess it up – more dots? Great! Fewer dots? Also great! Dots that overlap? Adds character!
Glow-in-the-Dark Ghost
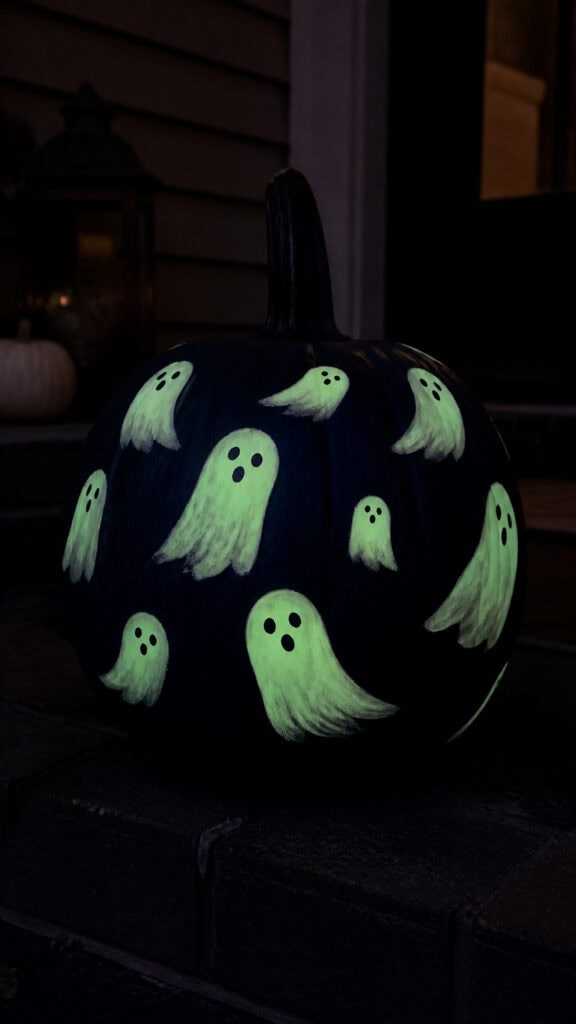
Want to know one of the most exciting halloween pumpkin painting ideas that’ll make your kids absolutely flip? Glow-in-the-dark paint! There’s something so magical about a pumpkin that looks one way during the day and completely transforms when the sun goes down. My boys check on these pumpkins approximately seven hundred times on Halloween night to see them glowing, and honestly, I don’t blame them because it never gets old!
Paint your pumpkin a dark base color – black, deep purple, or navy blue works best because it makes the glow effect more dramatic! Once that’s dry, use white glow-in-the-dark paint (available at any craft store and totally worth the investment!) to paint ghost shapes all over your pumpkin. Keep your ghosts simple – just a rounded shape with a wavy bottom edge and two black dots for eyes and a little “o” for a mouth. You can make them look friendly, surprised, or slightly spooky depending on the expression you choose!
The key to getting the best glow is to apply the glow-in-the-dark paint in thick, even coats – thin paint won’t glow as brightly! You might need two or three coats to get that really impressive glow. During the day, your pumpkin will look cute with its white ghosts on a dark background, but when evening hits and those ghosts start glowing? Pure magic! Pro tip: place your pumpkin where it’ll get some sunlight during the day to “charge” the glow paint, or shine a flashlight on it for a few minutes before you want it to glow. We usually set ours on the front porch where it gets afternoon sun, and by trick-or-treat time, it’s glowing like crazy and always catches everyone’s attention!
Time to Get Painting!
There you have it – eight amazing halloween pumpkin painting ideas that are perfect for families with young kids! Whether you choose the simple elegance of polka dots, the spooky charm of spider webs, or the magical glow of ghost pumpkins, you really can’t go wrong. The best part about painting pumpkins instead of carving them is that there’s no pressure for perfection, they last longer, and everyone from toddlers to adults can participate safely!
So grab some pumpkins, break out the paint, spread out some newspaper or a drop cloth (learn from my mistakes!), and let your creativity run wild! These painted pumpkins will make your home feel festive all season long, and you’ll create such wonderful memories with your kids. Plus, when your little ones proudly show off their painted pumpkin creations to everyone who visits, your heart will just melt! Happy painting, and have the most wonderful Halloween season!
This post may contain affiliate links. Read the full disclosure here.